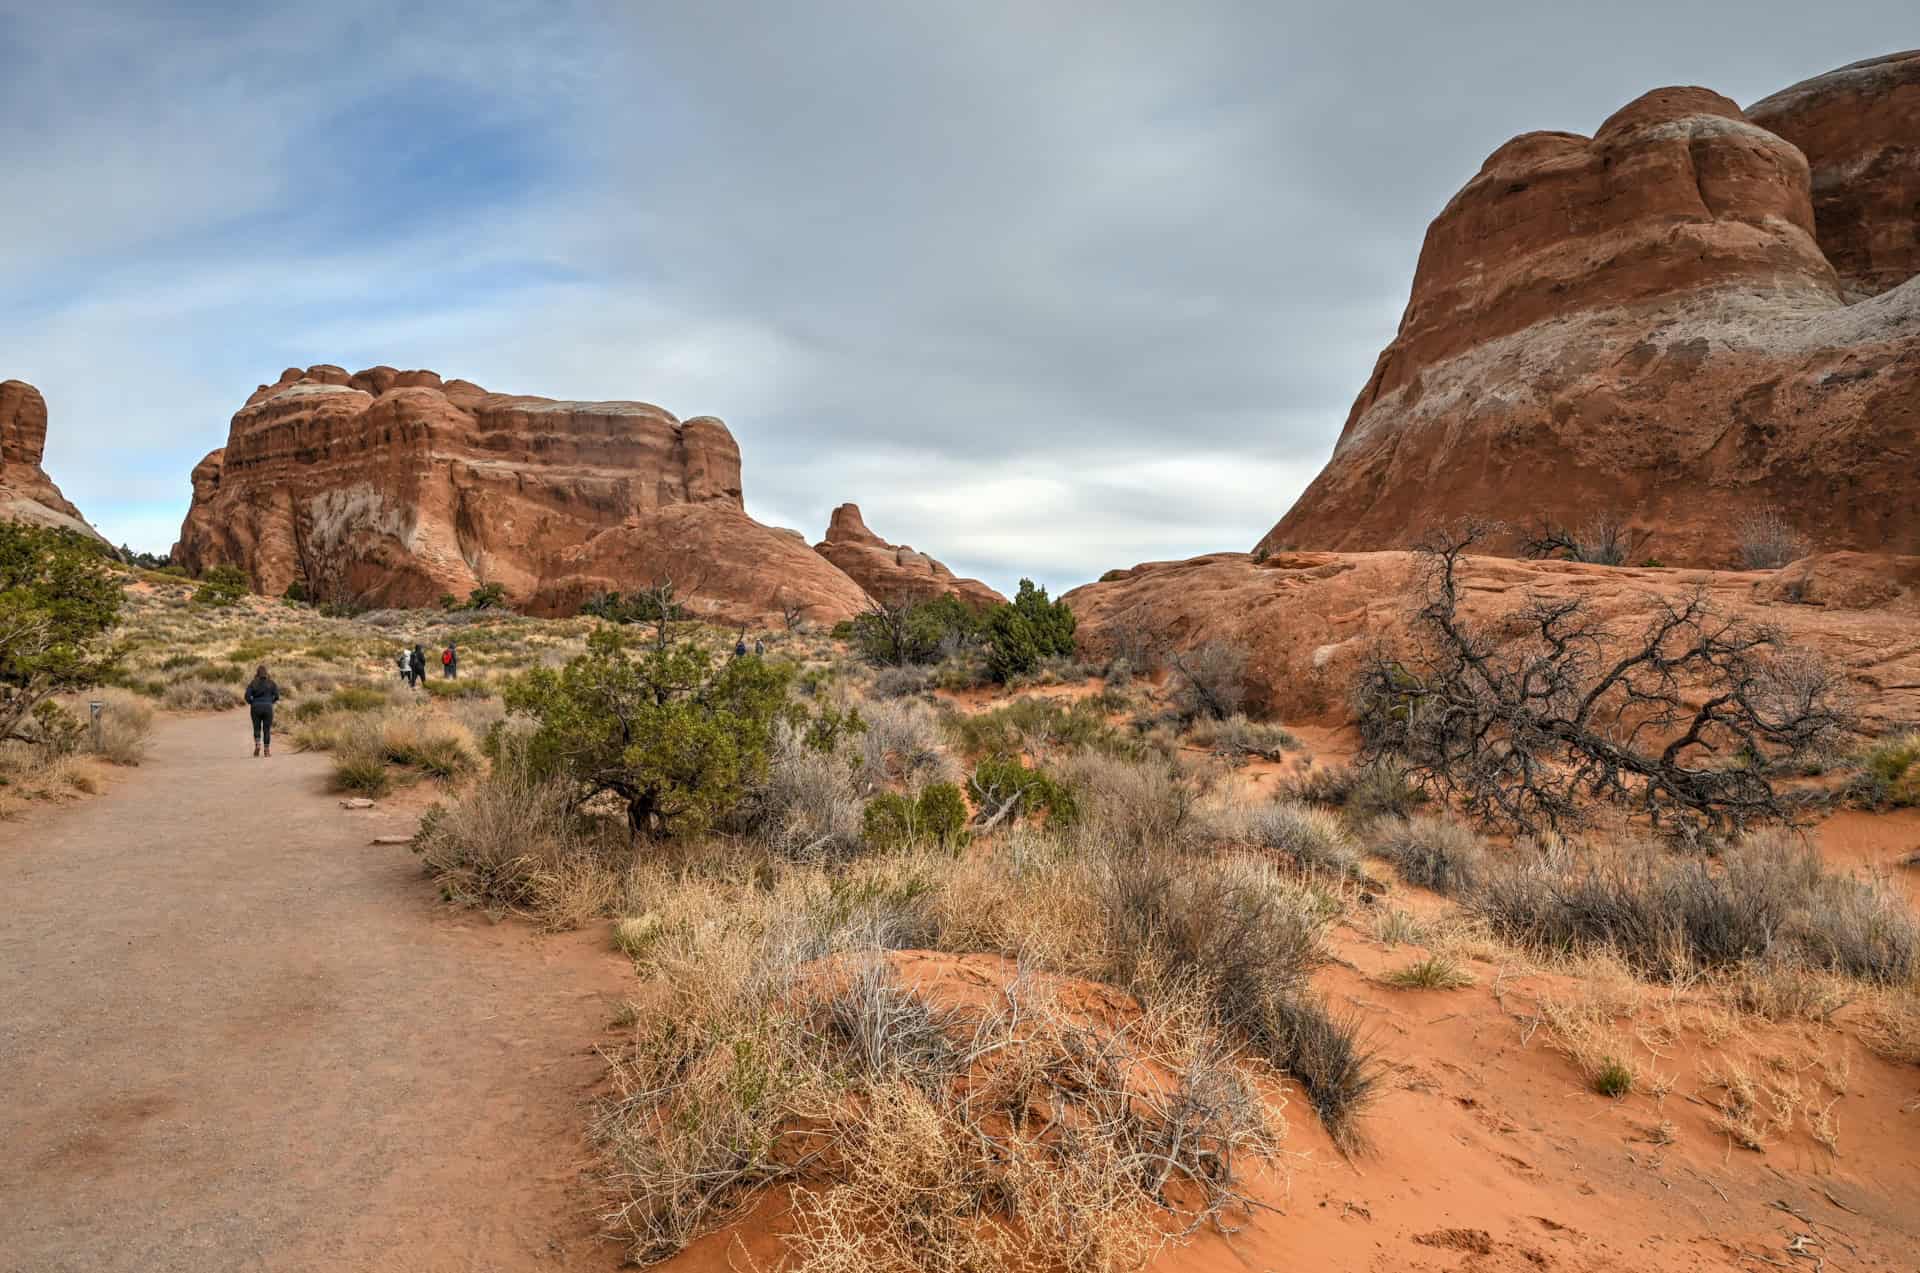
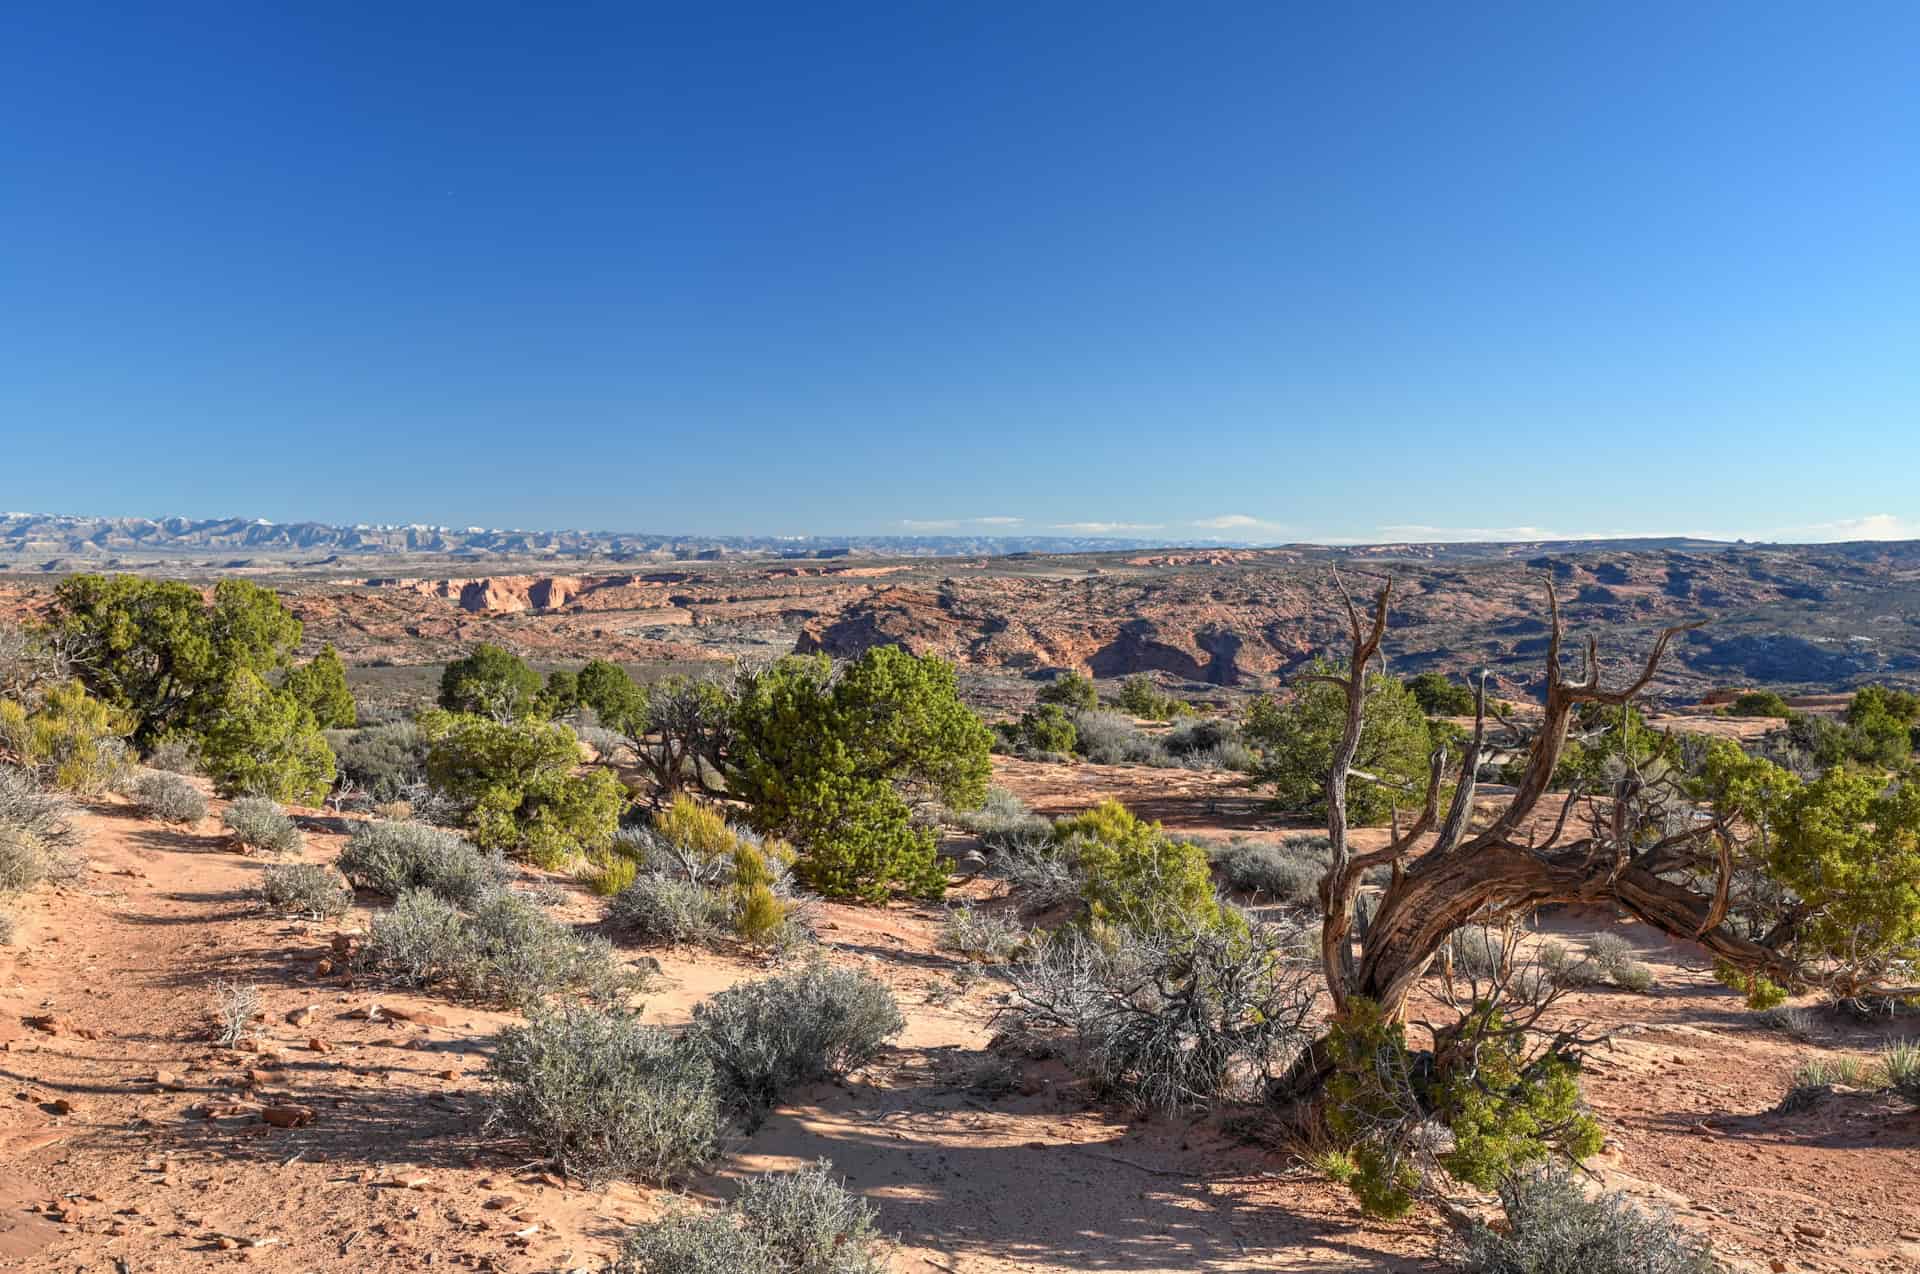
Arches National Park is one of the most hike-friendly parks in Utah. Unlike destinations where viewpoints are the main attraction, many of Arches’ most iconic formations require a short walk, and often a memorable hike, to experience them fully. From easy strolls beneath towering sandstone arches to longer routes that traverse narrow rock fins and expansive desert plateaus, the park offers trails for nearly every fitness level. Some hikes are short but dramatic, while others reward sustained effort with multiple arches in a single outing.
In this guide, we break down the best hiking trails in Arches, grouped by difficulty and overall experience, so you can quickly decide which routes fit your time, energy level, and interests. For detailed route descriptions and logistics, we also link to our dedicated trail guides where available.
Best Hiking Trails in Arches – At a Glance
Very Easy (Short Walks, Minimal Elevation Gain)
Sand Dune Arch Trail
A short, shaded walk through soft sand leading to a tucked-away arch framed by sandstone fins. Great for families and hot afternoons.
Broken Arch Trail
A gentle, scenic loop across open desert terrain leading to a large freestanding arch you can walk beneath. Slightly longer than it looks, but very manageable.
Double Arch
A brief, flat walk to one of the park’s most dramatic formations. Minimal effort for a big visual payoff.
Easy (Low Elevation Gain, Well-Defined Trails)
The Windows Section
Multiple arches clustered in one area with short connecting trails. One of the most rewarding low-effort hikes in the park.
Park Avenue
A slightly longer walk through towering rock walls that feels almost canyon-like. Can be done as an out-and-back or one-way if you arrange a pickup.
Moderate (Sustained Climb, Full Sun Exposure)
Delicate Arch
The park’s most iconic hike. A steady climb across slickrock leads to Utah’s most famous freestanding arch. Exposure and heat make this feel harder than the mileage suggests.
Moderately Challenging (Longer Distance + Rock Fin Sections)
Devils Garden (Landscape Arch to Double O Arch)
A unique route that links multiple arches in one hike. The first section to Landscape Arch is relatively easy and suitable for most visitors. Beyond that, the trail becomes more rugged, with narrow rock fins and uneven footing leading toward Double O Arch.


Disclosure: This page (Best Hiking Trails Arches) may contain product affiliate links. At no additional cost to you, we may receive a commission for purchases made through these links. More details can be found on our disclosure and policies page.
Arches National Park: Location, Map, and How to Get There
Arches National Park is located in eastern Utah, just five miles (8 km) north of the town of Moab, and is directly accessible from U.S. Highway 191, making it one of Utah’s most convenient national parks to reach
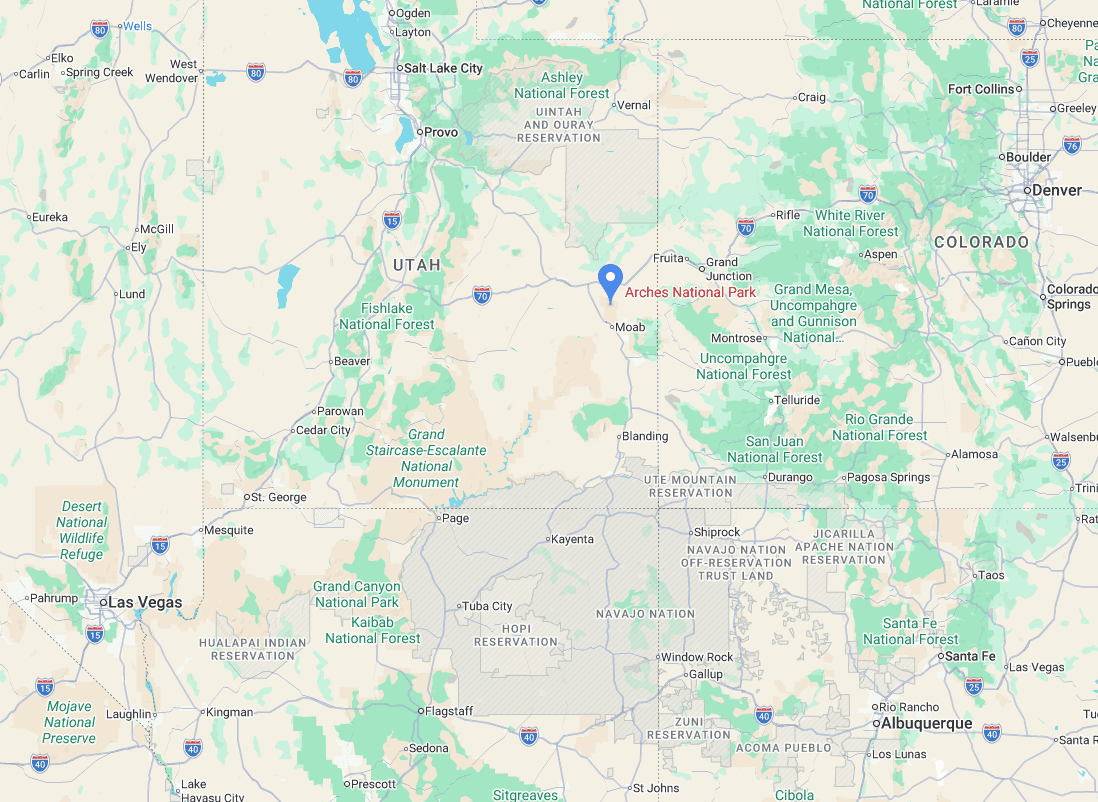
Arches National Park is best reached by car, as there is no public transportation that provides direct access to the park. The park has a single main entrance located just north of Moab along U.S. Highway 191.
Driving times to Arches Canyon National Park
- Canyonlands National Park (Island in the Sky District): 50 km / 30 mi – about 40 minutes
- Capitol Reef National Park: 230 km / 145 mi – about 2.5 hours
- Zion National Park: 500 km / 310 mi – about 5 hours
- Salt Lake City: 740 km / 460 mi – about 6.5–7 hours
- Las Vegas: 430 km / 270 mi – about 4.5 hours
These times assume clear weather and normal traffic conditions.
If you need to book a rental vehicle for your hiking excursion, we highly recommend using Discover Cars to get the best rates on your rental in Utah, Nevada, and Arizona.
We also highly recommend Airalo (eSIM card) for your connectivity needs when travelling abroad. Airalo is the world’s first and largest eSIM store with eSIM plans for 200+ countries and regions worldwide.
Arches National Park – Entrance Fees, Navigation, and Access
Anyone visiting Arches National Park, whether to hike, drive the scenic road, or explore its iconic arches, must pay the applicable entrance fee to the National Park Service.
Entrance Fees (per vehicle, valid 7 days)
Private vehicle: $30
Motorcycle: $25
Individual (on foot, bicycle, etc.): $15
Annual Pass Options
Southeast Utah Parks Pass: $55 – valid for one year and covers Arches, Canyonlands National Park, and Hovenweep National Monument.
America the Beautiful Pass: $80 – valid for one year at all U.S. National Parks and more than 2,000 federal recreation sites nationwide. This is the best value if you plan to visit multiple national parks within a year.
Passes can be purchased at the park entrance station, at the Visitor Center, or online through the USGS website or via the REI store.
—> Most visitors exploring Utah’s “Mighty 5” parks (Arches, Bryce Canyon, Canyonlands, Capitol Reef, and Zion) should strongly consider the America the Beautiful Pass: it saves money and avoids the hassle of buying separate entry fees at each park.
Park Opening Hours: Arches National Park is open year-round, 24 hours a day. The scenic drive, trailheads, and viewpoints are generally accessible at all hours, weather permitting. Visitor services operate on seasonal schedules.
Park Navigation: Arches is structured around a single paved scenic road that runs roughly north to south for about 18 miles (29 km). Nearly all major trailheads and viewpoints branch directly off this road, making navigation straightforward and efficient.
Unlike Bryce Canyon or Zion, Arches does not operate a shuttle system. Private vehicles are allowed throughout the park at all times. During winter storms, short-term closures are possible, but the main park road is typically reopened quickly.
Parking: Parking lots are located at each major trailhead and viewpoint. During peak spring and summer months, lots at Delicate Arch, the Windows Section, and Devil’s Garden can fill quickly between late morning and mid-afternoon.
Arriving early in the day is the most reliable way to secure parking and avoid congestion. Even without timed-entry requirements (as of 2026), high visitation can still cause delays at the entrance station and at popular trailheads.
Very Easy Hiking Trails in Arches National Park
These trails require minimal elevation gain, short distances, and are accessible to most visitors. They’re ideal for families, hot afternoons, or anyone looking for big scenery without committing to a longer hike.
1. Sand Dune Arch Trail
Tucked between tall sandstone fins, Sand Dune Arch feels surprisingly secluded compared to many of the park’s more exposed formations. The short trail winds through deep, soft sand before narrowing into a shaded corridor where the arch emerges almost unexpectedly. The surrounding rock walls create a cooler microclimate, making this one of the more comfortable short walks during summer.


Highlights:
• Unique “hidden” setting between rock fins giving the trail a slot canyon feel
• Excellent option in hot weather, with shaded sections offering cooler temperatures
Location: Along the main scenic road (northern end – near Devil’s Garden campground)
Difficulty: Very Easy
Important to know: Given its location, it’s easy to combine with the Broken Arch Trail.
Potential drawbacks: Deep sand can make walking slightly tiring. Sand Arch is smaller and less dramatic than most of the park’s other notable arches.
2. Broken Arch Trail
Despite its name, Broken Arch is a large, freestanding arch set in open desert terrain. The trail crosses relatively flat ground with minor elevation change, offering expansive views of sandstone formations and the La Sal Mountains in the distance. You can walk directly beneath the arch, which feels more immersive than some roadside viewpoints.


Highlights:
• Spacious setting around the arch with fewer crowds
• You can walk directly under the arch
• Gentle terrain suitable for most hikers
Location: Along the main scenic road (northern end – near Devil’s Garden campground)
Difficulty: Very Easy
Important to know: Given its location, it’s easy to combine with the Sand Dune Arch Trail.
Potential drawbacks: Limited shade, can feel hot and exposed midday
See our full Broken Arch and Sand Dune Arch Trail Hiking Guide for more information on hiking these trails.
3. Double Arch Trail
One of the most visually dramatic formations in the park, Double Arch consists of two massive arch spans sharing the same rock foundation. The trail to reach it is short, flat, and well-defined, making it one of the highest “reward-to-effort” walks in the park.
The scale becomes more impressive the closer you get, and visitors can scramble gently across smooth rock near the base for different perspectives.


Highlights:
• Massive, photogenic formation
• Minimal effort for dramatic scenery (you can reach the arch in under 5 minutes)
• Excellent trail option for families and small children
Location: Windows Section (off spur road in the middle of the park)
Difficulty: Very Easy
Important to know: Its location makes it easy to combine with the Windows arches for a compact but rewarding loop-like circuit.
Some light rock scrambling might be required near the base if you want to get right under the arches for different photography perspectives.
Potential drawbacks: Very popular mid-day
See our full Double Arch Trail Hiking Guide for more information.
Easy Hiking Trails in Arches National Park
These trails remain accessible to most visitors but involve either slightly more distance, elevation change, or sustained walking than the very easy category. They’re still approachable for beginners, but expect a bit more movement and exposure.
4. The Windows Trail
The Windows area is one of the most iconic and rewarding parts of Arches National Park. While the main arches are reached via short trails, the terrain includes more steps and gradual elevation gain than neighboring Double Arch, which is why we categorize it as “Easy” rather than “Very Easy.”
That said, mileage-wise, it could absolutely qualify as very easy.


The main trail leads to North Window, South Window, and Turret Arch, and we strongly recommend adding the short primitive trail section that loops behind the arches. This quieter backside path provides different angles, fewer crowds, and a more immersive desert feel.


Highlights:
• Multiple arches in one compact area
• Excellent introduction to Arches and a great place to go if you have limited time
• Primitive loop adds great trail variety and fewer crowds
Location: Windows Section, central scenic drive
Difficulty: Easy (borderline Very Easy by distance)
Important to know: Combine with Double Arch for an efficient and high-reward stop.
Potential drawbacks: One of Arches’ more popular trails; tends to be very busy midday
See our full Windows Trail hiking guide for detailed route options and photos.
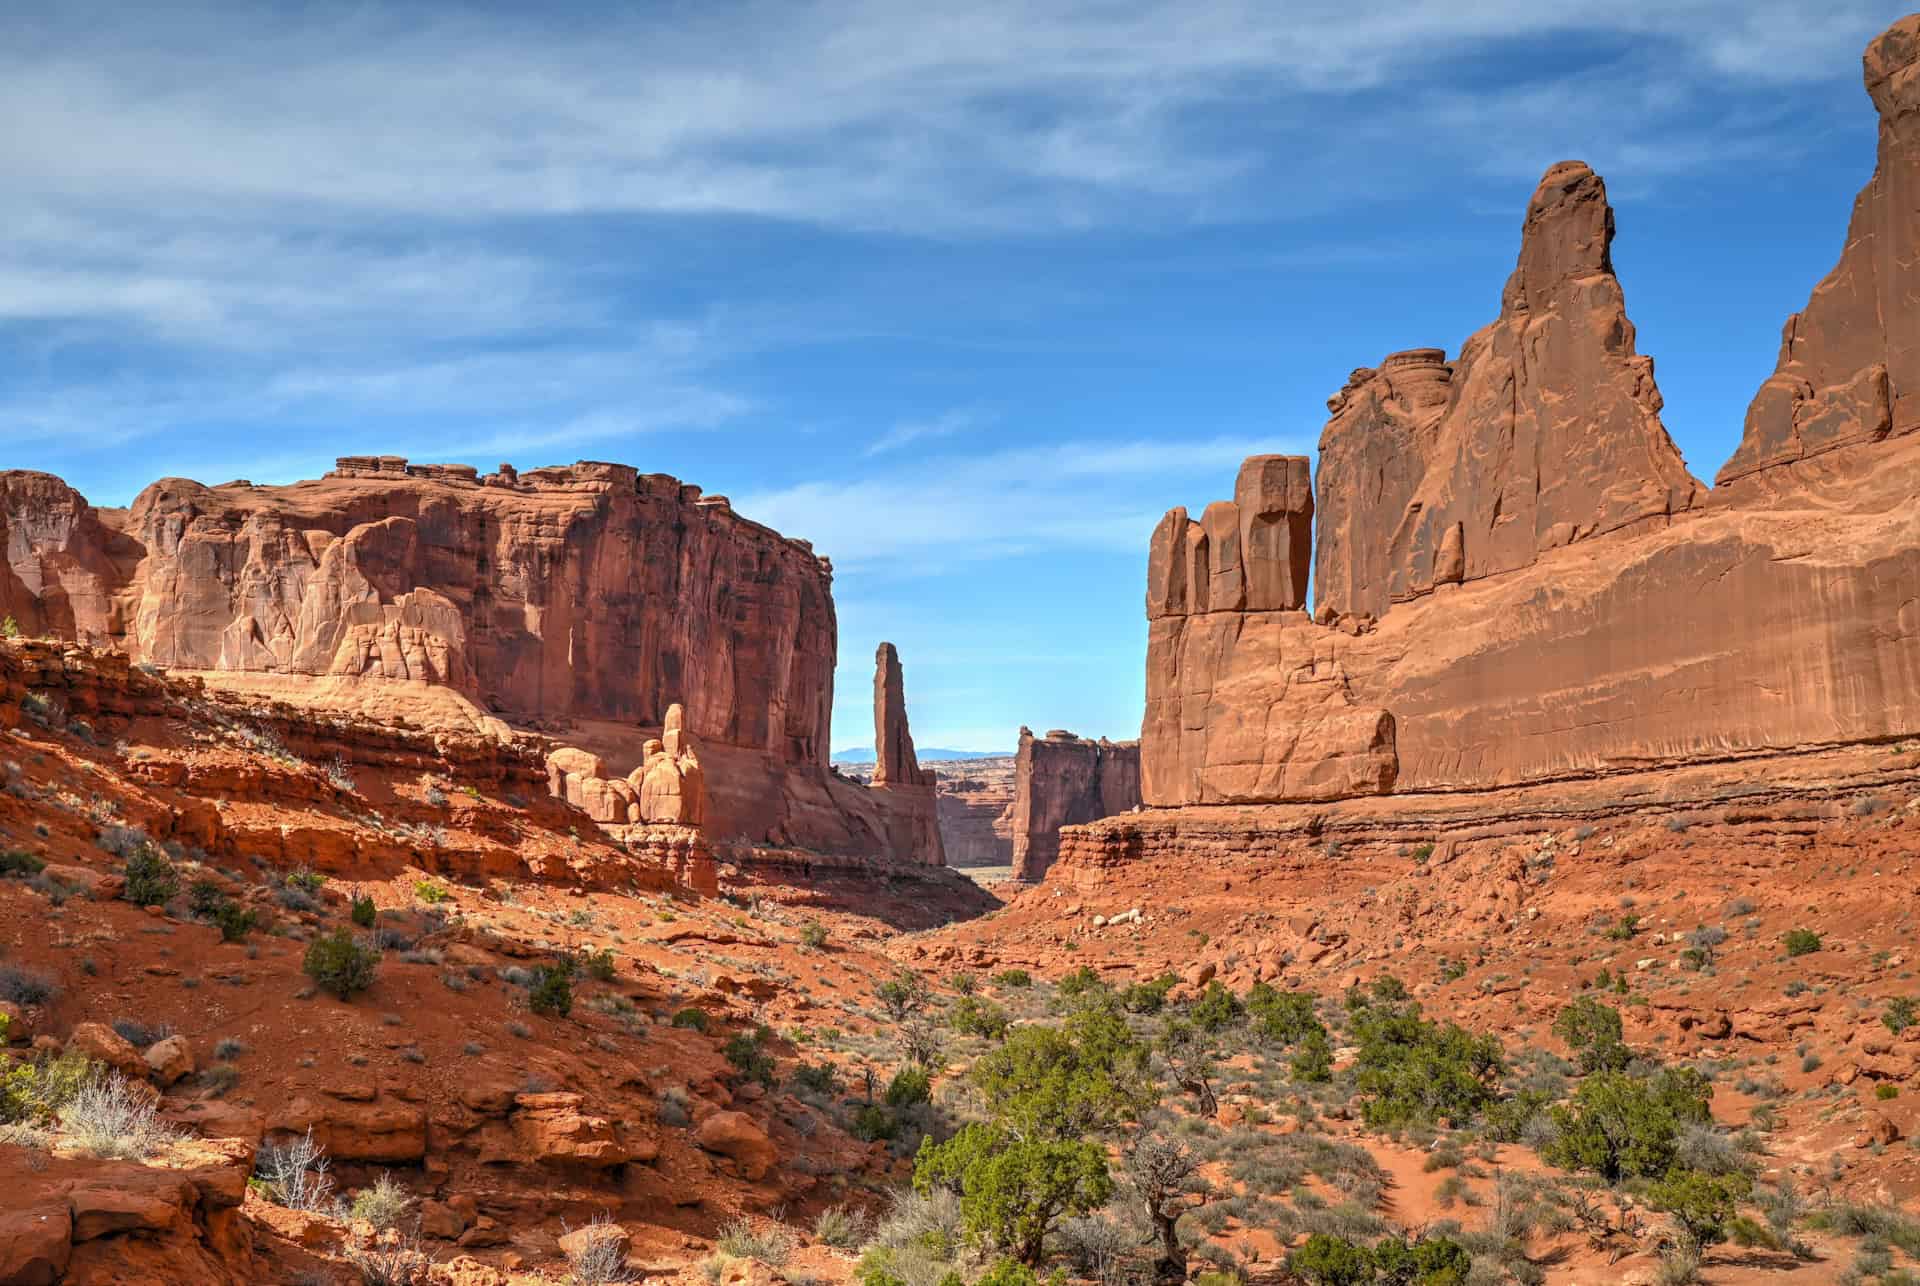
5. Park Avenue
Park Avenue feels different from the rest of the park. Instead of standing beneath arches, you walk through towering sandstone walls that resemble an urban canyon, hence the name.
The trail descends gently from the viewpoint and continues along the valley floor between massive rock formations such as the Courthouse Towers. It can be done as an out-and-back or as a one-way hike if you arrange transportation at the lower trailhead.
Although the elevation change is moderate and manageable, the total walking distance is longer than the very easy hikes, which is why we place it in the Easy category.


Highlights:
• Dramatic canyon-like scenery
• Not crowded; most people stay up top at the overlook
• Excellent early morning light
Location: Near the park entrance along the scenic road
Difficulty: Easy
Important to know: Starting early avoids heat and improves lighting conditions.
Potential drawbacks: Limited shade midday
See our full Park Avenue Hiking Guide for additional route details and hiking tips.
Moderate Hiking Trails in Arches National Park
6. Delicate Arch
If there’s one hike most visitors associate with Arches National Park, it’s Delicate Arch.
The trail climbs steadily across open slickrock, gaining elevation almost immediately. There is very little shade along the route, and the final approach traverses exposed rock slabs before revealing the arch dramatically framed against distant mountains.
Unlike arches that can be viewed from roadside pullouts, Delicate Arch requires commitment. The reward, however, is standing face-to-face with Utah’s most iconic freestanding arch: a formation that feels larger and more impressive in person than in photos.


Highlights:
• The park’s most recognizable landmark
• Dramatic final reveal (you don’t see the arch until the very end of the trail)
• Expansive and open desert views along the route
Location: Mid-park, short detour from the main scenic road
Difficulty: Moderate (primarily due to steady elevation gain)
Important to know: Start early in warm months. Sunset is beautiful but extremely busy; sunrise offers cooler temperatures and fewer people.
Potential drawbacks: Full sun exposure for most of the hike; Parking fills quickly mid-morning; Very crowded at sunset
For a detailed breakdown of trail conditions and the best time of day to hike, see our full Delicate Arch Hiking Guide.
Moderately Challenging Hiking Trails in Arches National Park
7. Devils Garden (Landscape Arch to Double O Arch)
Devils Garden is the longest maintained trail in Arches National Park (and arguably its most varied).
What makes this hike unique is that it unfolds in stages:
- The first section of the trail to Landscape Arch is wide, well-defined, and relatively easy.
- Beyond that, the trail becomes more rugged, weaving across sandstone fins and narrow ridgelines.
- Continuing toward Double O Arch introduces steeper rock sections and more exposed terrain.
Because of this progression, Devils Garden works for different ability levels depending on how far you choose to go.
The hike begins in relatively flat desert terrain before reaching Landscape Arch, one of the longest natural arches in the world. Many visitors turn around here. Those who continue encounter a more adventurous landscape of slickrock scrambling and dramatic desert views.


Highlights:
• Multiple arches in one hike (Landscape, Navajo, Partition, Double O, and more)
• Most varied terrain in the park and the most adventurous trail
• Fewer crowds beyond Landscape Arch
Location: Northern end of the scenic drive
Difficulty: Moderately Challenging (Easy to Landscape Arch; progressively harder beyond)
Important to know: Arrive early-this parking lot fills quickly. If unsure about the harder sections, hiking to Landscape Arch alone is still very worthwhile.
Potential drawbacks: Uneven slickrock sections beyond Landscape Arch and exposed rock fins may feel intimidating/challenging to some
For a full breakdown of distances, route options, and what to expect past Landscape Arch, see our detailed Devil’s Garden Hiking Guide.
8. Bonus Hike: Fiery Furnace (Permit Required)
If you’re looking for something completely different from the park’s maintained trails, the Fiery Furnace offers a maze-like desert adventure through narrow sandstone corridors and hidden passages.


Unlike other hikes in Arches National Park, this is not a marked trail. Instead, it’s a route-finding scramble through tight slots, steep rock sections, and winding sandstone fins. Navigation requires attention, and the terrain involves frequent short climbs and squeezes between rock walls.
Because of its fragile environment and complex layout, access is controlled by permit.
Visitors must either:
- Join a ranger-led tour (seasonal), or
- Obtain a self-guided permit in advance and complete a required orientation.
Permits frequently sell out during spring and fall.
Highlights:
• Maze-like sandstone corridors
• Minimal signage and a true route-finding experience
• One of the most unique landscapes in the park
Location: Mid-park, signed viewpoint and trailhead along the scenic road
Difficulty: Moderate (due to scrambling and navigation)
Important to know: This is not a standard hiking trail. Plan ahead and secure permits early.
Potential drawbacks: Permit required; Not suitable for young children or those uncomfortable scrambling
Hiking Strategy for Arches National Park
Arches National Park is compact and highly accessible, but parking pressure, heat, and crowd patterns can dramatically shape your experience. A little planning goes a long way, so here are some suggestions to help you structure your time hiking in Arches.
Combine Multiple Hikes in One Day
With the exception of Devil’s Garden (if you go beyond Landscape Arch), most hikes in Arches easily take less than two hours, and most can be completed in under one hour. That makes it easy to combine several hikes within a day without overexerting yourself.
Start Early for High-Demand Trailheads
Parking is often the limiting factor, not the hike itself. The lots at:
-Delicate Arch
-Devil’s Garden
-The Windows
All frequently fill by mid-morning in spring and fall. Arriving before 8:00 a.m. significantly improves your odds of securing a spot.
Yes, Delicate Arch at Sunset Is Worth It
The arch glows warm orange as the sun lowers, and the basin behind it softens in layered desert tones. Just manage expectations: you won’t be alone.
If you prefer fewer crowds, sunrise offers cooler temperatures and a quieter experience.
Avoid Midday Hiking in Summer
Shade is scarce throughout Arches. From June through September, exposed slickrock and sandstone reflect heat intensely. Even moderate hikes can feel far more strenuous than the mileage suggests.
Pair Hikes with Scenic Drive Stops – But Prioritize Trails First
Because trailhead parking is more competitive than viewpoint parking (viewpoint-only pullouts tend to have faster turnover, but trailhead lots can remain full for extended periods), it’s usually best to secure your hike first and fill in overlooks afterward.
Mix and Match with Canyonlands or Moab
If you’re staying several days in Moab and have an America the Beautiful Pass, consider spreading activity across locations. For example, after an early morning hike in Arches, you can spend the afternoon exploring nearby Canyonlands National Park or other trails around Moab, which allows you to avoid peak congestion inside Arches while still maximizing your time in the region.
Which Hike Should You Choose?
Here’s a simple way to help you decide based on time, fitness level, and what kind of experience you’re looking for:
| If You Want… | Choose This Hike | Why |
|---|---|---|
| The most iconic photo in the park | Delicate Arch | Utah’s most recognizable arch with a dramatic payoff |
| Multiple arches in one outing A more adventurous hike | Devils Garden | See Landscape Arch plus several others in a single hike |
| Big scenery with minimal effort | Double Arch | Massive formation reached in minutes |
| A cluster of photogenic arches in one compact area | Windows Section | Several arches with short connecting trails |
| A quieter, slightly immersive walk | Broken Arch | Freestanding arch with fewer crowds |
| A short, shaded option in hot weather | Sand Dune Arch | Cooler corridor between rock fins |
| A canyon-like walking experience | Park Avenue | Towering rock walls and dramatic vertical scale |
Our Personal favorites:
1) Devil’s Garden trail: a combination of the most varied scenery + multiple arches + the most adventurous trail (without being too difficult)
2) The Windows trail (particularly the primitive section): just a fun place to explore, and the primitive trail is peacefully relaxing with stunning desert views
3) Broken Arch trail: short but rewarding, without the crowds of some of the other trails
Best Months for Hiking in Arches
Best Overall Months: March–May & October
These shoulder-season months offer:
- Comfortable daytime temperatures (60–75°F / 15–24°C)
- Full trail access
- Cooler mornings for exposed hikes
- Excellent photography light
Crowds are high, but conditions are ideal.
Summer (June–September)
Hiking is still possible, but timing becomes more important.
- Temperatures frequently exceed 95°F (35°C)
- Trails are fully exposed
- Early starts are essential
If hiking in summer, aim for sunrise and avoid long midday routes.
Winter (December–February)
Underrated but still worth a visit if you prefer a more crowdless experience and don’t mind the colder weather.
- Cooler temperatures (30–50°F / –1 to 10°C)
- Lighter crowds
- Occasional snow dusting on the arches
Icy slickrock can form after storms, so proper footwear choice matters.
Quick Take
If hiking is your priority, plan for spring or fall.
If visiting in summer, plan around avoiding the heat.
If visiting in winter, plan around cold and occasional ice.
What Else to Do in Arches and Moab
While this guide focuses specifically on the best hikes in Arches National Park, many visitors combine hiking with scenic viewpoints, short walks, and time exploring nearby Moab.
Inside Arches National Park
Not every highlight requires a hike. The scenic drive alone includes:
- Balanced Rock
- Courthouse Towers
- Fiery Furnace Viewpoint
- Panorama Point


For a full breakdown of viewpoints, sunrise and sunset strategies, scenic drive structure, and how long to spend in the park, see our complete Best Things to Do in Arches National Park Guide.
Beyond Arches: Exploring Moab
Moab itself is a major outdoor hub. Many travelers stay 3–5 nights and mix park hikes with additional trails on BLM land.
If you’re looking to expand beyond Arches, see our Best Hikes Around Moab Guide, where we cover trails outside the national park boundaries.
Pair Arches with Canyon Views
Just 45 minutes from Arches, Canyonlands National Park offers expansive canyon overlooks that contrast beautifully with Arches’ close-up rock formations.
Nearby Dead Horse Point State Park is another excellent sunset location with dramatic river views.
Where to Stay Near Arches National Park
Unlike some national parks with limited lodging near the entrance, Arches National Park sits just five minutes from the town of Moab, which serves as the region’s main base.
Moab offers a wide range of accommodations — from national hotel chains to boutique adventure lodges. Staying in town makes it easy to:
- Enter Arches early for sunrise hikes
- Return midday to escape the heat
- Explore Canyonlands or Dead Horse Point without relocating
- Enjoy restaurants and services in the evening
Below are three well-located, reliable options at different mid-range price points and styles.
La Quinta Inn & Suites by Wyndham Moab
Best for: Comfortable, reliable mid-range stay with strong value
La Quinta offers a familiar, dependable experience with spacious rooms, a large outdoor pool, and complimentary breakfast. It’s located along the main highway entering Moab, about 10 minutes from the Arches entrance.
Why it works well:
- Good value relative to other Moab hotels
- Large parking area (useful for larger vehicles or road trips)
- Easy access in and out of town
This is a solid choice for families, road trippers, or anyone prioritizing comfort and practicality.
Best for: Modern amenities close to Arches
Wingate is one of the newer properties in Moab and sits slightly north of town, closer to the entrance of Arches. Rooms are modern and well-appointed, and amenities include a pool, fitness center, and free breakfast.
Why it stands out:
- Shorter drive to Arches (ideal for early starts)
- Newer build with a contemporary feel
- Reliable comfort without boutique pricing
If your priority is minimizing drive time into the park, this is one of the most convenient options.
Best for: Outdoor-focused travelers and an adventure vibe
Field Station blends hotel comfort with a gear-friendly, adventure-oriented design. The property includes communal gathering spaces, bike storage, and a laid-back atmosphere that caters to hikers, climbers, and mountain bikers.
Why people love it:
- Clean, minimalist rooms
- Social outdoor areas
- Feels aligned with the Moab adventure culture
It’s ideal if you want something more distinctive than a traditional chain hotel without sacrificing comfort.
A Quick Planning Tip
Moab fills quickly during spring and fall, especially March through May and October, so booking in advance is strongly recommended. Summer availability is often easier, but rates can still be high during peak travel periods.
Arches Hiking National Park – Frequently Asked Questions
What is the best hike in Arches National Park?
That depends on your goals.
For easy access and big payoff: Double Arch or the Windows
For iconic scenery: Delicate Arch
For variety and multiple arches: Devils Garden
Can beginners hike in Arches?
Yes. Many trails, including Sand Dune Arch, Double Arch, and Broken Arch, are suitable for beginners and families. Summer heat is often a bigger challenge than terrain.
How hard is the Delicate Arch hike?
Delicate Arch is considered moderate. The steady elevation gain and full sun exposure make it feel more demanding than the mileage suggests, especially in warm weather.
Is Devil’s Garden difficult?
The first section to Landscape Arch is relatively easy. Beyond that, the trail becomes more rugged and includes narrow rock fins and uneven slickrock. You can turn around at any point.
How much time do you need to hike in Arches?
Most individual hikes take 30 minutes to 2 hours. You can combine multiple trails in one day, especially outside of peak heat hours.
Are dogs allowed on hiking trails?
No. Pets are not permitted on hiking trails in Arches. They are allowed only on paved roads and in parking areas, and must remain leashed.
Are dogs allowed in Arches?
Pets are allowed in parking lots and on paved roads, but are not permitted on hiking trails or off developed areas. They must be leashed at all times.
Do you need reservations to hike in Arches?
No reservations are required for general park entry as of 2026. However, the Fiery Furnace requires a permit, either through a ranger-led tour or a self-guided permit system.
Is Arches worth visiting if you’re already going to Canyonlands?
Yes, particularly if you’re comfortable with cold conditions. Snow-covered hoodoos create a striking contrast, and visitor numbers drop significantly. However, some roads and trails may be closed or icy, and flexibility is important.
Is Arches worth visiting if you’re already going to Canyonlands?
Absolutely. Canyonlands National Park focuses on expansive canyon views, while Arches emphasizes close-up rock formations. The two parks complement each other extremely well and are only about 45 minutes apart.
Explore More Utah National & State Park Guides
Continue exploring Utah with these detailed guides:
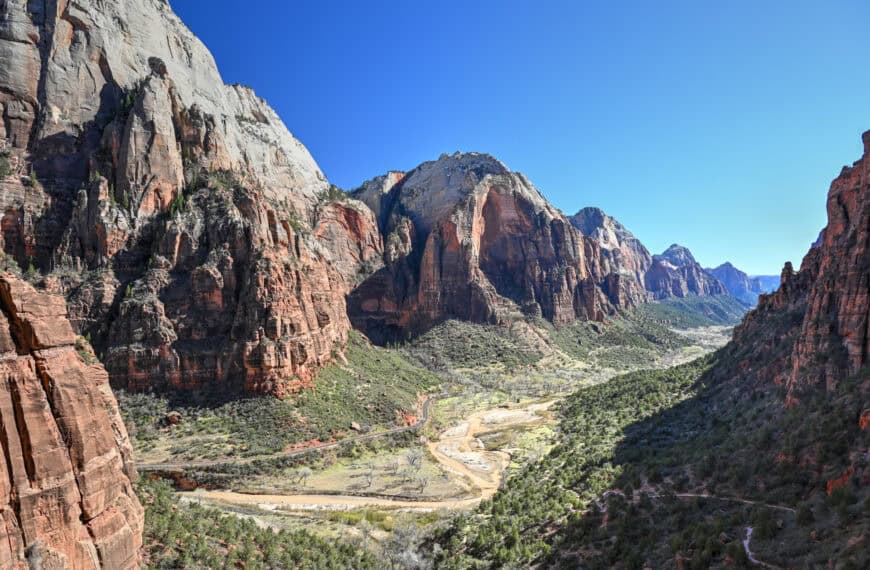
Zion National Park Guide
Capitol Reef National Park Guide
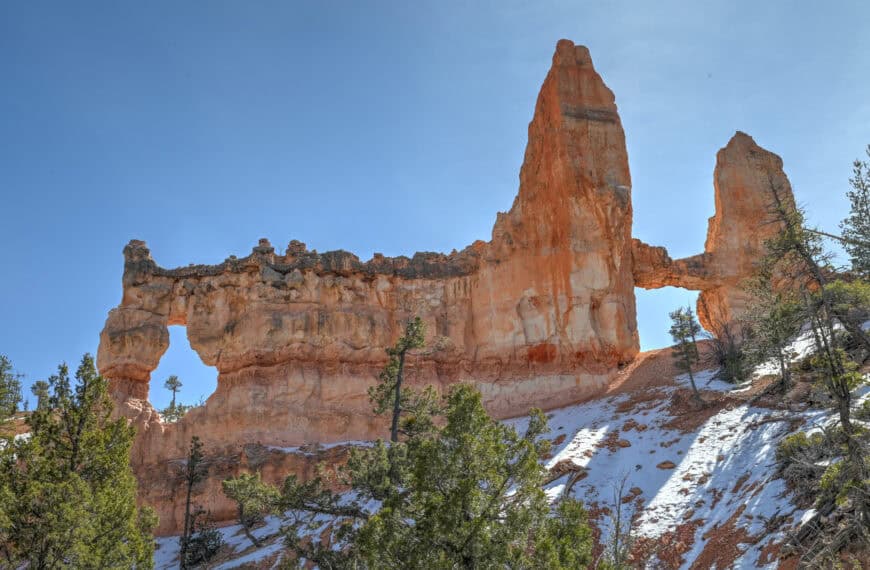
Bryce Canyon National Park
Goblin Valley State Park Guide
Monument Valley Guide
Photography Gear
If you like our photography, you might be interested in some of the gear we use to shoot our travel and hiking destinations.
Camera Body – Nikon Z 6ii Fx-series Mirrorless Body
Main Lens – NIKON 24-120mm F/4G ED VR AF-S
Zoom Lens – Sigma 745-306 150-600mm f/5-6.3
Polarizing filters – Urth Circular Polarizing (CPL)
Camera Tripod – K&F Concept 64-inch Camera Tripod
Mini-tripod – Lammcou Flexible Camera Tripod
Camera/hiking backpack – Vanguard Alta Rise 48 Backpack
Universal Travel Adapter – VYLEE Universal International Power Travel Plug
Other Travel Essentials
Travel Insurance
SafetyWing is a travel insurance company that offers comprehensive coverage for travellers. Includes Medical Insurance and Travel Insurance. Primarily geared towards long-term travellers, digital nomads, and expats.
e-Sim cards
Airalo is the world’s first and largest eSIM store with eSIM plans for 200+ countries and regions worldwide. With Airalo eSIMs, travellers can get connected the moment they land at their destination and avoid nasty data roaming charges
eSIMS are a sustainable alternative to single-use SIM cards – they are 100% digital, require less energy to produce and be re-used rather than disposed of.
Car Rentals
Discover Cars is our go-to website for car rentals. We almost always find our preferred rate there.
Transfer from Airport
Welcome Pickups is our favourite private transfer service, which you can pre-book at a fixed price. Currently available in 220 cities all over the world (mostly in Europe, but with several major cities in Asia, the Middle East and the US).
Kiwitaxi is another private transfer service – we haven’t tried it yet, but it’s currently available in a few more countries (102 as of 2024).
Hotels and Accommodations (coming soon)
Photography Prints
If you found this blog useful, you can help support our blog by purchasing low-cost digital prints. Printed physical prints are also available for purchase.


—–
Well, that wraps it up! We hope you enjoyed our Best Hiking Trails Guide for Arches National Park and that it will prove useful for planning your trip.
—–
You might also be interested in these related pages: