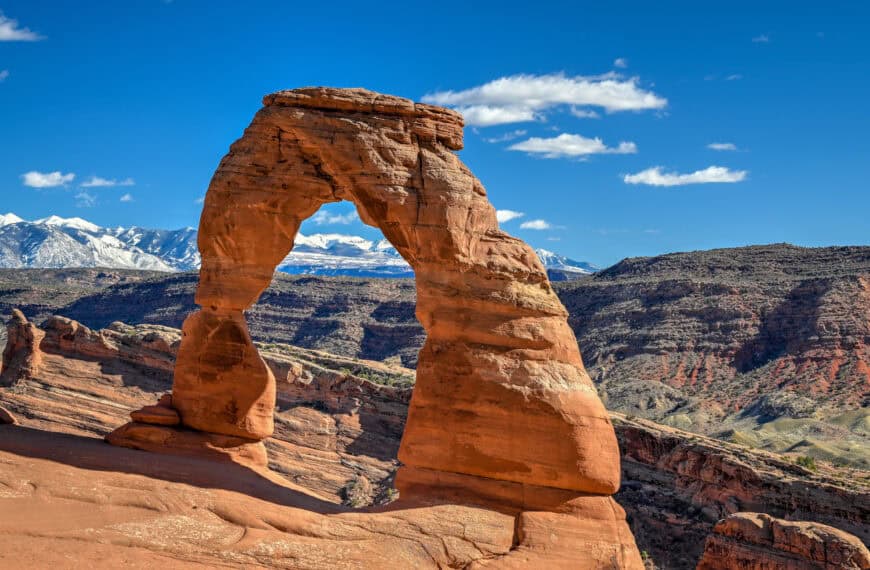
The West Rim Trail to Scout Lookout and beyond is one of the most rewarding hikes in Zion National Park, even if you don’t have (or don’t want) a permit for Angels Landing. While Scout Lookout marks the end of the permit-free section for many hikers, it’s far from where the experience has to end. Continuing along the West Rim Trail beyond Scout Lookout leads to broader canyon perspectives and a sense of open space that’s often missing on the crowded Angels Landing spur. Even hiking just a short distance past Scout Lookout delivers one of Utah’s most iconic viewpoints and noticeably fewer people, making it well worth the extra effort.
In this guide, we focus primarily on hiking the West Rim Trail, including how far you need to hike to reach Scout Lookout and Angels Landing, what to expect along the route, and why it’s worth going farther even if you don’t plan to reach the very end of the trail. For those who are interested, we also include all the essential details for hiking Angels Landing itself, including permit requirements and how the lottery system works.
The West Rim Trail – At a Glance
Big canyon views without a permit – The hike up the West Rim Trail to Scout Lookout delivers many of the same sweeping Zion Canyon views as Angels Landing, without requiring a permit. Long before reaching the famous chains section, the trail climbs high above the canyon floor, offering expansive perspectives of Zion’s main canyon.
Progressive rewards as you climb – Unlike short overlook hikes, the West Rim Trail builds scenery gradually. Each switchback opens wider views, and by the time you reach Scout Lookout, you’ve already gained significant elevation and perspective.
Flexible turnaround options – One of the biggest advantages of the West Rim Trail is that it doesn’t force a single destination. Continuing farther up the West Rim Trail beyond Scout Lookout rewards hikers with even quieter viewpoints and a sense of space that contrasts sharply with the crowds below.
A smart alternative to Angels Landing – For those who didn’t get a permit (or simply don’t want to deal with chains and exposure), the West Rim Trail offers one of Zion’s best high-elevation hiking experiences without the stress or logistics of the lottery system.
Trail Difficulty: Moderately Challenging
Typical Hike Duration: 2h30 – 4h, depending on turnaround point


Disclosure: This page (The West Rim Trail – Zion National Park Hiking Guide) may contain product affiliate links. At no additional cost to you, we may receive a commission for purchases made through these links. More details can be found on our disclosure and policies page.
West Rim Trail, Scout Lookout, and Angels Landing: What’s the Difference?
The West Rim Trail, Scout Lookout, and Angels Landing are all part of the same hiking route, but they refer to different sections of the trail that offer very different experiences.
West Rim Trail
The West Rim Trail is the main backbone of this route. It begins at the Grotto in Zion Canyon and climbs steadily through Refrigerator Canyon and a series of long switchbacks. This trail continues well beyond Scout Lookout toward Lava Point and is completely permit-free. Most of the elevation gain, scenery, and effort occur on this portion of the hike.
Scout Lookout
Scout Lookout is a major viewpoint and junction along the West Rim Trail. It sits high above Zion Canyon and marks the start of the Angels Landing spur. Many hikers assume Scout Lookout is just a waiting area for Angels Landing, but it is actually a rewarding destination on its own, with dramatic views and space to rest, eat, and decide whether to continue.
Angels Landing
Angels Landing is a short spur trail branching off from Scout Lookout. This final section is famous for its narrow ridge, steep drop-offs, and fixed chains. It is the only part of the route that requires a permit. While iconic, it represents a small fraction of the total hike and is significantly more exposed and technical than the rest of the West Rim Trail.
In short:
- West Rim Trail = main hike, no permit required
- Scout Lookout = viewpoint and decision point
- Angels Landing = short, exposed spur requiring a permit
Can You Hike Angels Landing Without a Permit?
Short answer: no, but that’s only true for the final spur known as Angels Landing.
A permit is required only for the narrow, chain-assisted section that begins at Scout Lookout and climbs along the exposed ridge to the summit of Angels Landing. Rangers check permits at the start of this spur, and hiking beyond this point without one is not allowed.
However, you can hike the majority of the route without a permit, including:
- The entire West Rim Trail up from Zion Canyon
- Refrigerator Canyon
- Walter’s Wiggles
- Scout Lookout itself
- Any distance beyond Scout Lookout along the West Rim Trail
This means hikers without a permit still gain nearly all of the elevation, effort, and scenery associated with the Angels Landing hike. In fact, many visitors are surprised to find that the views from Scout Lookout, and from the West Rim Trail beyond it, are just as impressive, if not better, than those from the chains section.
Why Hiking Without a Permit Is Still Worth It
- Most of the views come before Angels Landing – By the time you reach Scout Lookout, you’re already hundreds of feet above the canyon floor with sweeping views in multiple directions.
- Less stress, more enjoyment – Skipping the chains avoids crowding, exposure, and long waits, especially during peak season.
- More flexibility – Without committing to Angels Landing, you can hike at your own pace, turn around whenever you want, or continue farther up the West Rim Trail into quieter terrain.
- Safer for many hikers – Those uncomfortable with heights or narrow ridges can still enjoy a high-elevation Zion hike without pushing beyond their comfort zone.
Bottom Line
You cannot legally hike the Angels Landing spur without a permit, but you can experience everything leading up to it, including Scout Lookout and the rest of the West Rim Trail. For many, this permit-free alternative delivers a more relaxed, scenic, and equally memorable Zion hike.
Angels Landing Permit Lottery – How It Works
Angels Landing Permit Lottery – How It Works
Angels Landing is subject to a permit lottery system managed by Zion National Park to reduce crowding and improve safety on the narrow, chain-assisted summit ridge.
A permit is required only for the final Angels Landing spur beyond Scout Lookout. The rest of the West Rim Trail remains open to all hikers without a permit.
Seasonal Lottery (Advance Planning)
- Opens several months before the hiking season
- Allows you to apply for specific dates
- Best option if your Zion trip is planned well in advance
Day-Before Lottery (Last-Minute Option)
- Opens at 12:01 a.m. (midnight) the day before your hike
- Results are typically released early in the morning
- Ideal for flexible itineraries or spontaneous hikers
Key Permit Rules
- Permits are checked at Scout Lookout by park rangers
- One permit covers a group (up to 6 people)
- A permit is valid only for the date and time window selected
- Hiking Angels Landing without a permit can result in fines
What Happens If You Don’t Get a Permit?
Not getting a permit does not mean your hike is over. You can still:
- Hike the full West Rim Trail up to Scout Lookout
- Enjoy panoramic views high above Zion Canyon
- Continue farther up the West Rim Trail beyond Scout Lookout
- Turn around whenever you choose without missing the main scenic payoff
Many find that Scout Lookout, and continuing beyond it, offers a more enjoyable and less stressful experience than the crowded and more challenging chains section of Angels Landing.
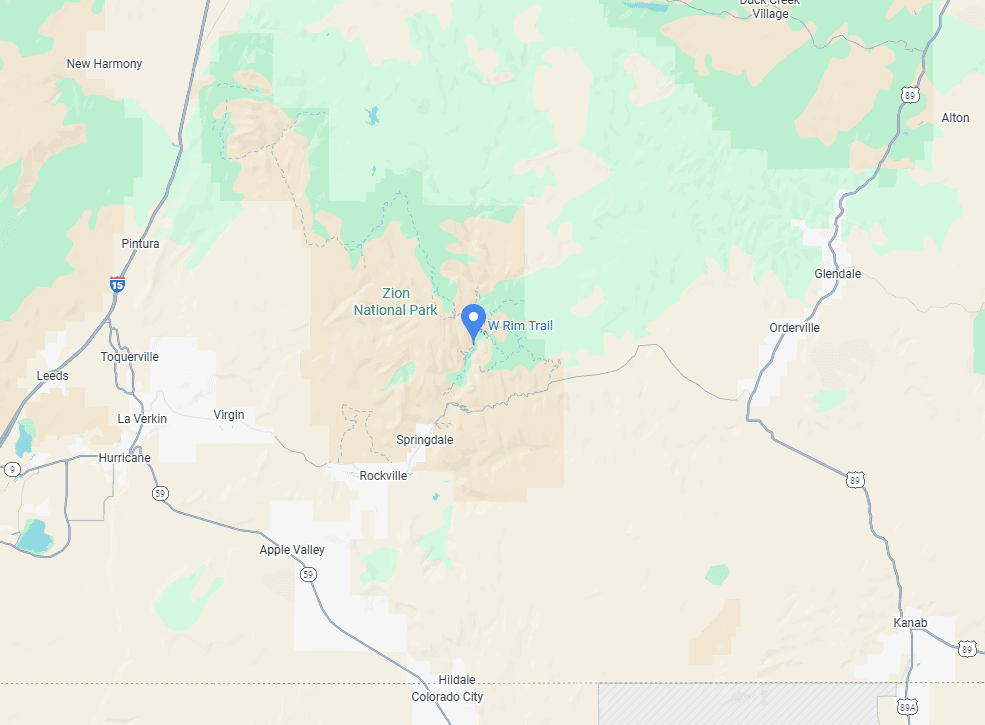
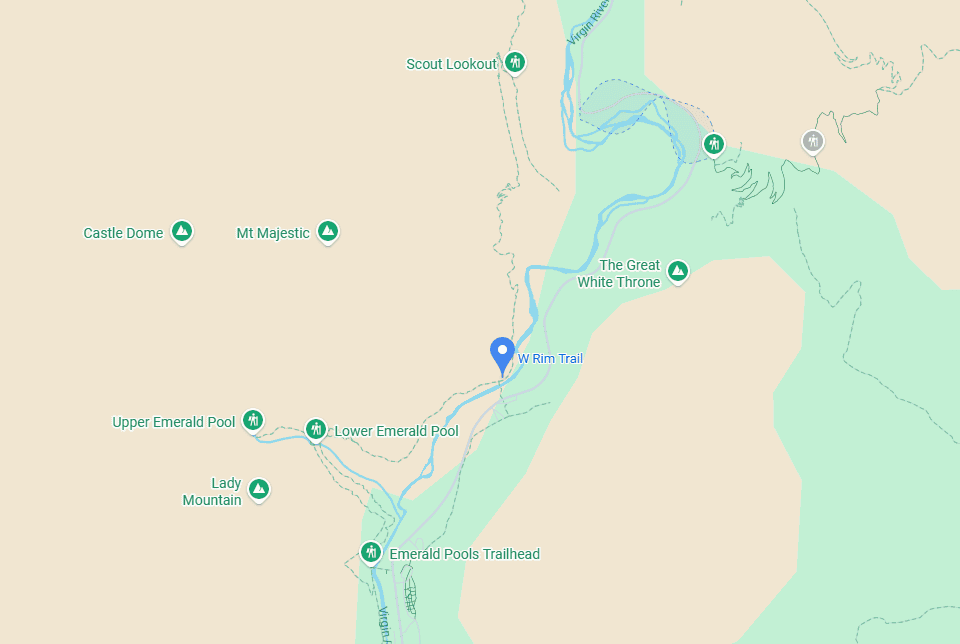
The West Rim Trail: Location and Map
The West Rim Trail begins deep within Zion’s main canyon, starting at the Grotto along the Virgin River. Actually, several trails start from this point, including the Grotto Trail, the West Rim Trail, and the Kayenta Trail to the Emerald Pools. Accessing the West Rim requires travelling into the heart of Zion—typically via the Zion Canyon Shuttle during peak season (more on the shuttle system further below)
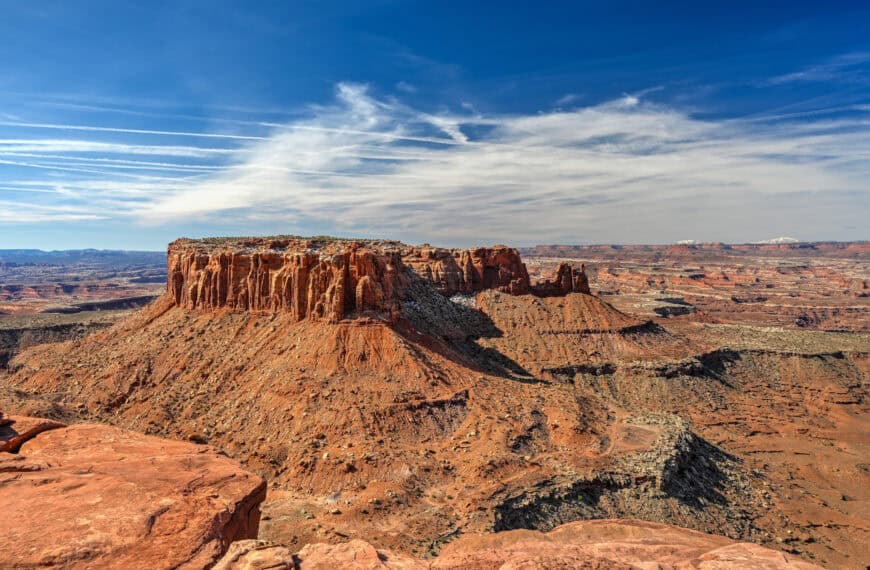
About Zion National Park
Utah’s Iconic Red-Rock Canyon: Zion National Park lies in southwestern Utah, where towering sandstone cliffs rise abruptly from the desert floor. The park is defined by sheer canyon walls, narrow slot canyons, and lush river corridors, creating dramatic contrasts between towering rock faces and green valley bottoms. Zion Canyon, carved by the Virgin River, is the park’s centerpiece and one of the most visually striking landscapes in the American Southwest.
A Landscape Carved by Water and Time: Zion’s cliffs are composed primarily of Navajo Sandstone, formed from ancient desert dunes over 150 million years ago. Over time, the Virgin River and seasonal flash floods sculpted these layers into steep canyon walls, alcoves, and narrow corridors. The result is a landscape of massive vertical relief, smooth rock textures, and striking color variations that shift throughout the day as the light changes.
A Park Built for Scenic Hiking: Zion is renowned for its diverse hiking opportunities, ranging from riverside walks and canyon-floor trails to exposed routes with sweeping views. Short hikes like the Canyon Overlook Trail deliver big scenery with minimal effort, while longer routes such as Angels Landing and The Narrows offer more immersive adventures. This range makes Zion accessible to casual visitors and experienced hikers alike.
Dramatic Viewpoints and Canyon Overlooks: One of Zion’s defining features is its abundance of elevated viewpoints. Trails and roadside pullouts reveal sweeping vistas over Zion Canyon, Pine Creek Canyon, and the surrounding plateaus.
Easy Access, High Demand: Zion is one of the most visited national parks in the U.S., thanks to its proximity to Springdale and easy access via Highway 9 and the Zion-Mount Carmel Tunnel. While the park’s popularity can mean crowded trails and limited parking—especially during peak season—its shuttle system, short hikes, and well-maintained infrastructure make it possible to experience world-class scenery even on a tight schedule.
How to Get to Zion National Park
Zion National Park is best reached by car, as there is no public transportation directly to the park. While there is a shuttle system that navigates throughout the park during Zion’s busiest months, it is not needed for the Watchman Trail, as the trailhead is less than a 2-minute walk from the Zion Canyon visitor center, which is where the shuttles depart from.
Zion National Park Entrances
South Entrance (Springdale):
This is the main access point for Zion National Park and where the majority of visitors begin their trip. It provides direct access to Zion Canyon, the shuttle system, and popular trails such as Angels Landing, The Narrows, Emerald Pools, and the West Rim Trail. If you’re spending most of your time in the main canyon, this is where you’ll enter the park.
East Entrance (via Highway 9):
The east entrance is quieter and more scenic, passing through slickrock domes and sandstone formations before reaching the Zion–Mount Carmel Tunnel. The Canyon Overlook Trail is located near this entrance, making it especially convenient for visitors approaching from Bryce Canyon, Page, Kanab, or Monument Valley.
All park roads, including the Zion–Mount Carmel Highway, are fully paved and suitable for standard vehicles. However, traffic delays at the tunnel can occur during peak seasons, which is another reason to plan your visit carefully.
Driving times to Zion National Park
- Las Vegas, NV: 260 km / 160 mi – about 2.5 hours
- St. George, UT: 70 km / 45 mi – about 1 hour
- Bryce Canyon National Park: 135 km / 85 mi – about 2 hours
- Page, AZ: 175 km / 110 mi – about 2.5 hours
- Flagstaff, AZ: 420 km / 260 mi – about 4.5 hours
These times assume clear weather and normal traffic conditions.
If you need to book a rental vehicle for your hiking excursion, we highly recommend using Discover Cars to get the best rates on your rental in Utah, Nevada and Arizona.
We also highly recommend Airalo (eSIM card) for your connectivity needs when travelling abroad. Airalo is the world’s first and largest eSIM store with eSIM plans for 200+ countries and regions worldwide.
Group Excursion from Vegas
Alternatively, if you don’t have a car and are staying in Las Vegas, you can still visit Zion National Park by joining an organized tour from the city. Several companies offer full-day excursions. This is the most popular tour, which allows for 6 hours of free time in the park.
The West Rim – Trailhead, Parking & Fees
Trailhead Location
The West Rim Trailhead starts just across the Virgin River from the Grotto shuttle stop. A pedestrian bridge spans the river, connecting the shuttle stop to the trailhead (link to Google Maps)
Reaching the Trailhead via Zion’s Shuttle System
During shuttle-mandatory months (typically March through late November), private vehicles are not permitted to access the trailhead. The Zion Canyon Shuttle is free, reliable, and operates roughly every 7–15 minutes, depending on the season and time of day. To reach the trailhead, board the shuttle at one of the main stops or the Visitor Center, and get off at Stop #6: The Grotto. Early morning rides are ideal for avoiding crowds and securing a quieter hike. Outside shuttle months, visitors can drive and park directly at the Grotto Parking Lot.
Trailhead parking lot
When shuttles are not in operation, visitors may drive into the park and park at the Grotto Parking Lot. The lot is paved but fills quickly during weekends, so arriving early is strongly recommended. Parking provides immediate access to the trailhead and nearby restrooms.
Facilities
Restrooms are available at the Grotto Picnic Area, adjacent to the parking lot. There are no water stations along the trail, so be sure to bring sufficient water.
Trail Opening Hours
The trail is accessible year-round, 24/7.
Entrance Fees for Zion National Park
Anyone visiting Zion National Park, whether to hike, take a scenic drive, or simply enjoy the views, must pay the applicable entrance fee to the National Park Service.
Entrance Fees (per vehicle, valid 7 days)
Private vehicle: $35
Motorcycle: $30
Individual (on foot, bicycle, etc.): $20
Annual Pass Options
Zion Annual Pass: $70 – unlimited entry for one year from the month of purchase.
America the Beautiful Pass: $80 – valid for one year at all U.S. National Parks and more than 2,000 federal recreation sites nationwide. This is the best value if you plan to visit multiple national parks within a year.
Passes can be purchased at the park entrance stations, the Visitor Center, or online through the USGS website or via the REI store.
—> Most visitors exploring Utah’s “Mighty 5” parks (Arches, Bryce Canyon, Canyonlands, Capitol Reef, and Zion) should strongly consider the America the Beautiful Pass—it saves money and avoids the hassle of buying separate entry fees at each park.
The West Rim – Trail Stats, Difficulty, and Map
West Rim to Scout Lookout
Distance: 3.3 miles (6.1 km)
Route Type: Out & Back
Elevation change: 540 ft / 340 m (difference between trail high and low point)
Elevation gain: 655 ft / 350 m (cumulative elevation gain)
AllTrails rating (2025): 4.9, 17816 ratings
Duration: Most people complete the full trail in 2h30-3h
Trail difficulty level assessment:
Very Easy | Easy | Moderate | Moderately Challenging | Challenging
West Rim, including Angels Landing
Distance: 4.7 miles (7.6 km)
Route Type: Out & Back
Elevation change: 1510 ft / 460 m (difference between trail high and low point)
Elevation gain: 1740 ft / 530 m (cumulative elevation gain)
AllTrails rating (2025): 4.9, 37423 ratings
Duration: Most people complete the full trail in 3h30-4h30
Trail difficulty level assessment:
Very Easy | Easy | Moderate | Moderately Challenging | Challenging
Not an AllTrails member yet? We highly recommend signing up for either their free or paid membership plans. The free plan allows you to find new trails and plan routes but it can only be used while hiking if you have access to mobile data. The paid membership plan (AllTrails+) allows you to download trail maps for offline use and provides live progress updates and off-route notifications.
If you are still uncertain – you should know that the All Trails mobile application was voted the 2023 iPhone App of the Year by Apple.
We find that AllTrails is a great tool to have when hiking, particularly for assisting with navigation when the trail is hard to locate and to help monitor your progress along the trail, which helps estimate how much time you’ll need to complete the trail.
The West Rim – Beyond Scout Lookout
The full West Rim Trail stretches for nearly 15 miles (24 km), connecting The Grotto in Zion Canyon with the Lava Point Trailhead far to the north. Within the context of a day hike, however, most hikers do not attempt the entire route. The farthest point commonly reached on a long out-and-back day hike is near Backcountry Campsites #1 and #2, where the West Rim Trail splits between the West Rim and Telephone Canyon routes. Reaching this junction and returning to The Grotto totals roughly 10 miles (16 km) round-trip, with about 3,100 feet (950 m) of elevation gain, and typically takes 6–7 hours to complete.
Because this represents a very demanding hike for most visitors, we recommend a more moderate turnaround point. A great option is to hike to approximately the 4 km (2.5-mile) mark, where the trail reaches a broad plateau before briefly descending and then climbing again (see map below). This section offers some of the quietest and most scenic terrain on the West Rim Trail, with expanding views and fewer crowds, while avoiding the sustained elevation gain farther up the route.
Notably, this suggested turnaround point takes you higher and farther than Angels Landing, making it one of the best alternatives for visitors hiking the West Rim without an Angels Landing permit.
Our suggested itinery:
Distance: 5 miles (8 km)
Route Type: Out & Back
Elevation change: 1575 ft / 480 m (difference between trail high and low point)
Elevation gain: 1640 ft / 500 m (cumulative elevation gain)
AllTrails rating (2025): 4.7, 20689 ratings
Duration: Most people complete this trail in 3h-4h
The West Rim Trail – Trail Description and What to Expect
An Easy Start
The West Rim Trail begins at The Grotto, one of the main shuttle stops in Zion Canyon. After crossing the Virgin River on a pedestrian bridge, the trail turns right and briefly follows the river’s edge. This opening stretch is wide, paved, and relatively flat, making for a gentle warm-up and a chance to take in views of the canyon walls before the climb begins.
After about the half-mile mark, the trail starts gaining elevation on a paved path, and the river falls away behind you. The canyon begins to open up, offering increasingly impressive views back toward the valley floor. This calm introduction ends abruptly at the base of a steep wall of switchbacks: the first real test of the hike.
A First Set of Switchbacks
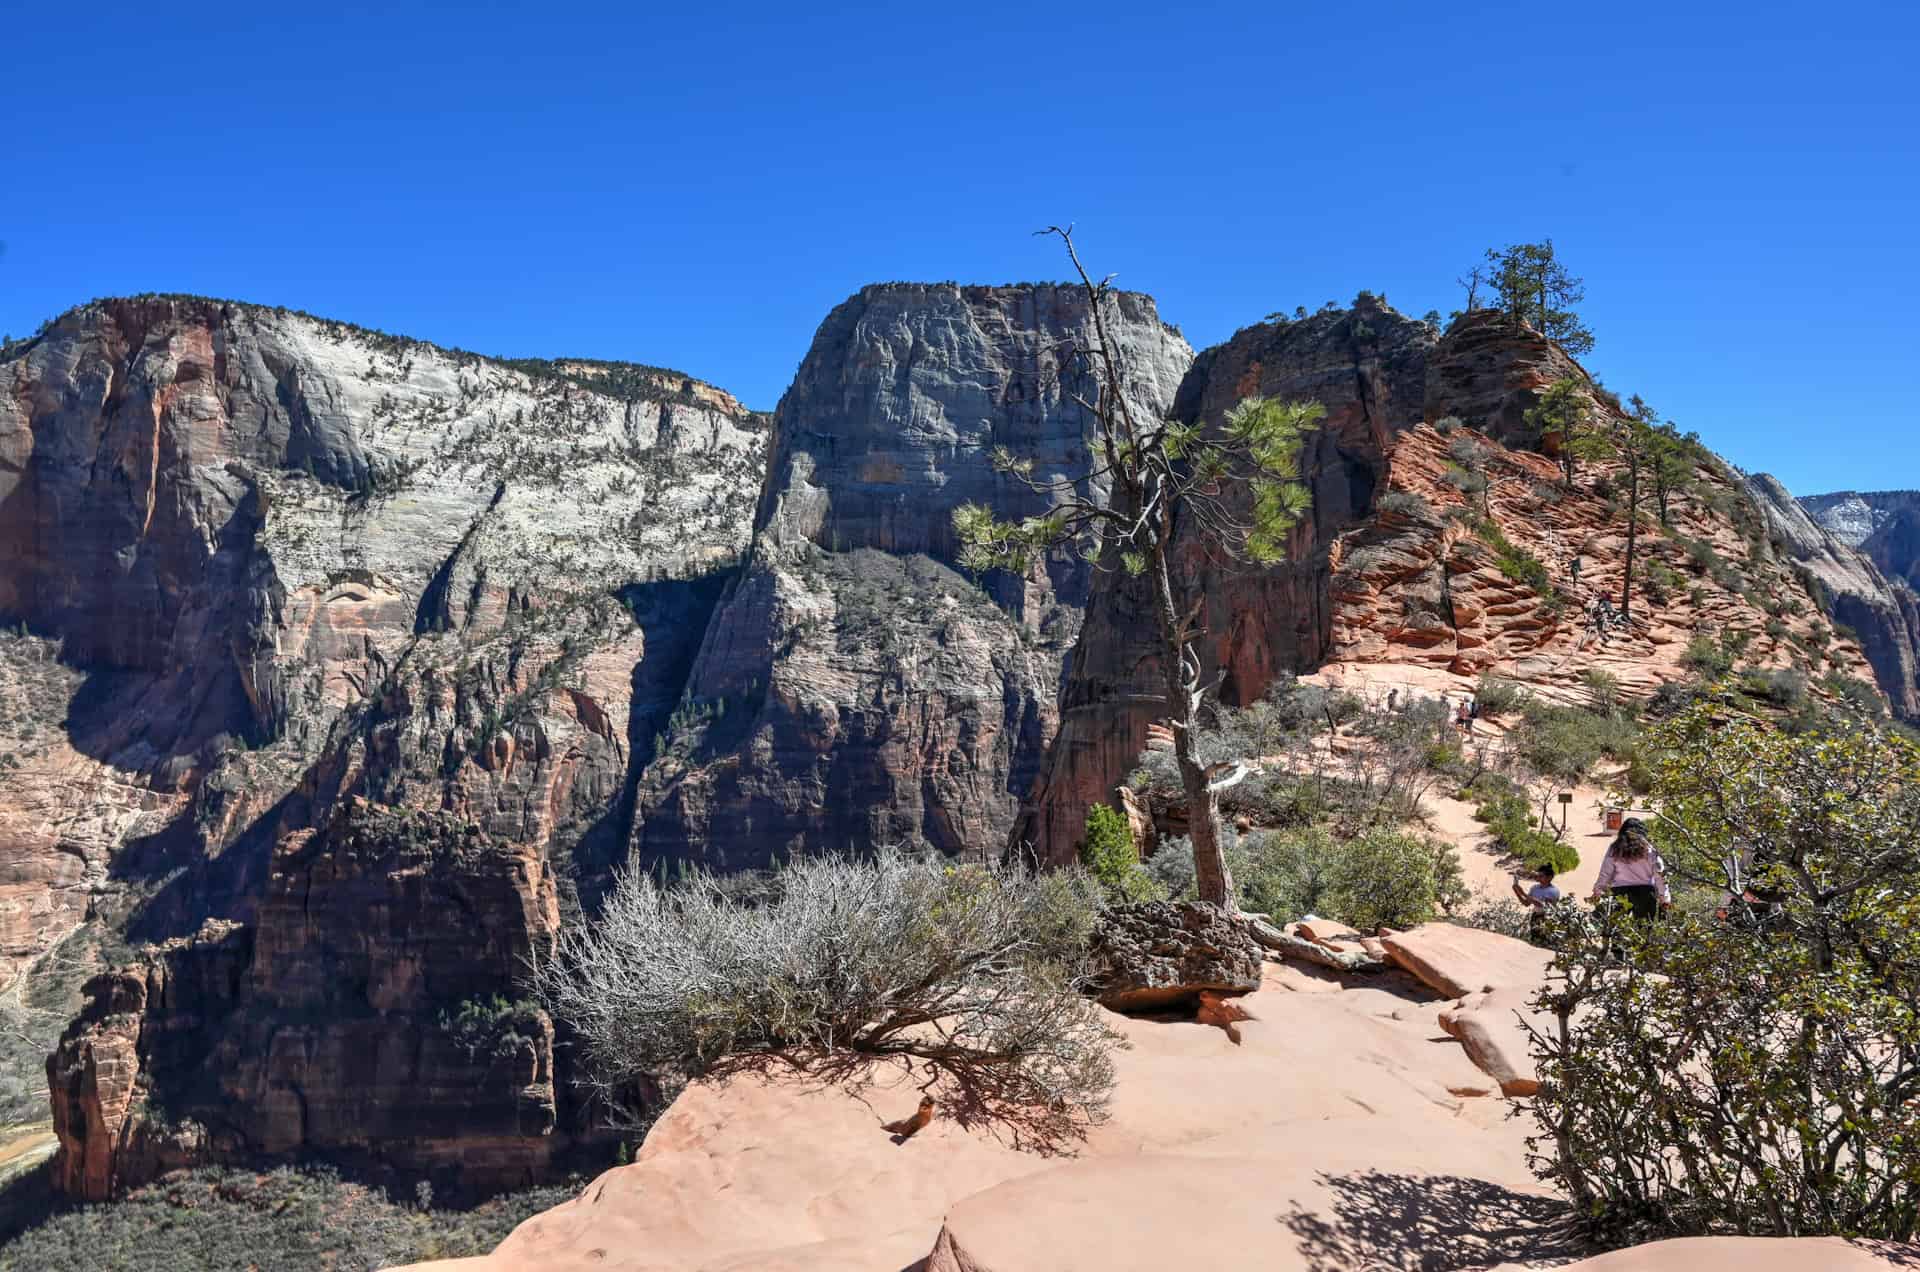
At around the 1-mile mark, the trail quickly turns upward into a relentless series of tight switchbacks, climbing roughly 330 feet (100 m) in just 0.3 miles (0.5 km). Can you spot in the pictures below how tiny the people are in the staircase carved into the rock?
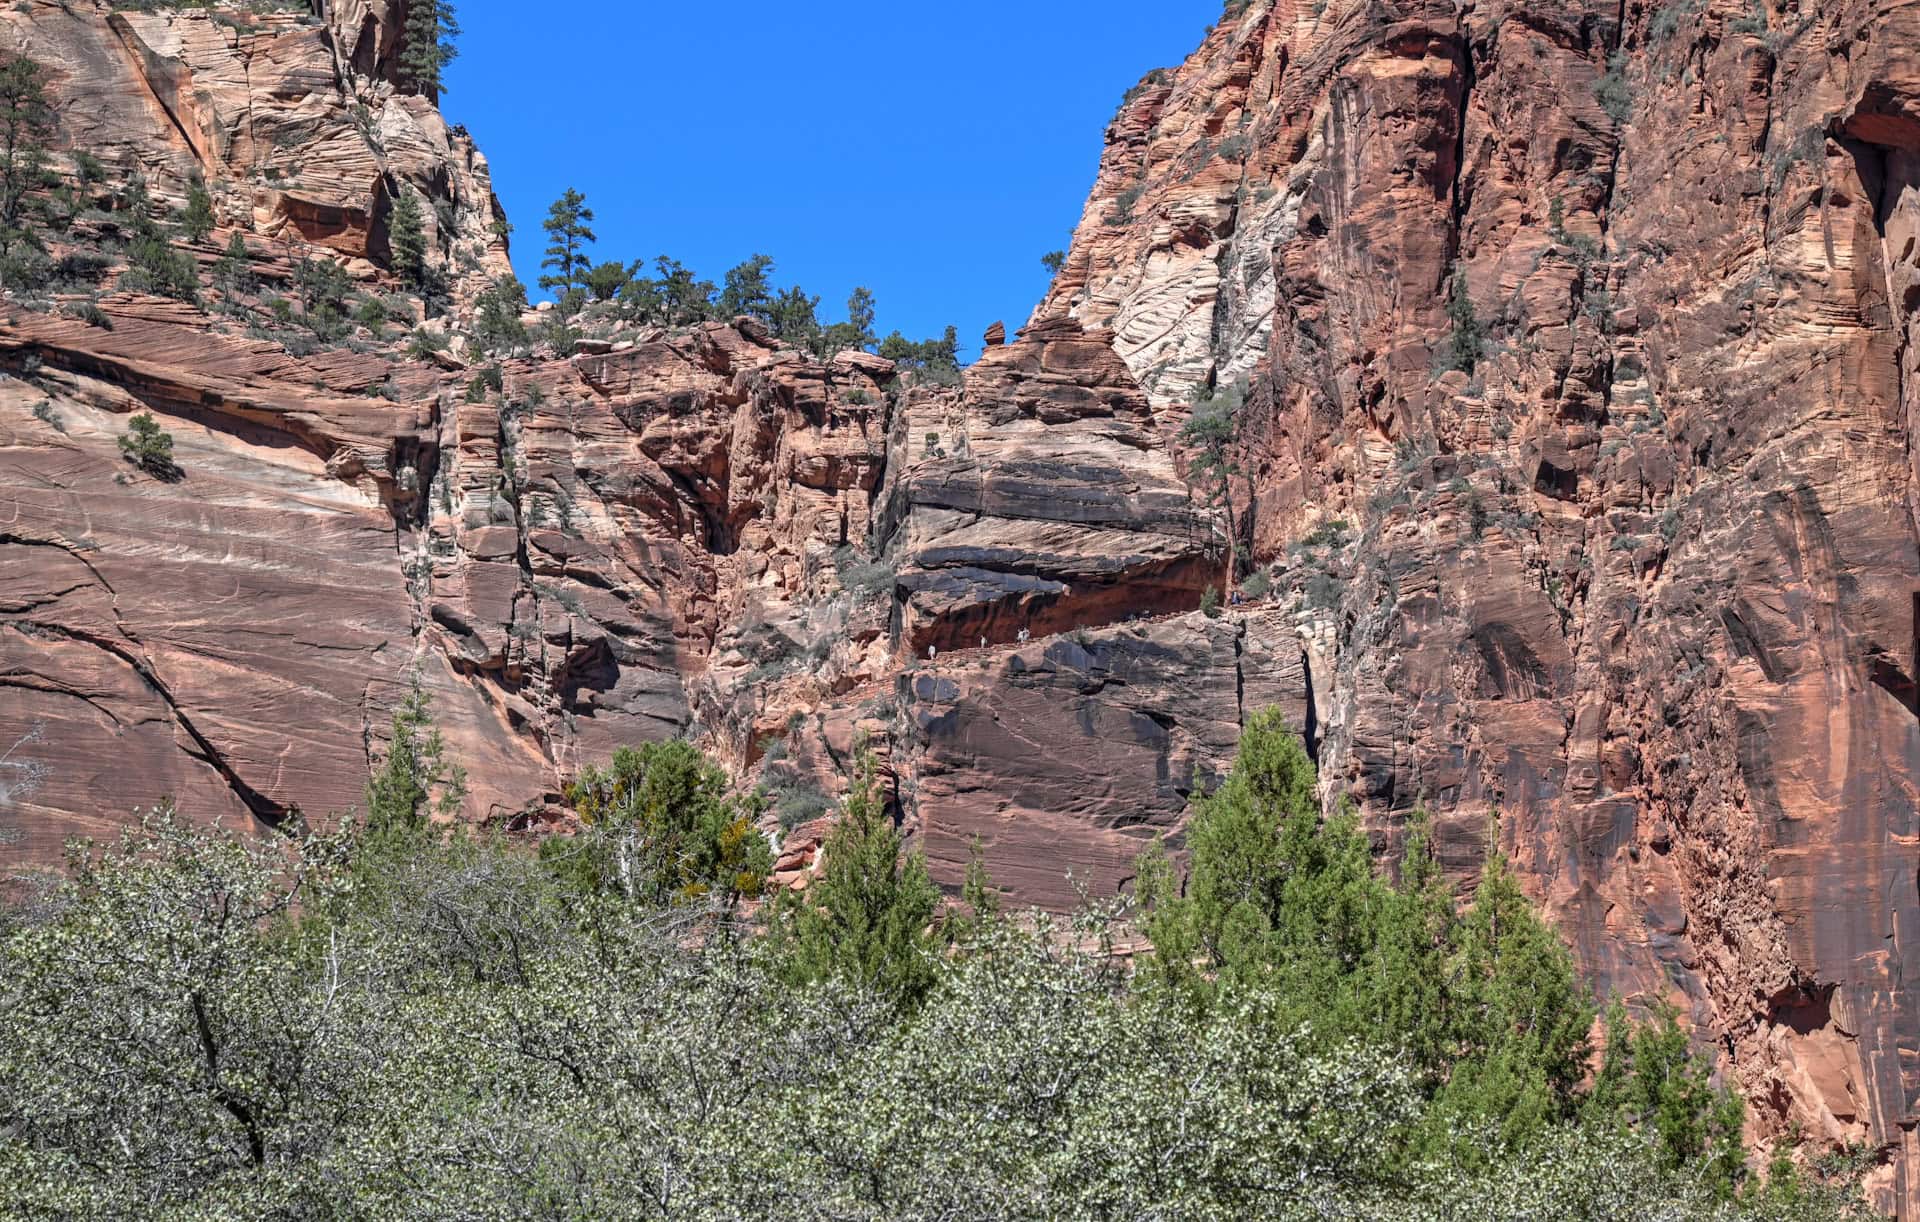

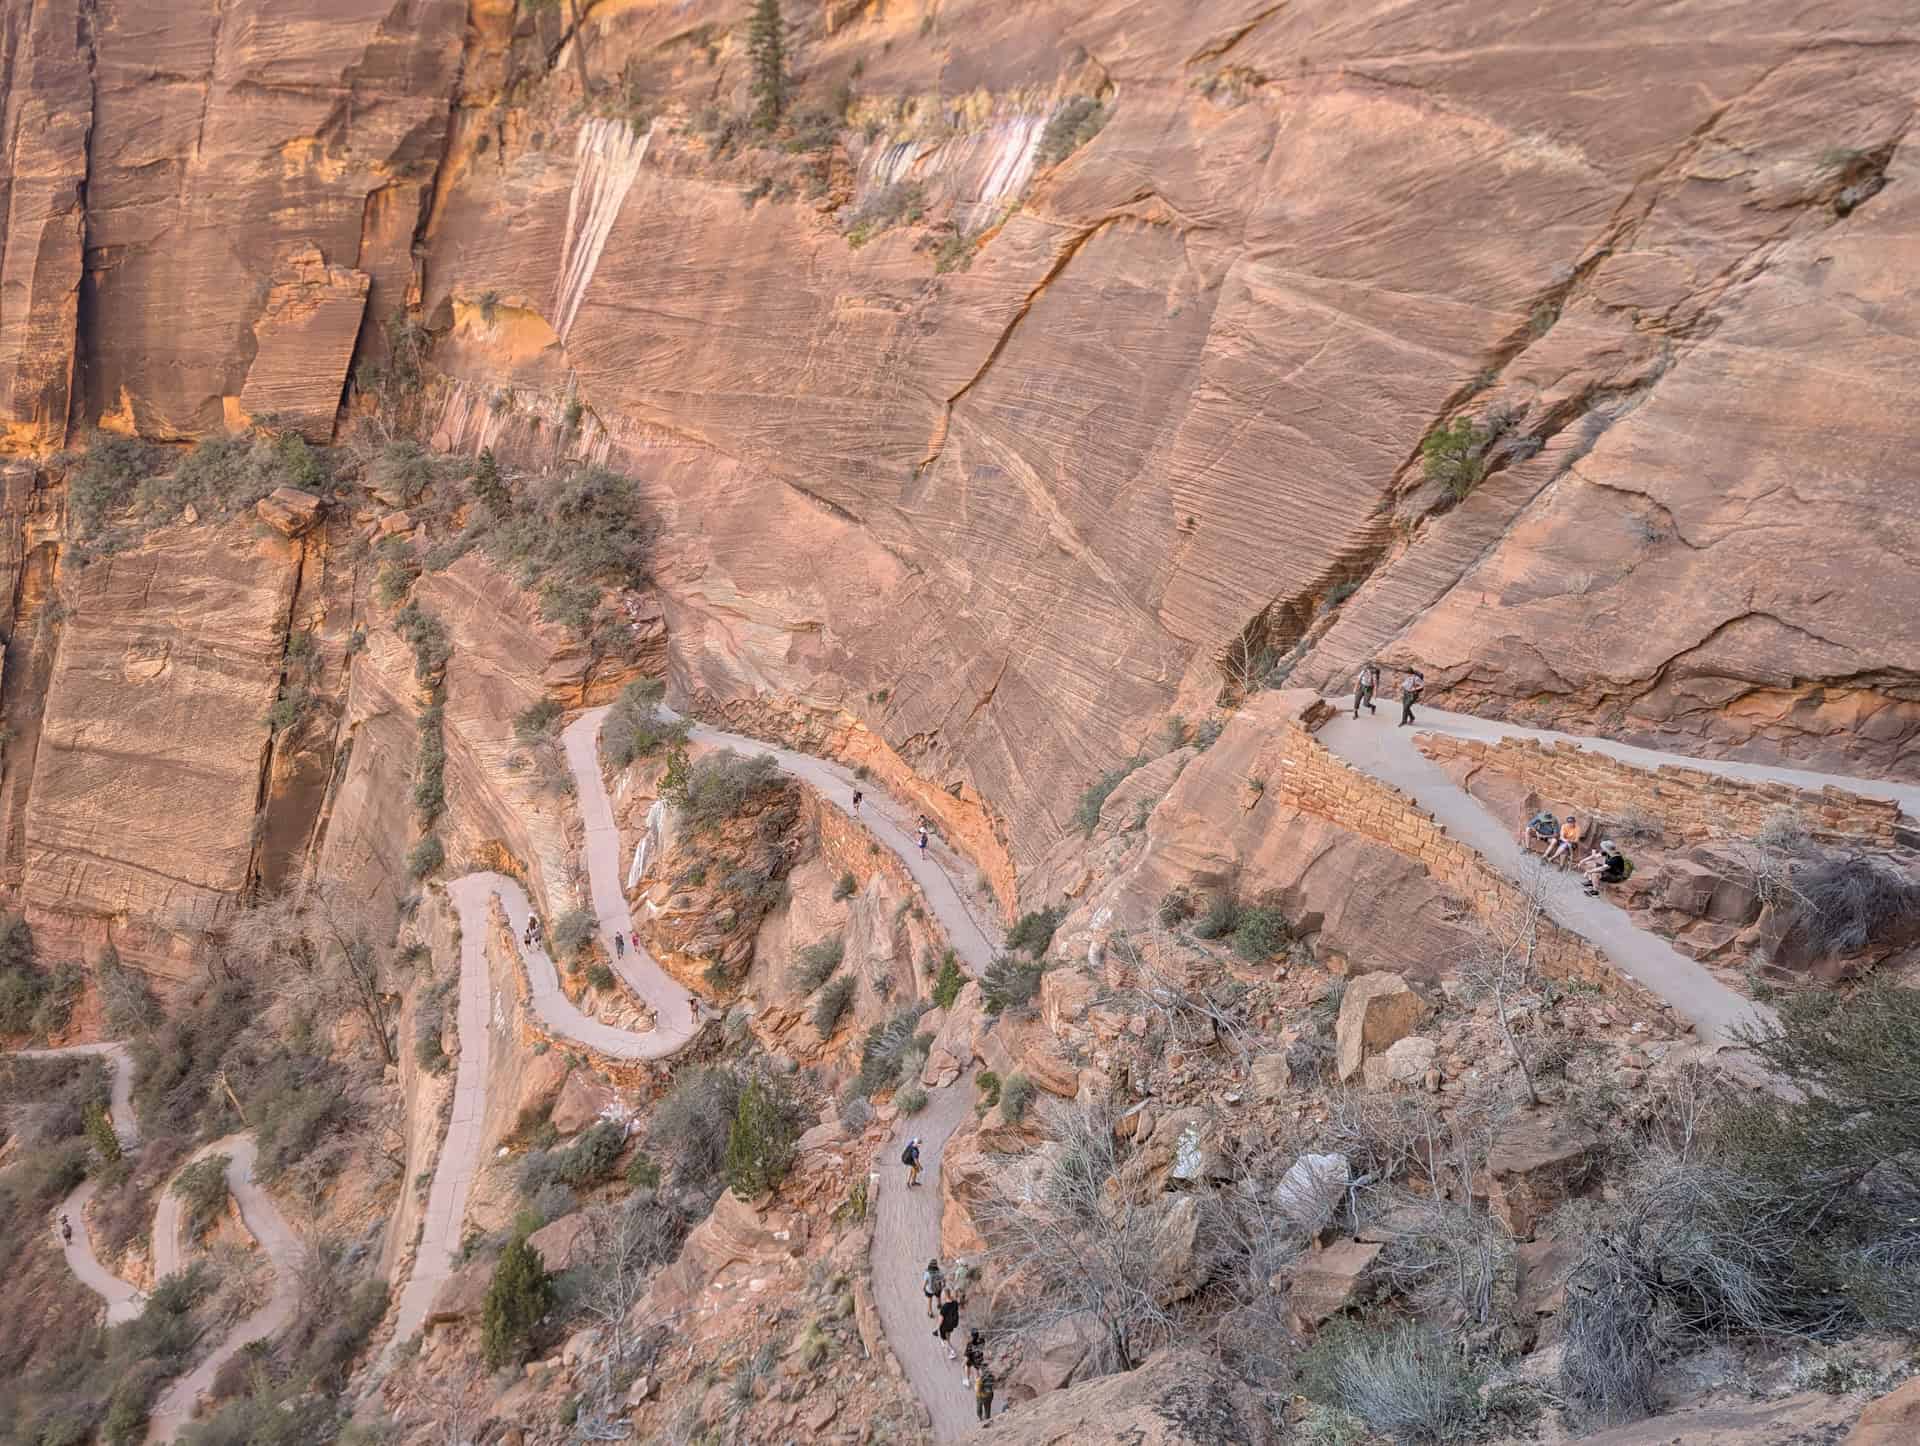
While demanding, this section rewards steady effort with ever-expanding views of Zion Canyon below. Frequent pauses are common here, not just to catch your breath, but to appreciate how quickly the landscape drops away behind you. From here, you can enjoy one of the most spectacular views in all of Zion.


Refrigerator Canyon
At the top of the switchbacks, the trail enters Refrigerator Canyon, a narrow cleft between towering sandstone walls that runs for about half a mile. This shaded corridor offers a brief but welcome respite from the sun and heat, especially during warmer months. The grade eases slightly here, and the cooler air makes it one of the most comfortable sections of the climb.
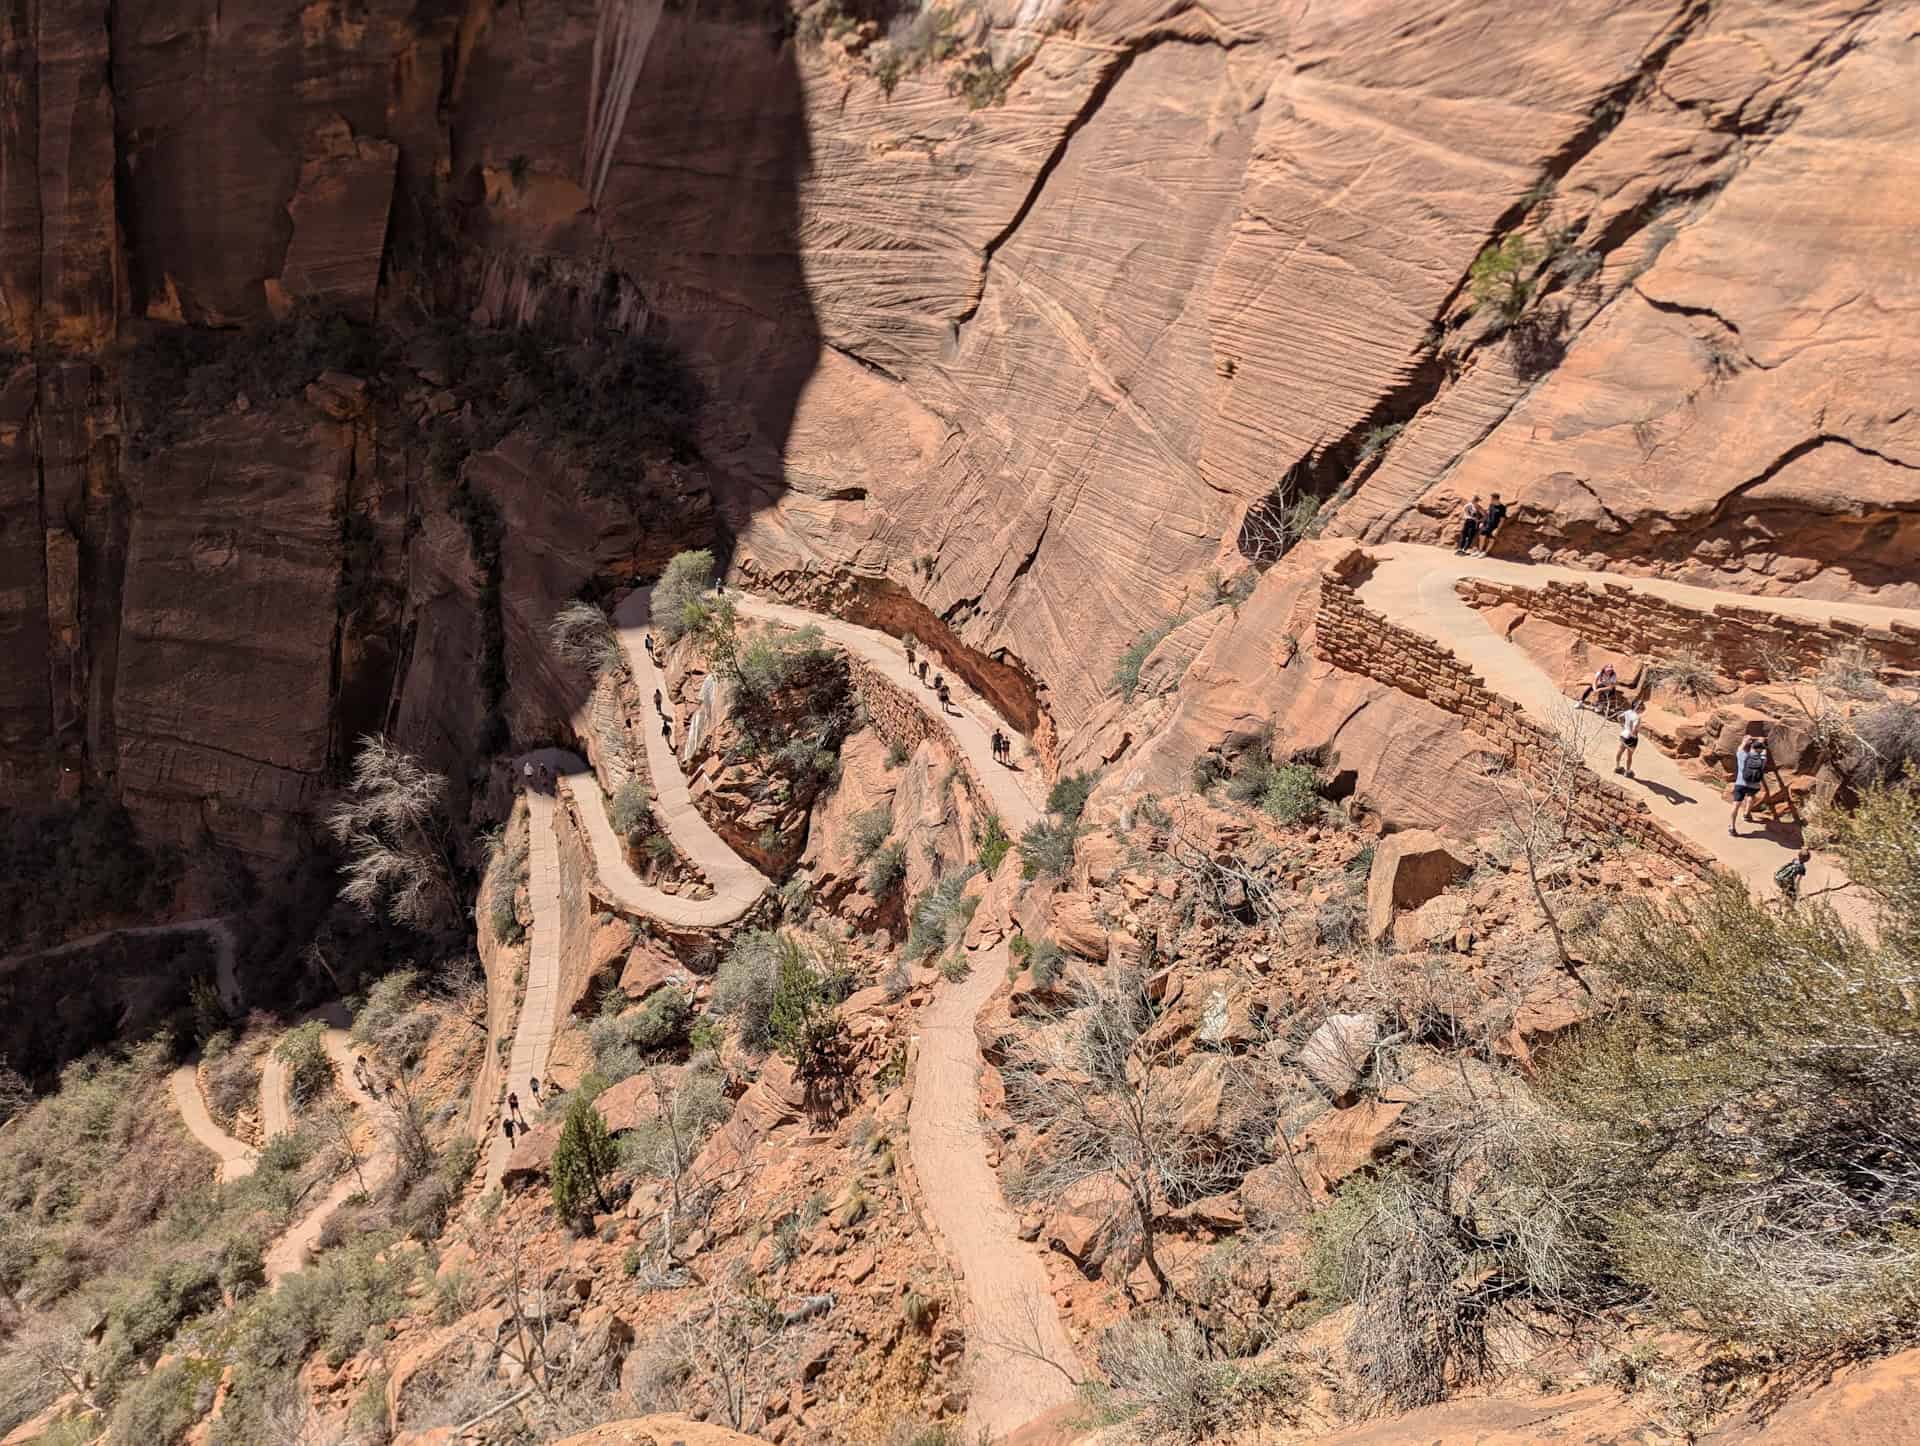
Walter’s Wiggles
Just when it feels like the hardest part might be over, the trail delivers Walter’s Wiggles, a famously compact set of 21 short, steep switchbacks carved directly into the rock. Named after Walter Ruesch, Zion National Park’s first superintendent, this section gains elevation efficiently in a short distance. Though narrower and steeper than the earlier switchbacks, they’re well-built and manageable at a steady pace.

Scout Lookout
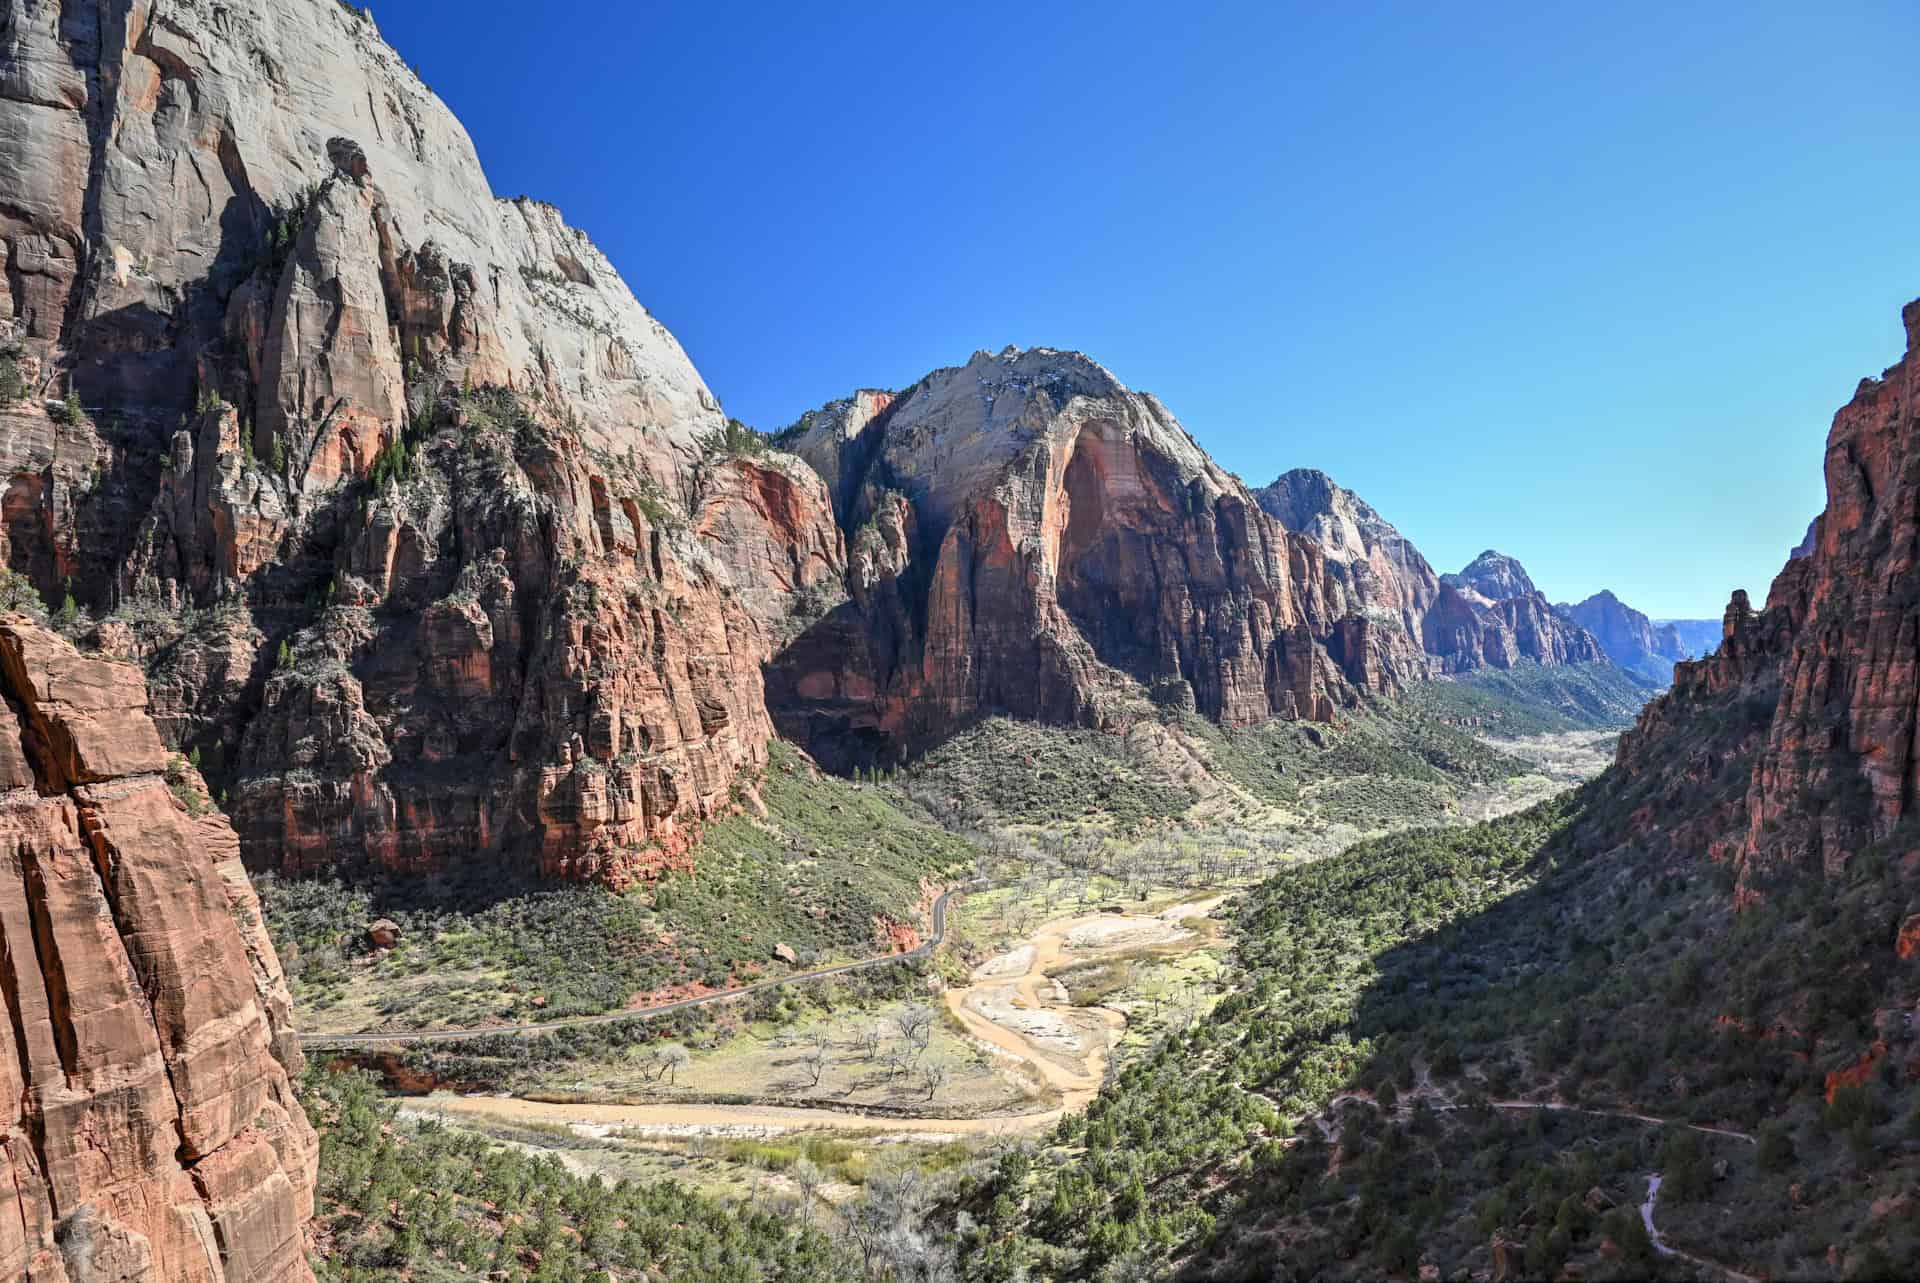
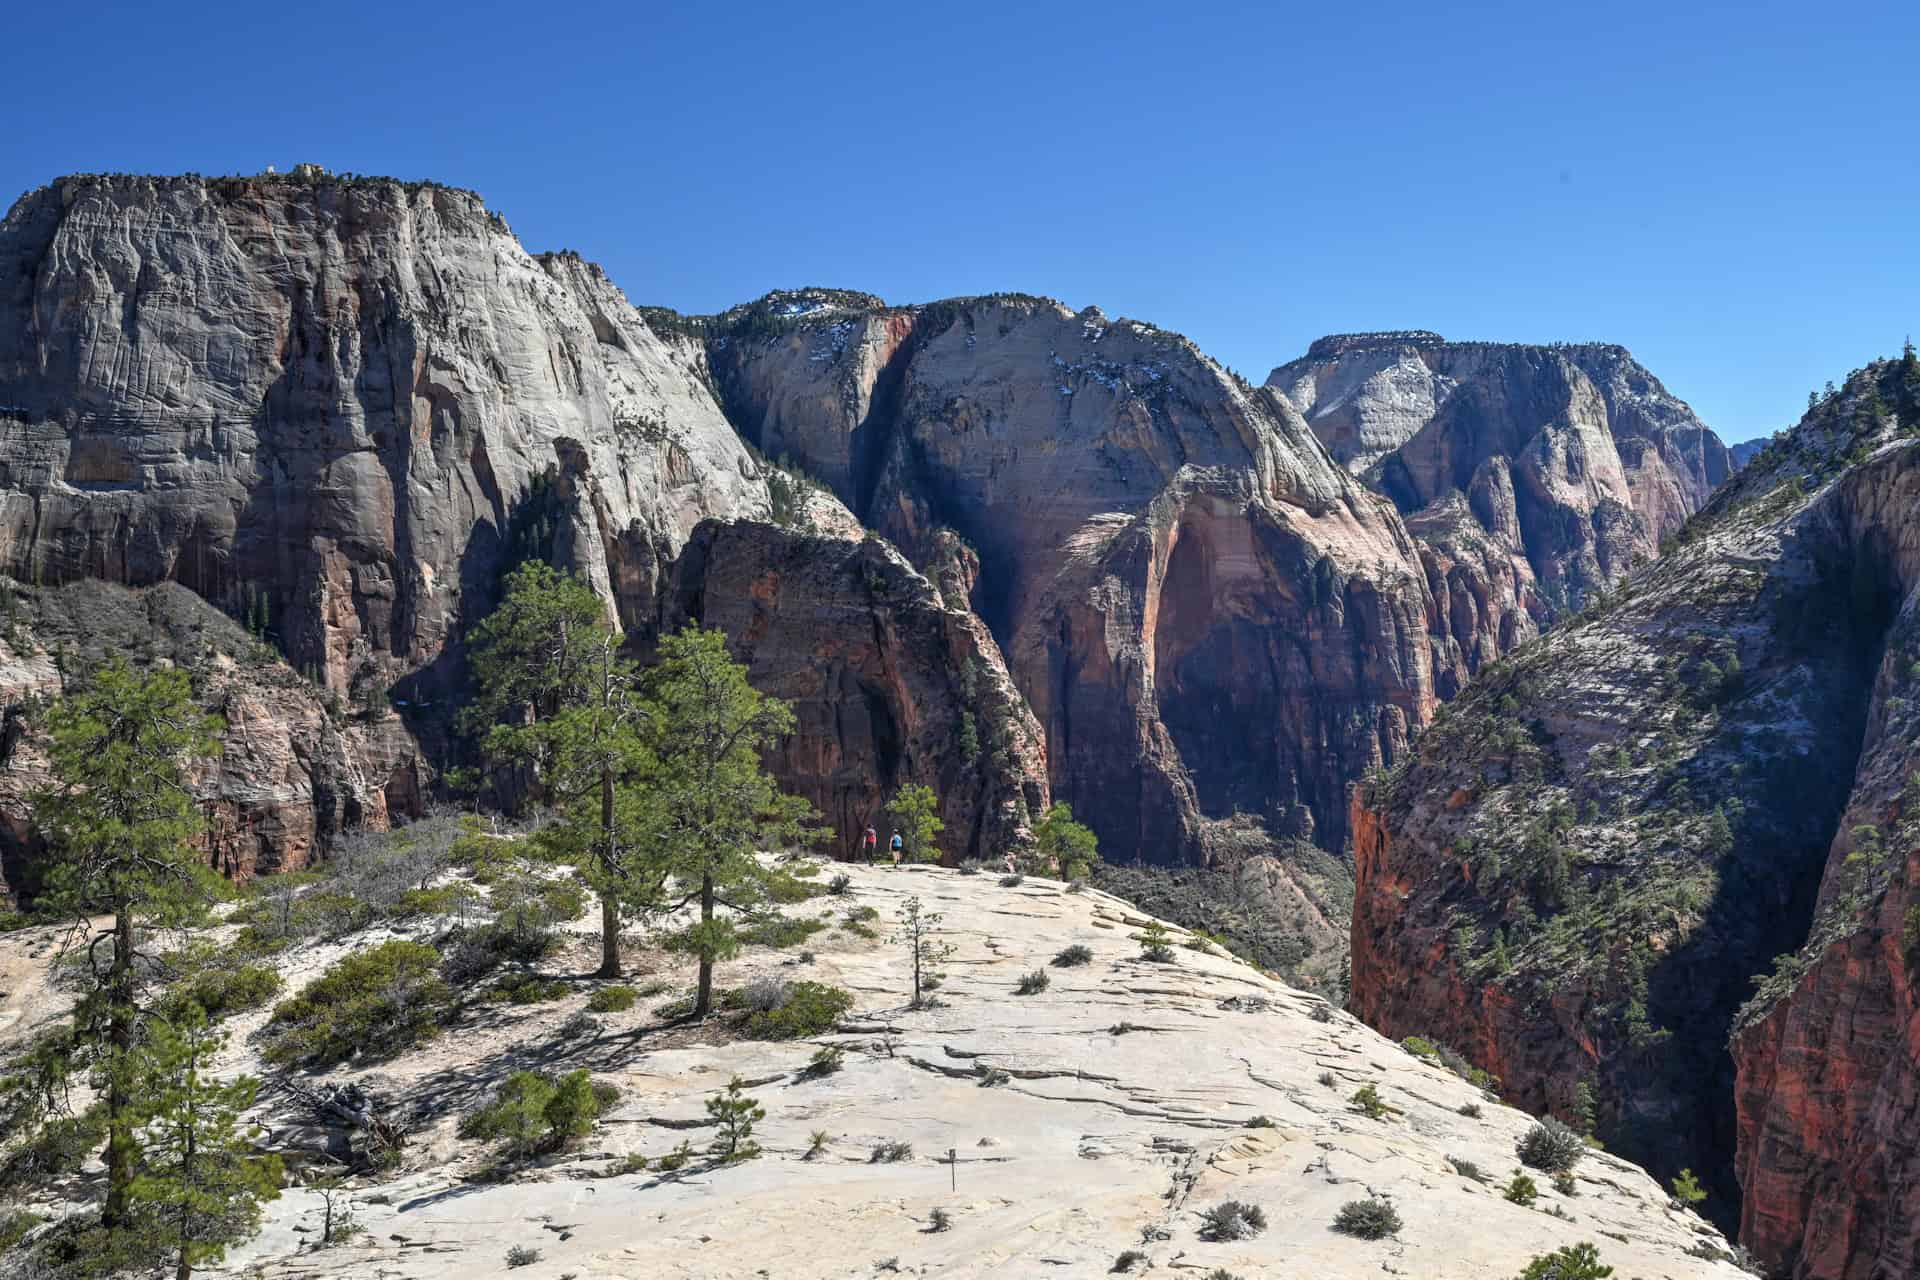
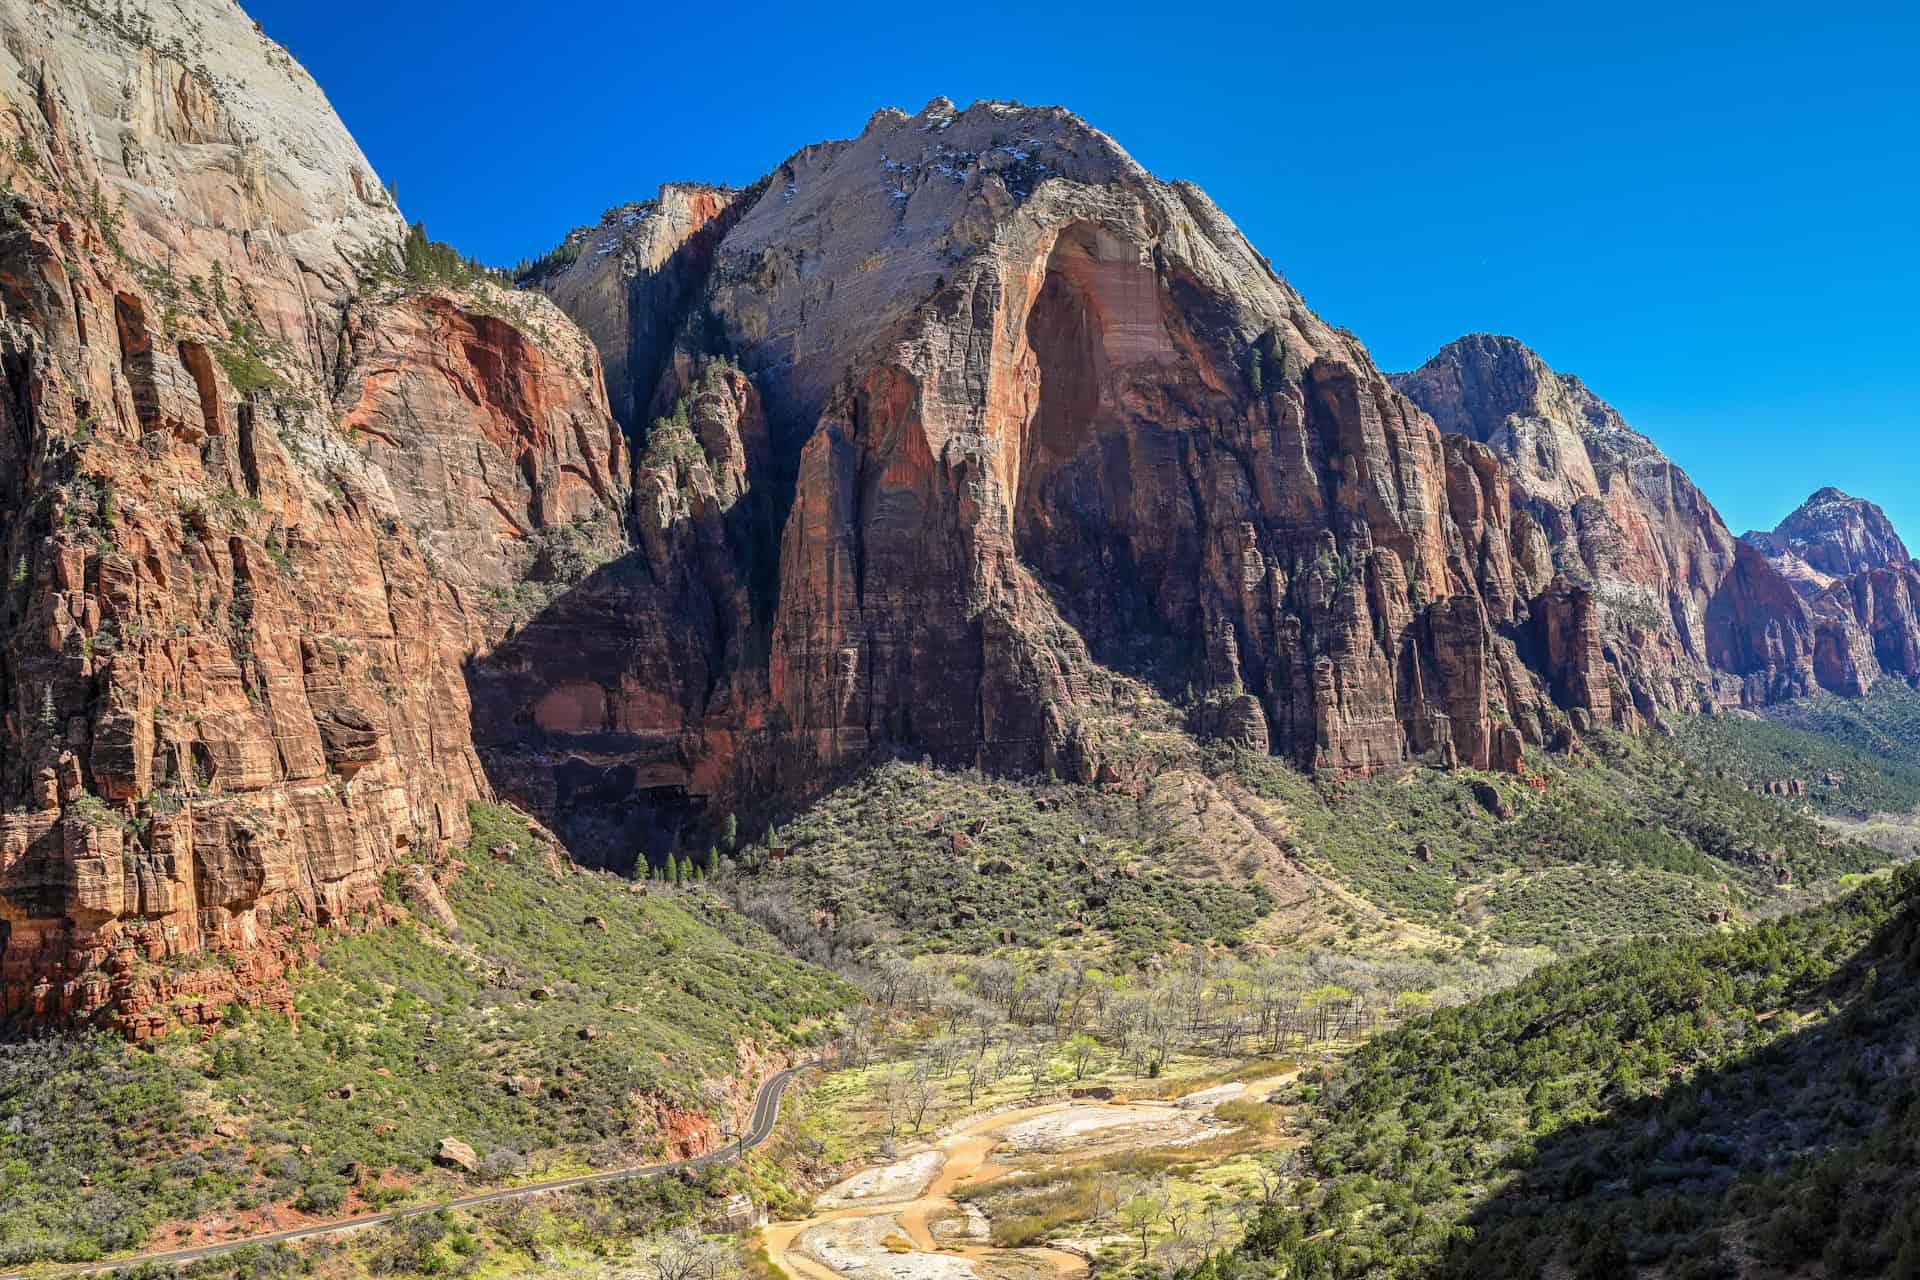
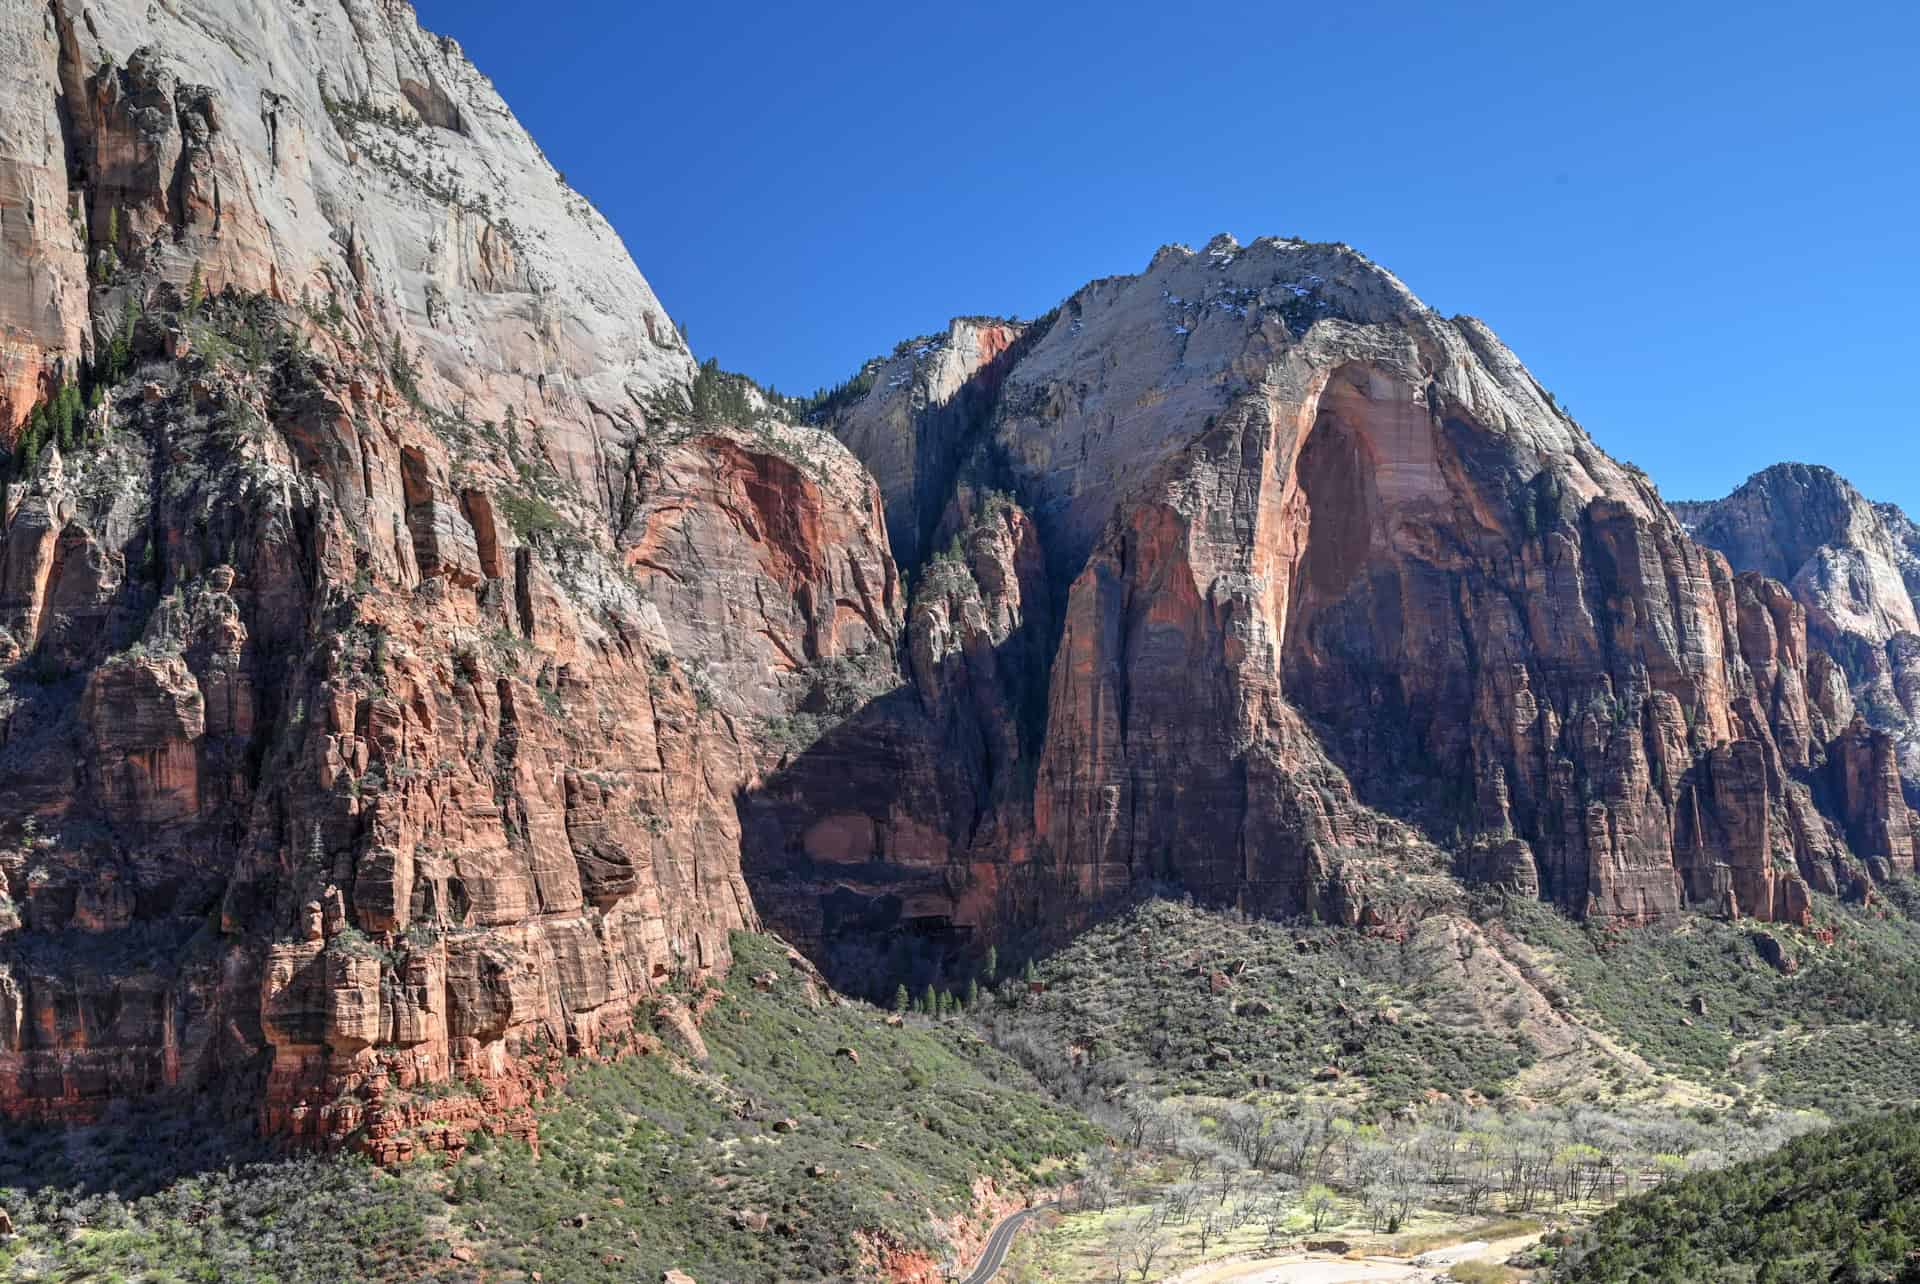
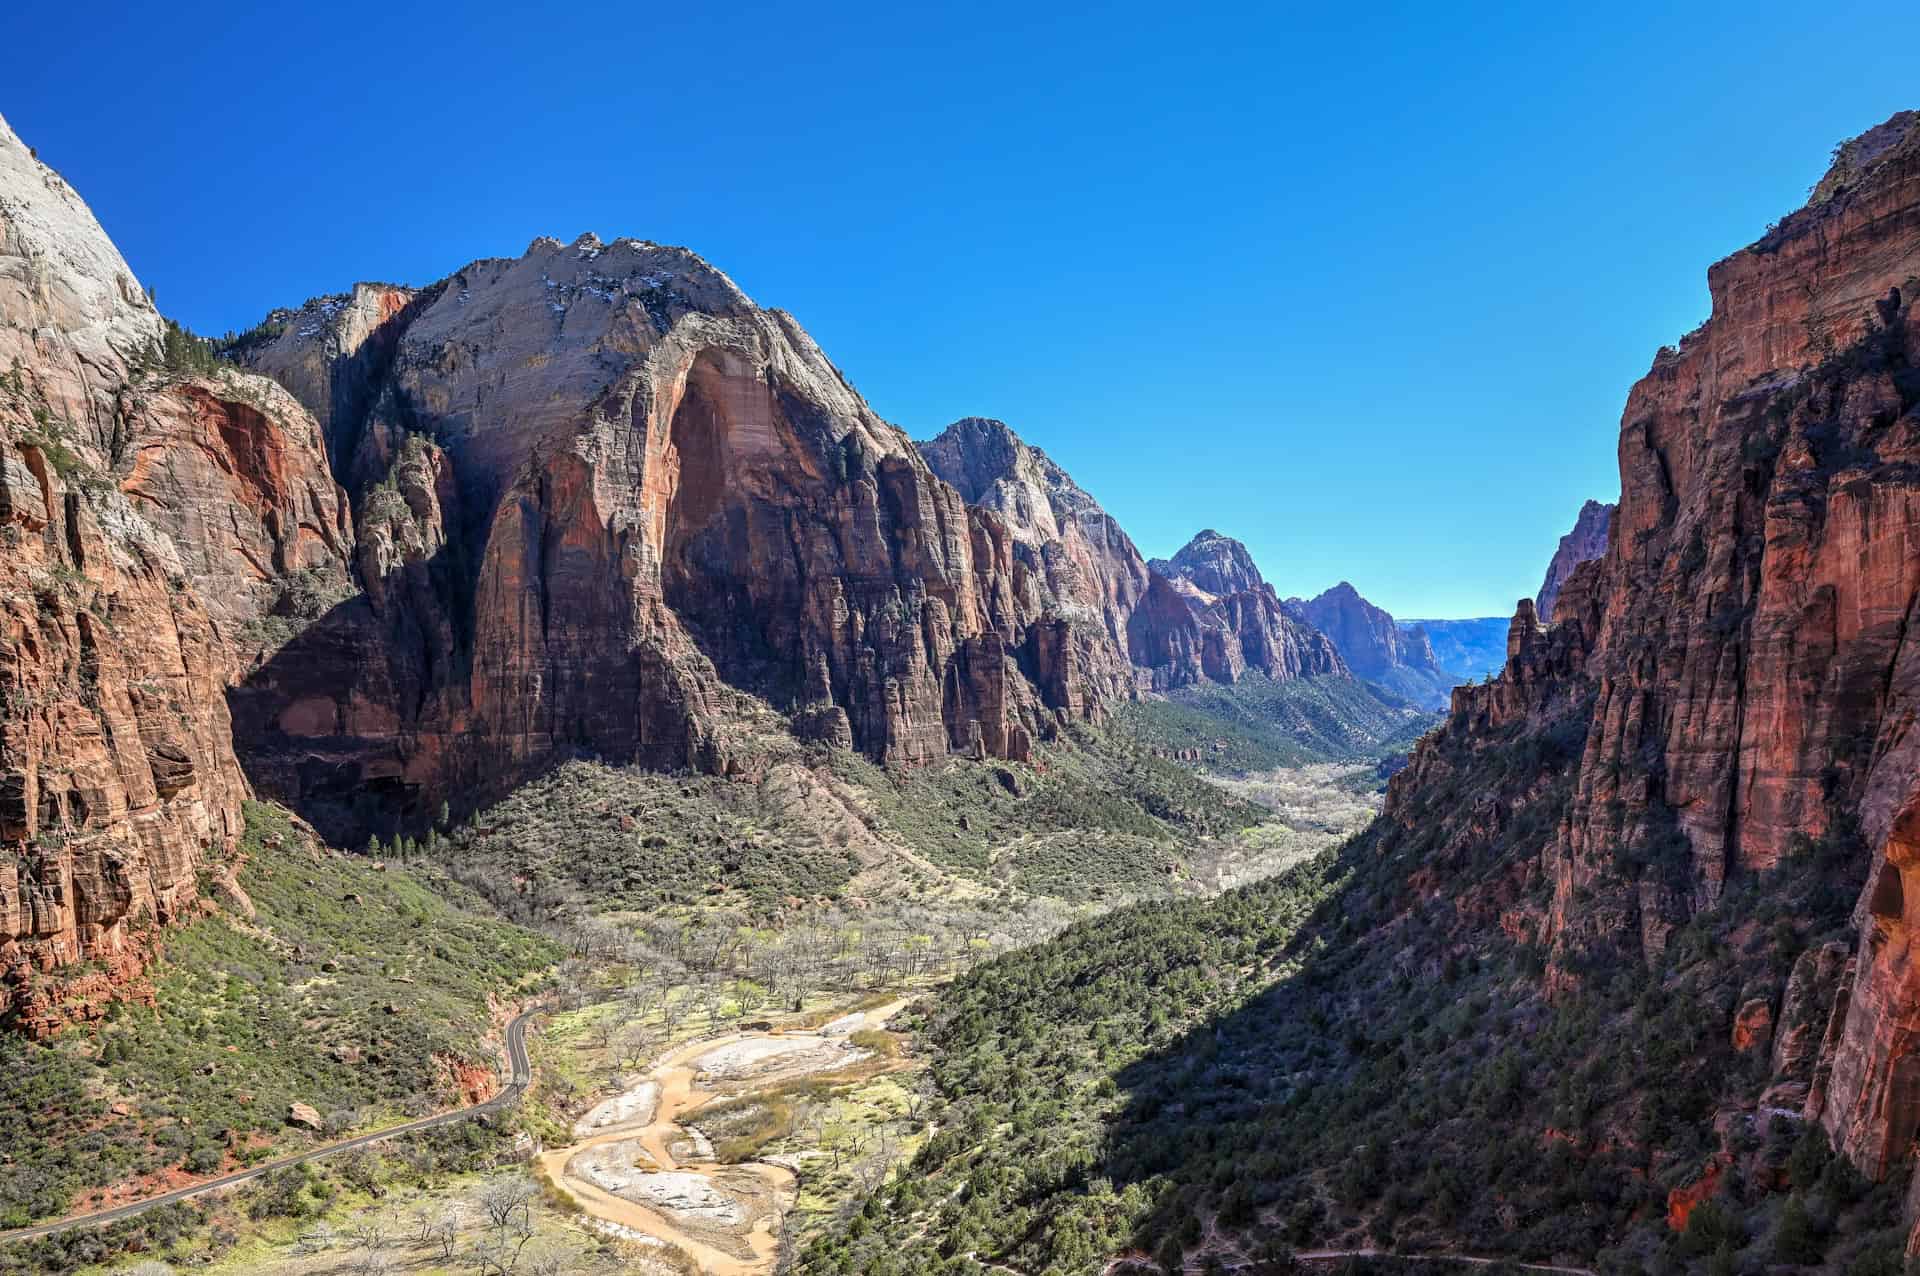
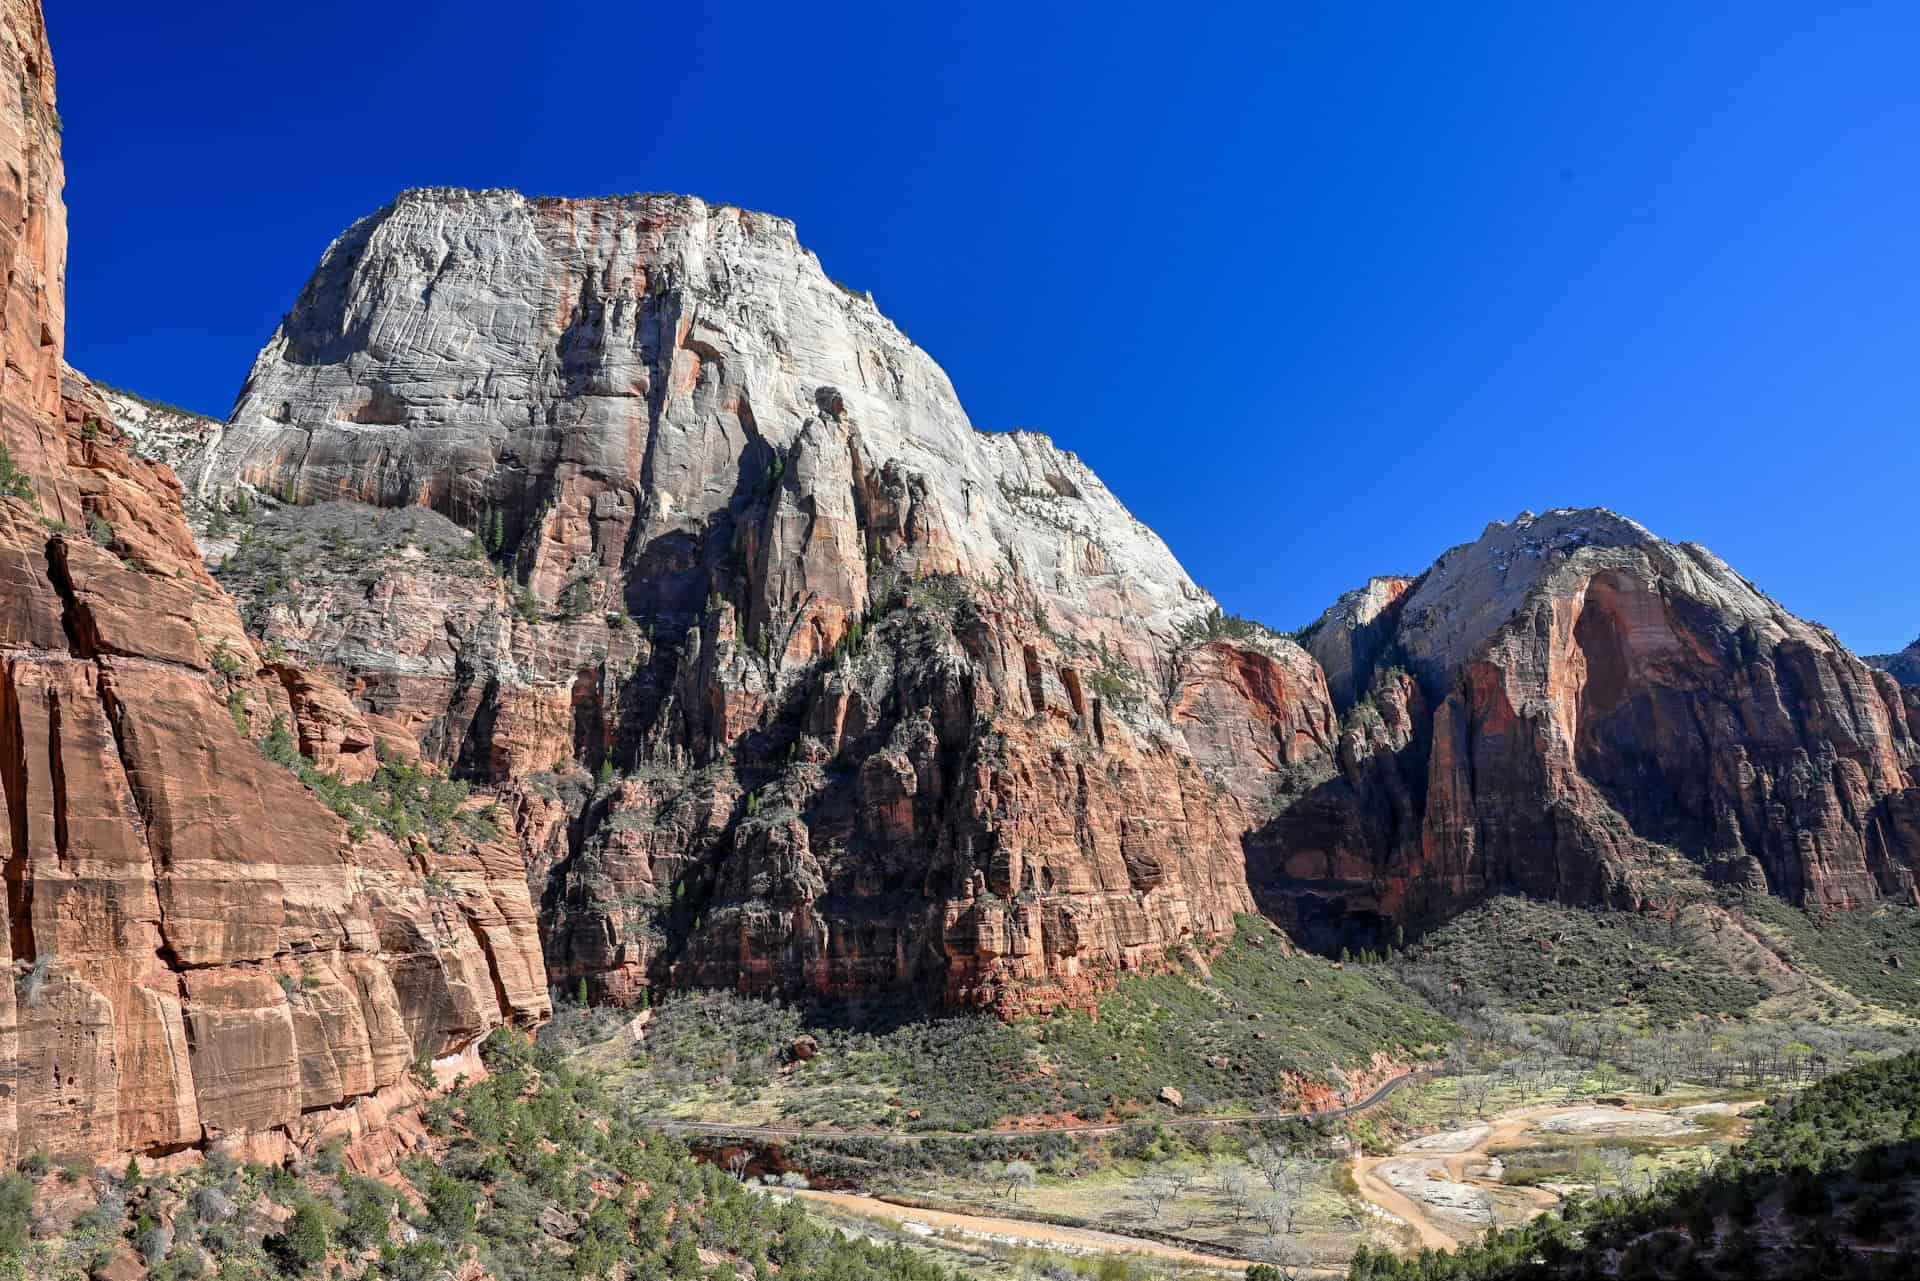
At the top of Walter’s Wiggles, the trail emerges onto Scout Lookout, a broad, exposed viewpoint perched high above Zion Canyon. From here, the views are expansive, stretching across the main canyon, down to the Virgin River, and out toward distant sandstone formations.


Scout Lookout is also where the Angels Landing spur begins. From this vantage point, you can clearly see the narrow ridge, steep drop-offs, and the chain-assisted route leading to the summit, offering a sobering perspective even for those not continuing onward.

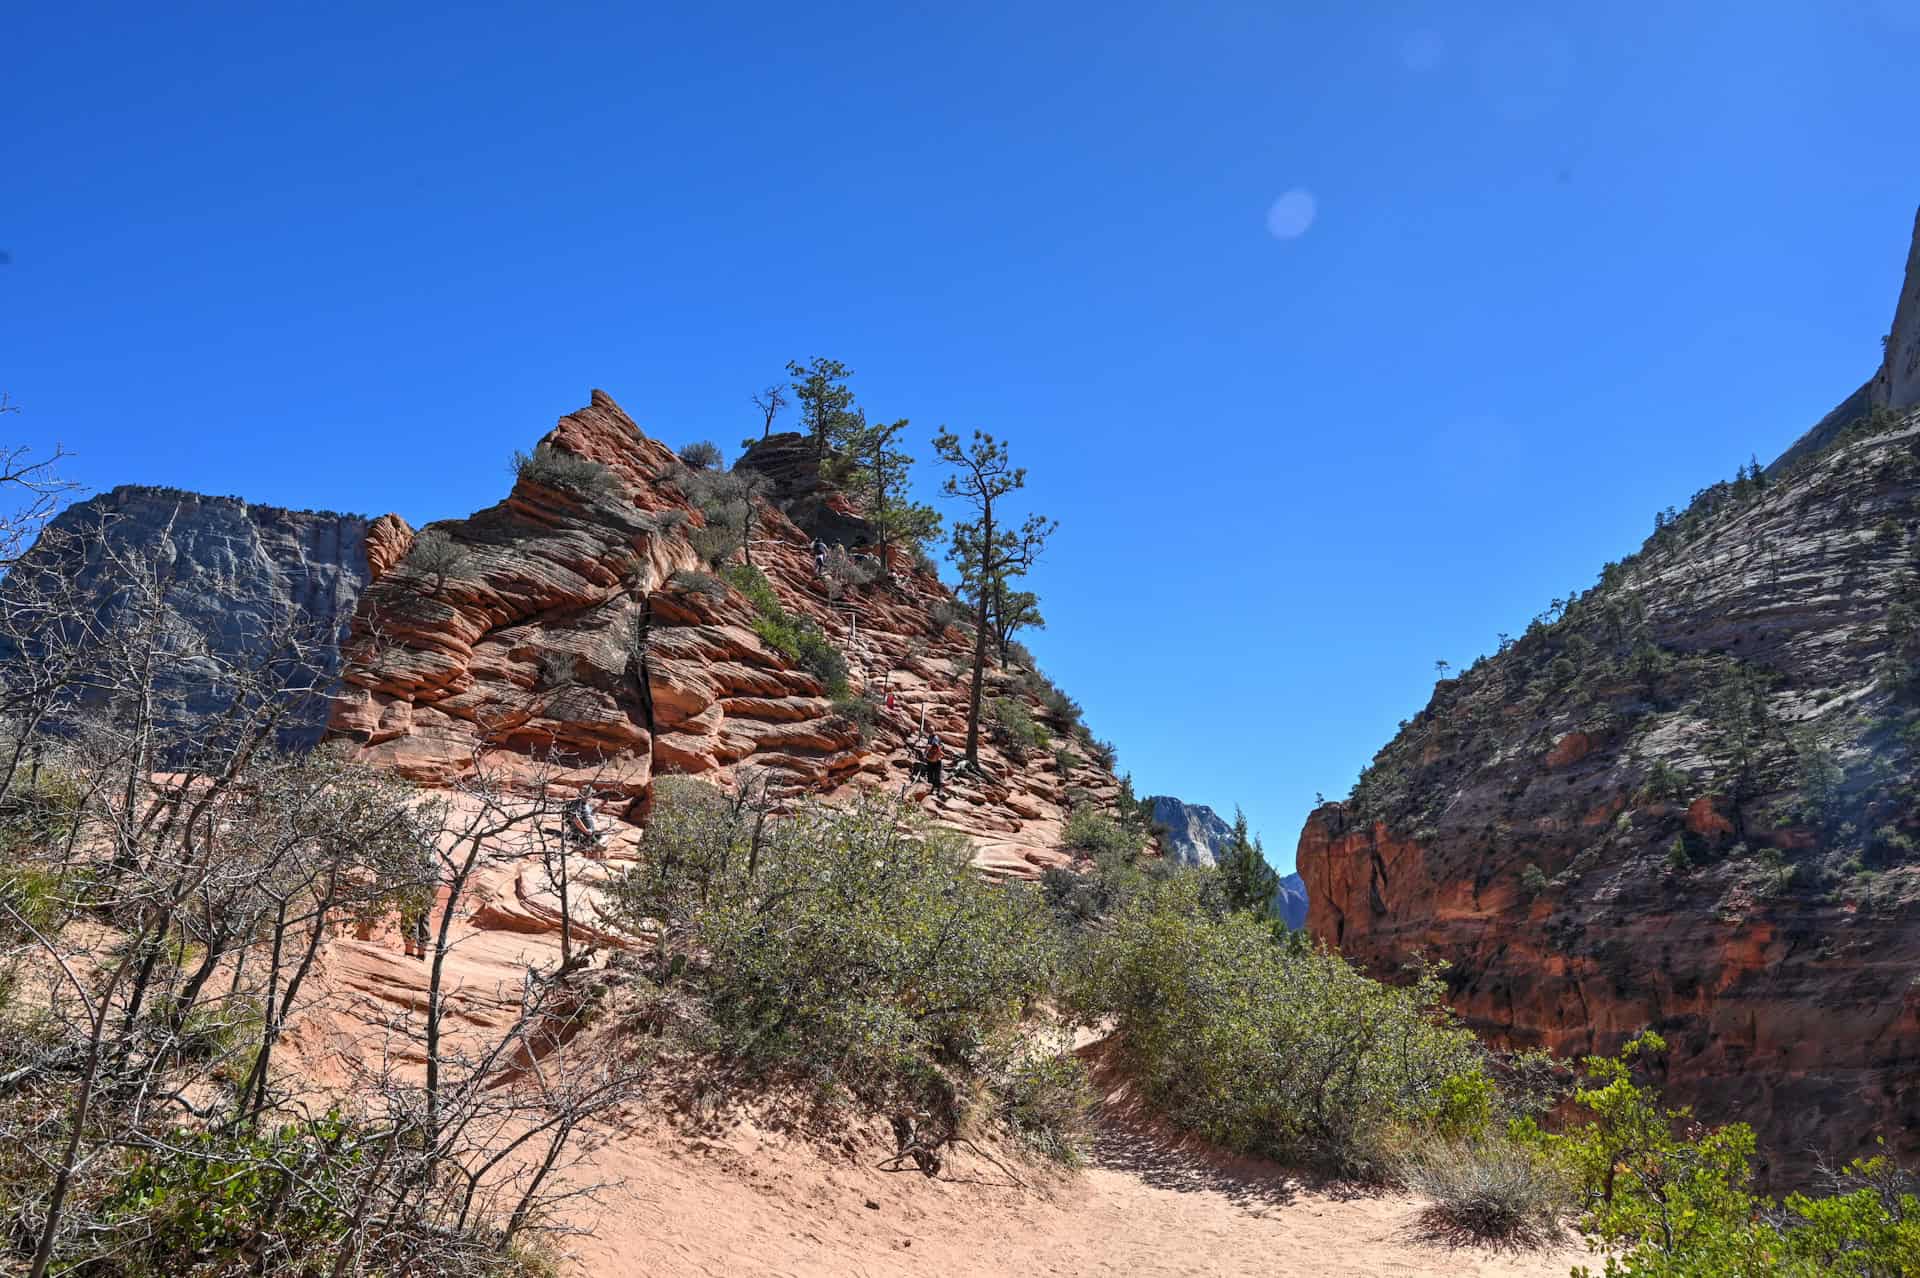
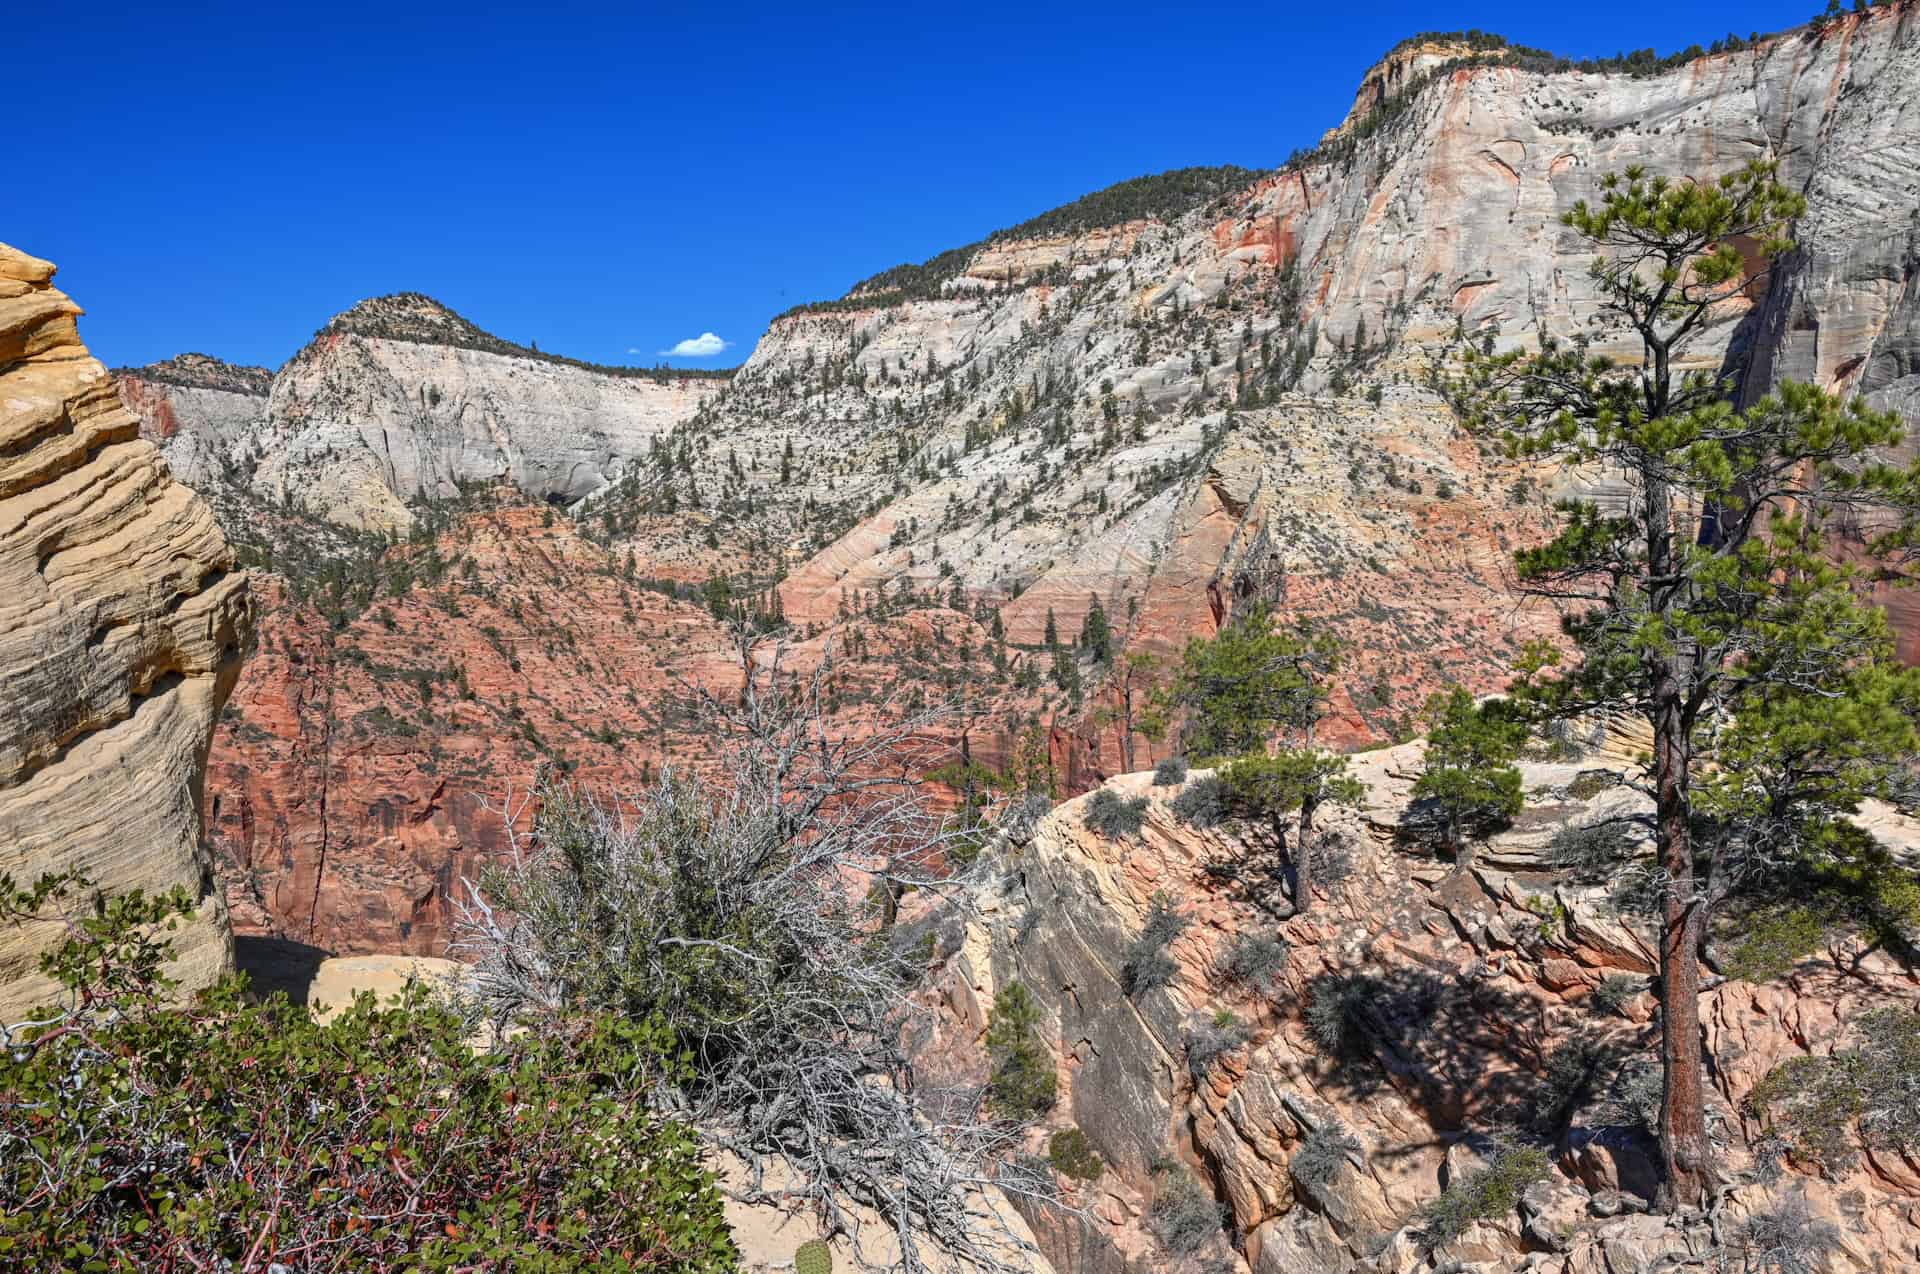
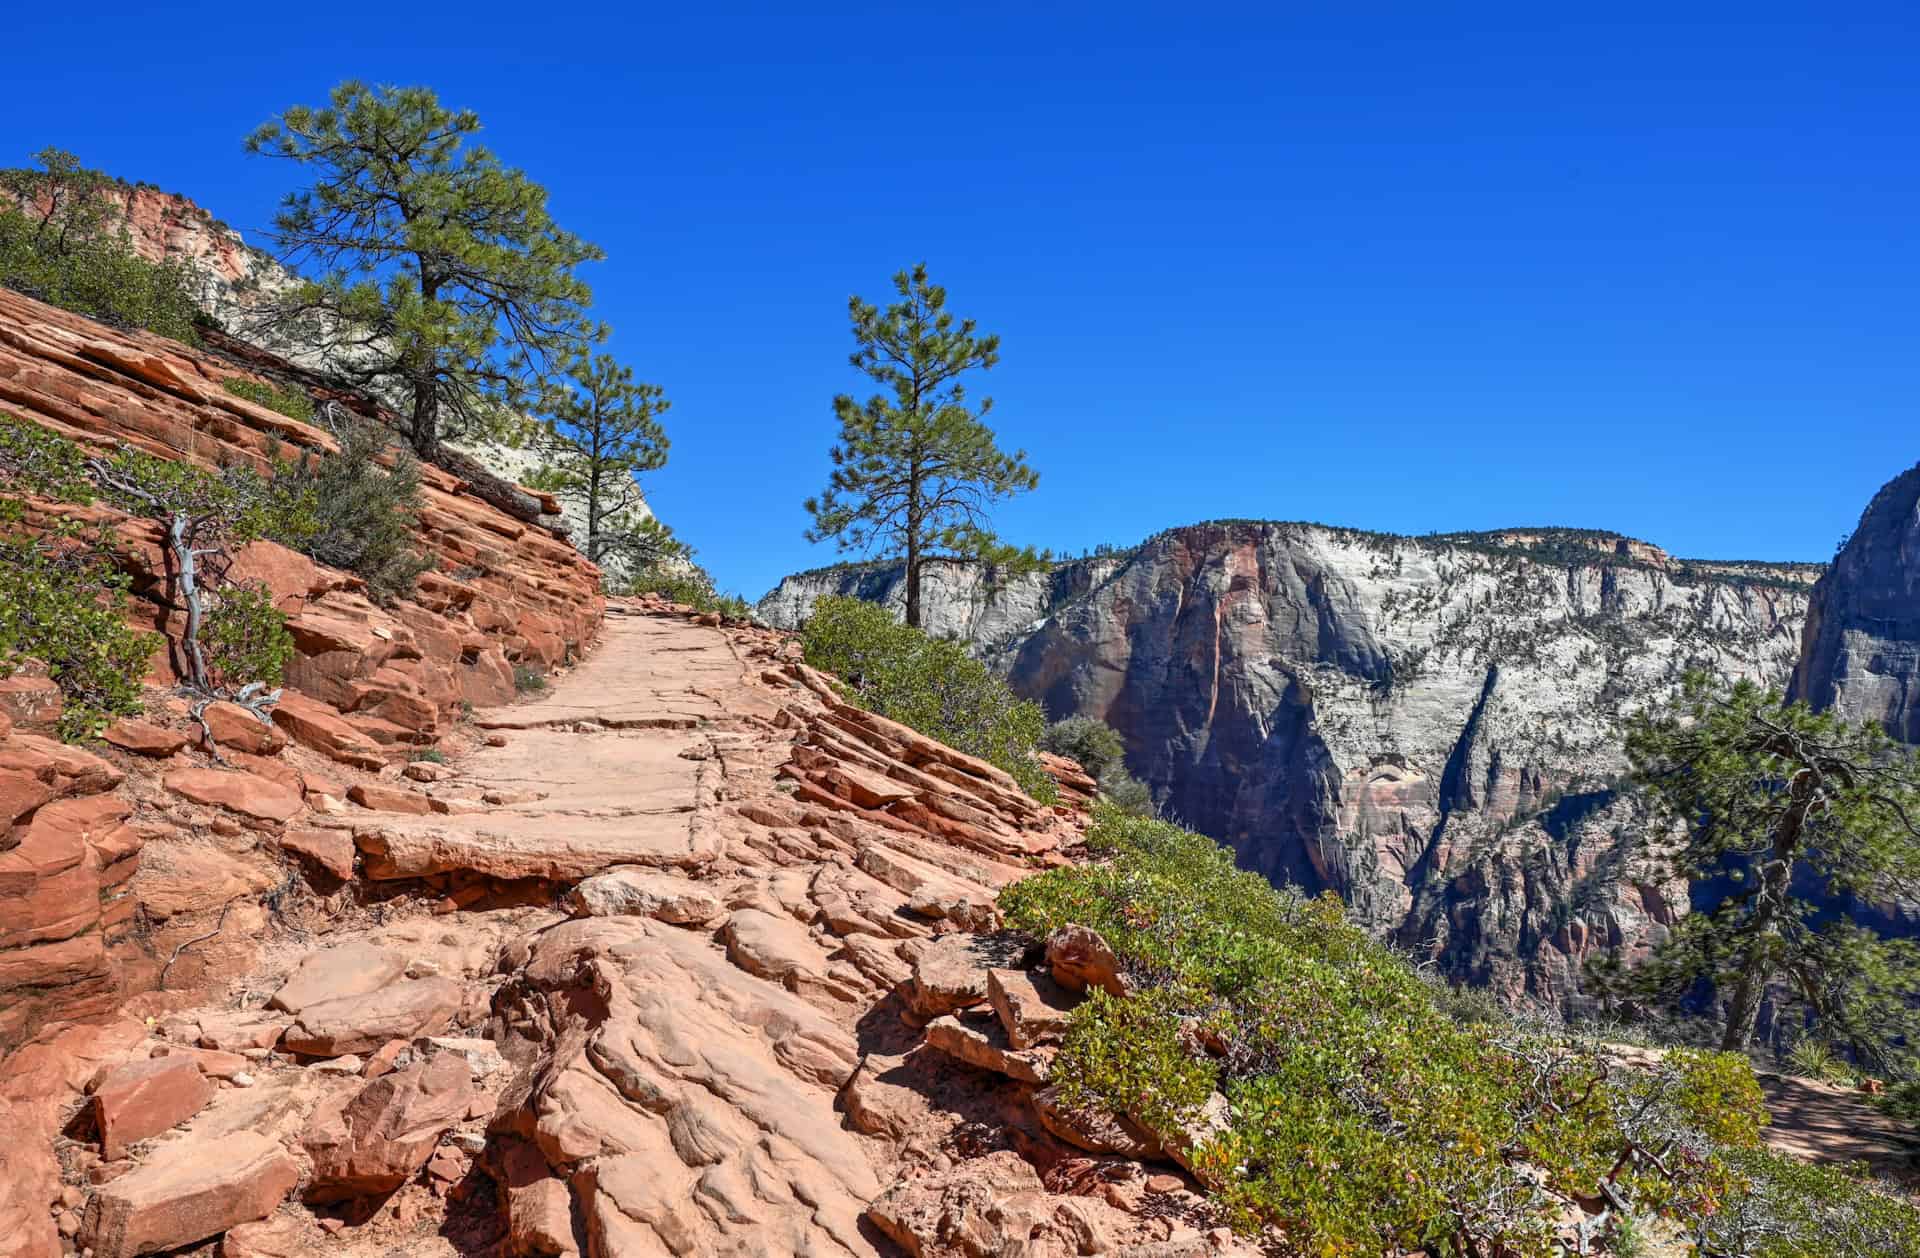
Further Along the West Rim
Beyond Scout Lookout, the West Rim Trail continues north, leaving much of the crowd behind. The trail becomes quieter, more open, and more rugged, traversing a mix of slickrock, packed dirt, and forested sections as it climbs gradually toward the West Rim plateau. This stretch offers some of the most scenic and peaceful hiking in Zion, with wide canyon views, fewer people, and multiple excellent turnaround points.
Eventually you’ll reach a slanted slickrock plateau where the trail is less obvious, but signs clearly indicate the way.
Even hiking just a short distance beyond Scout Lookout provides a sense of scale and solitude that rivals, and often surpasses, the Angels Landing experience, making it well worth continuing further along the West Rim.


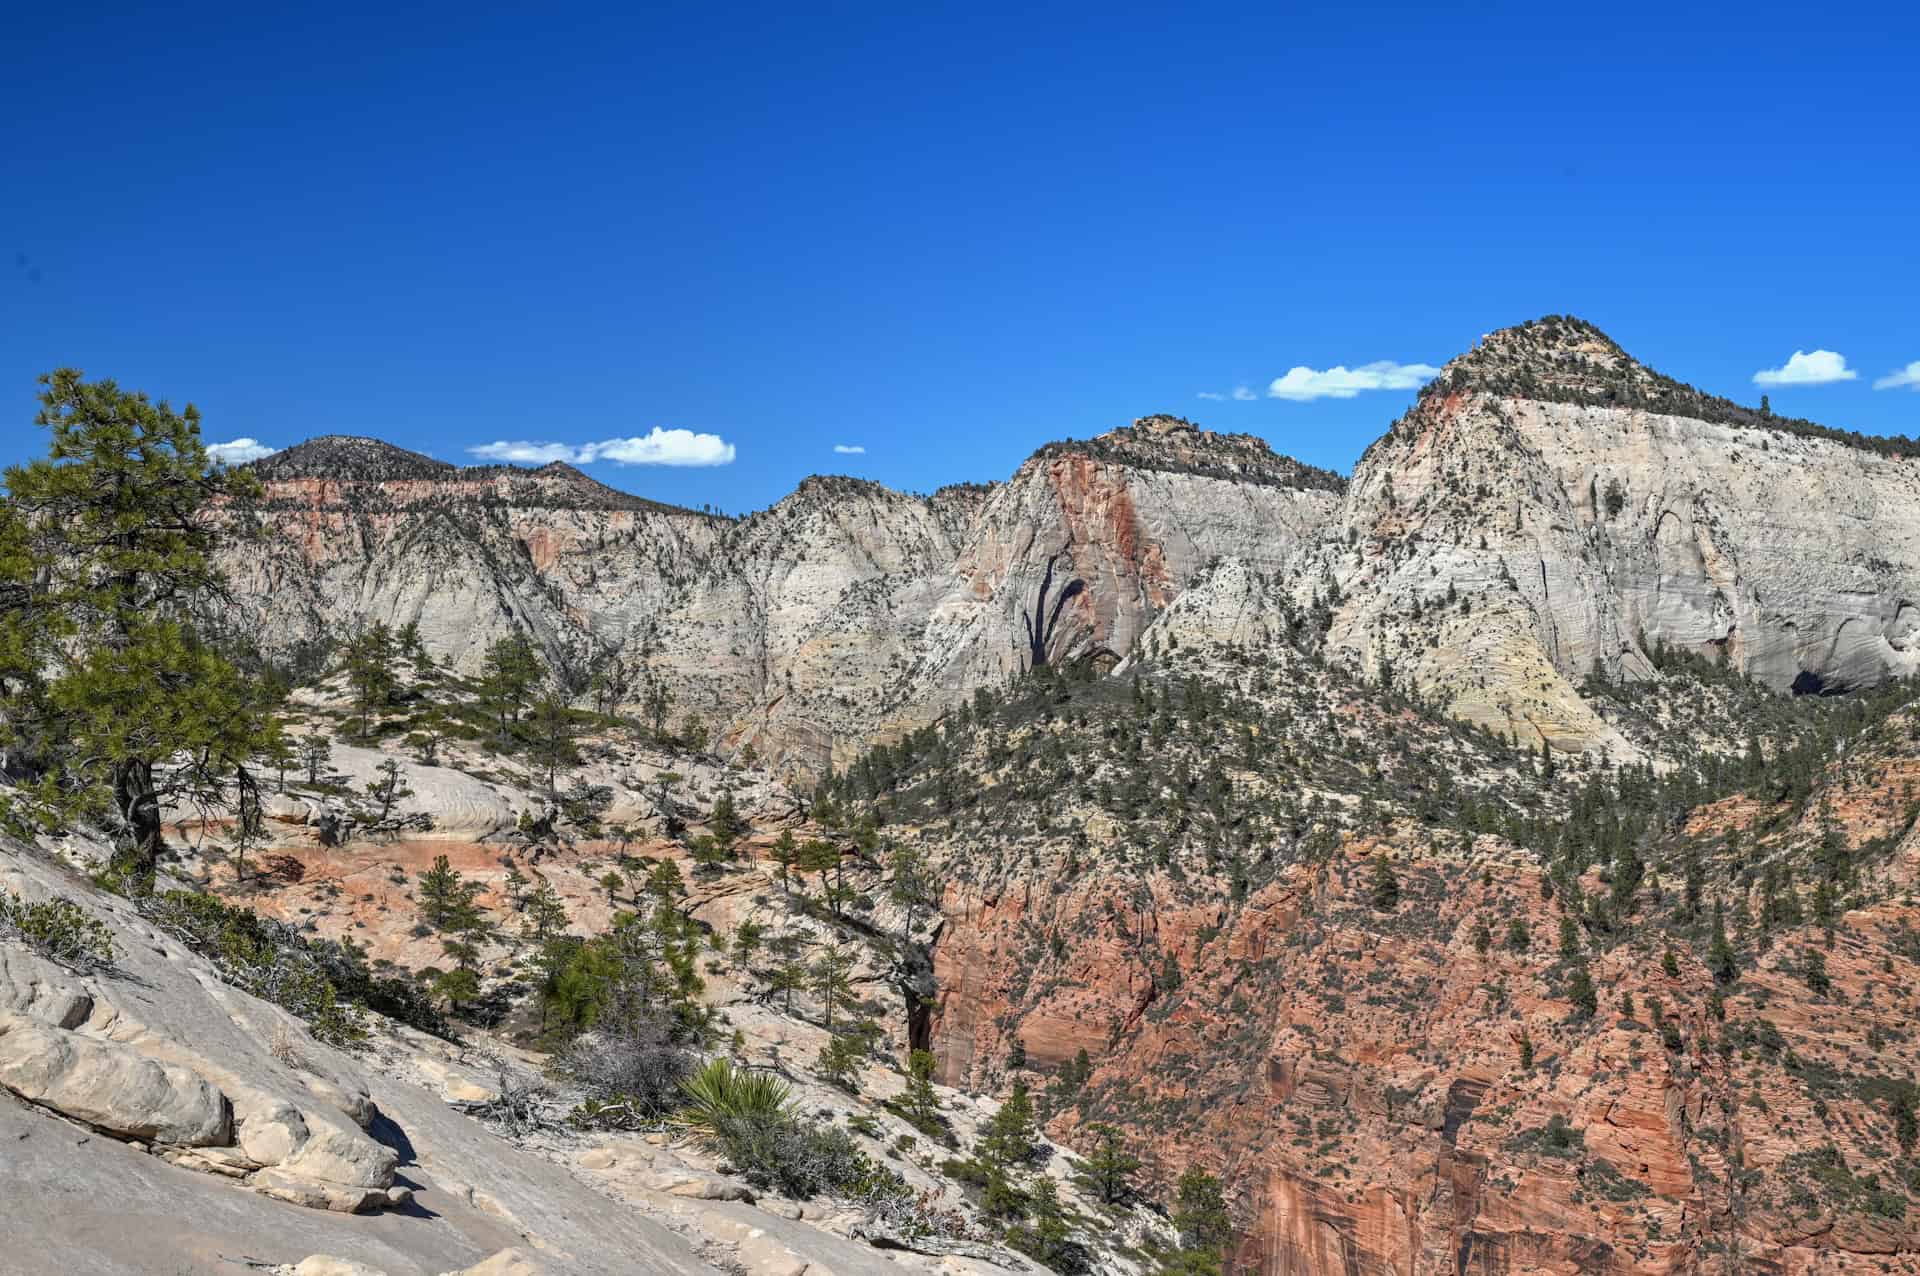
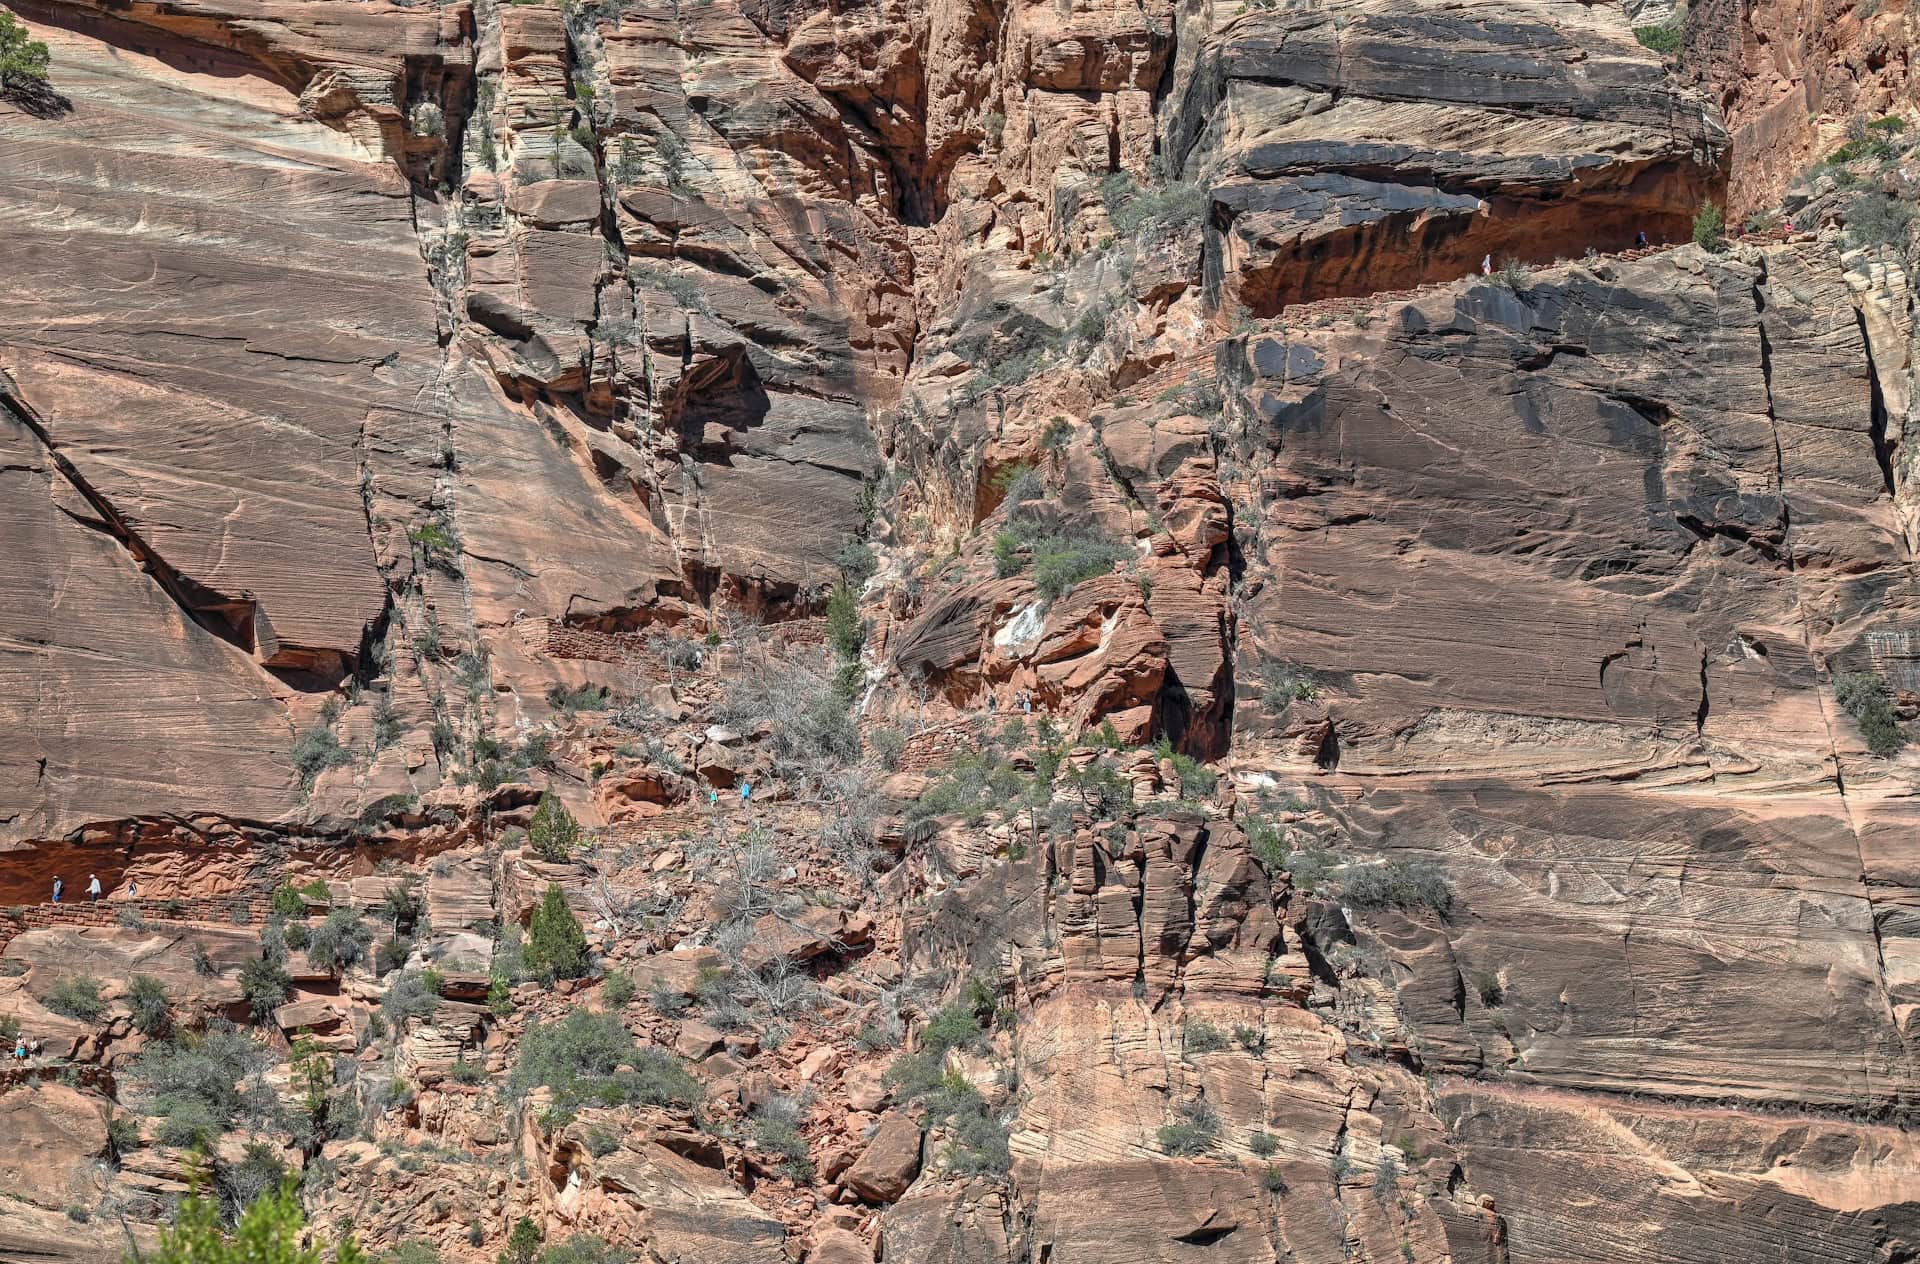
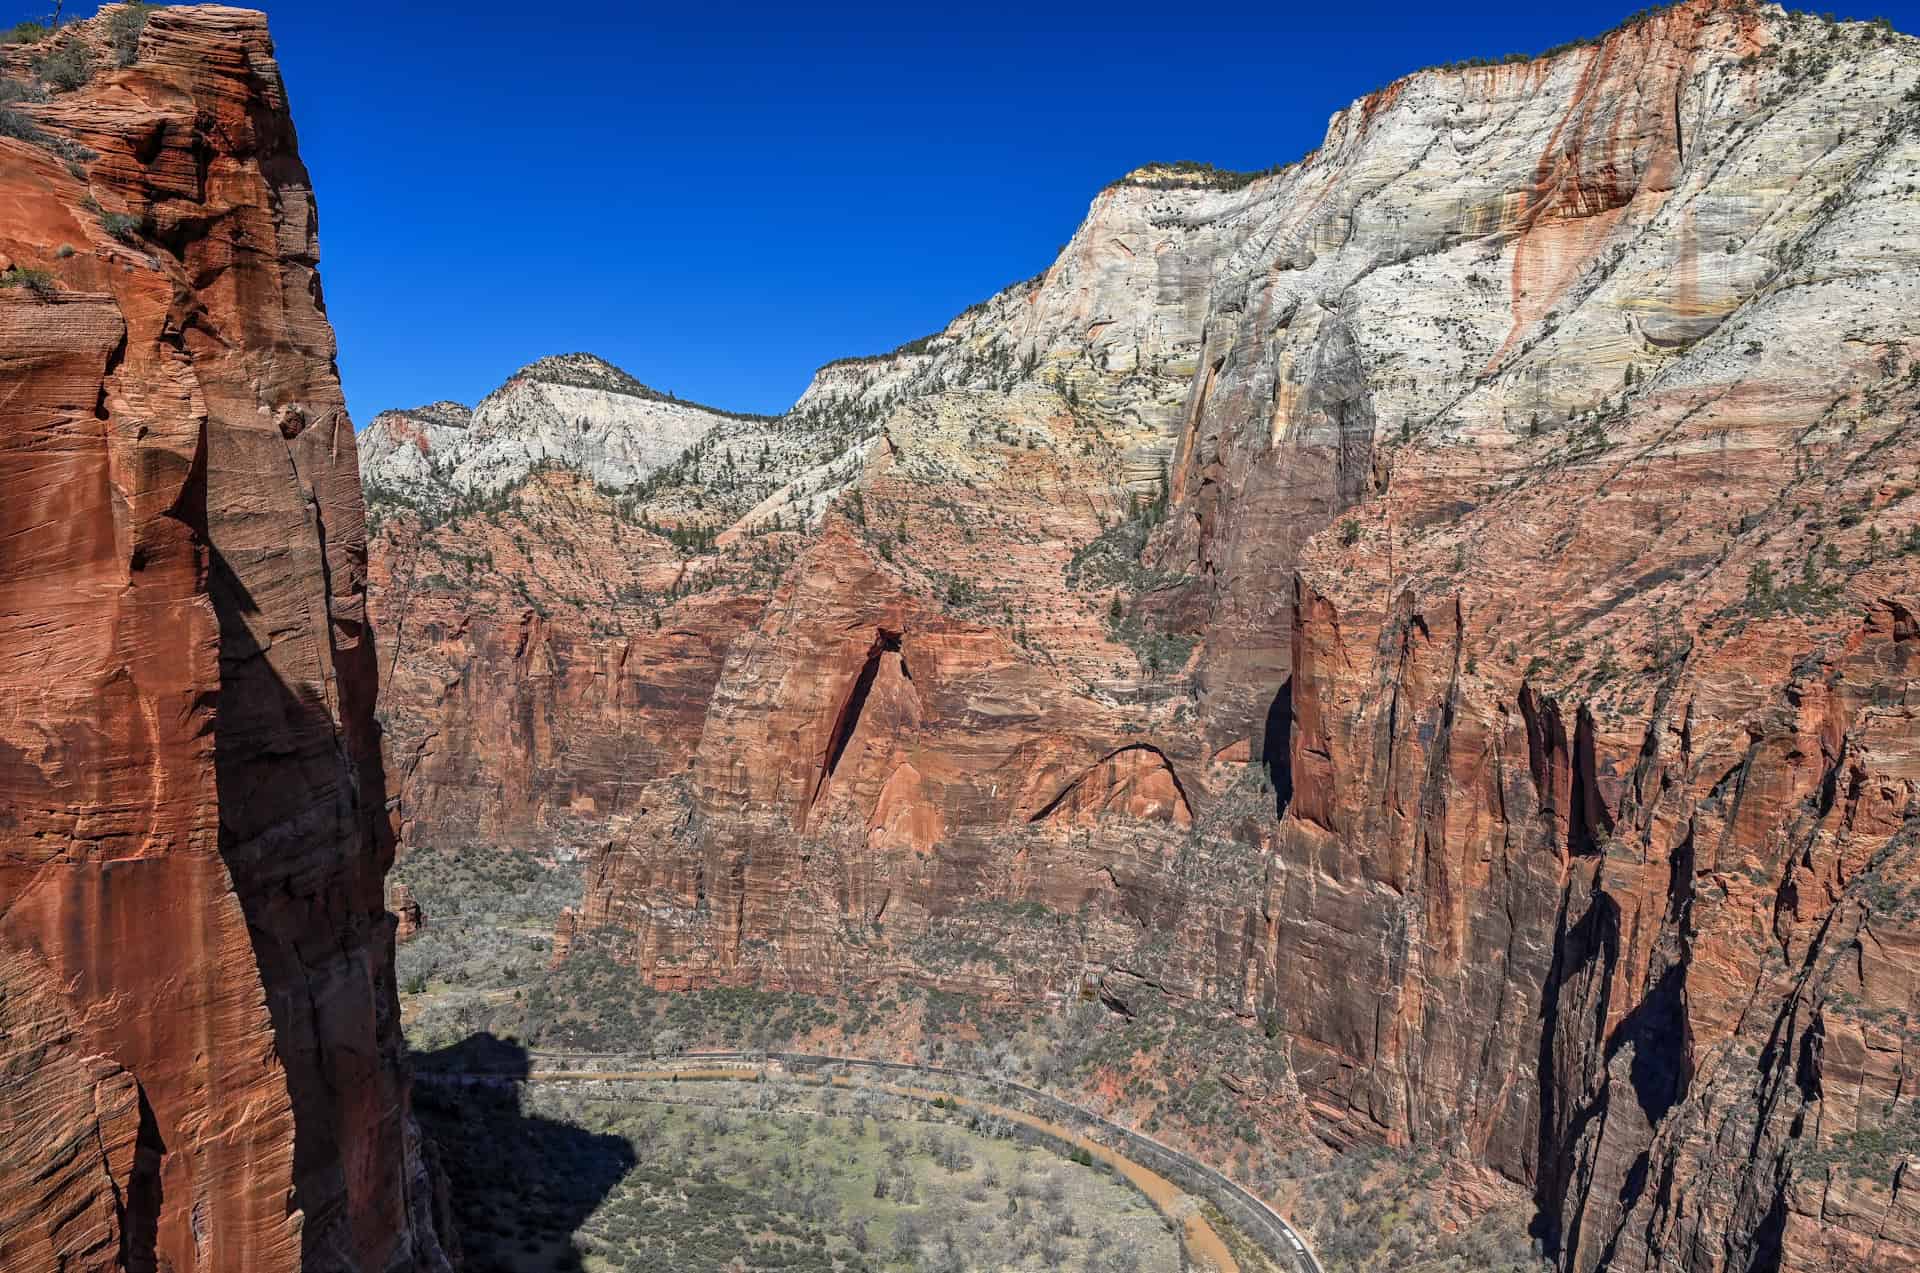
It won’t take long before you’ll find yourself nearly as high as the top of Angels Landing’s spur ridgeline.
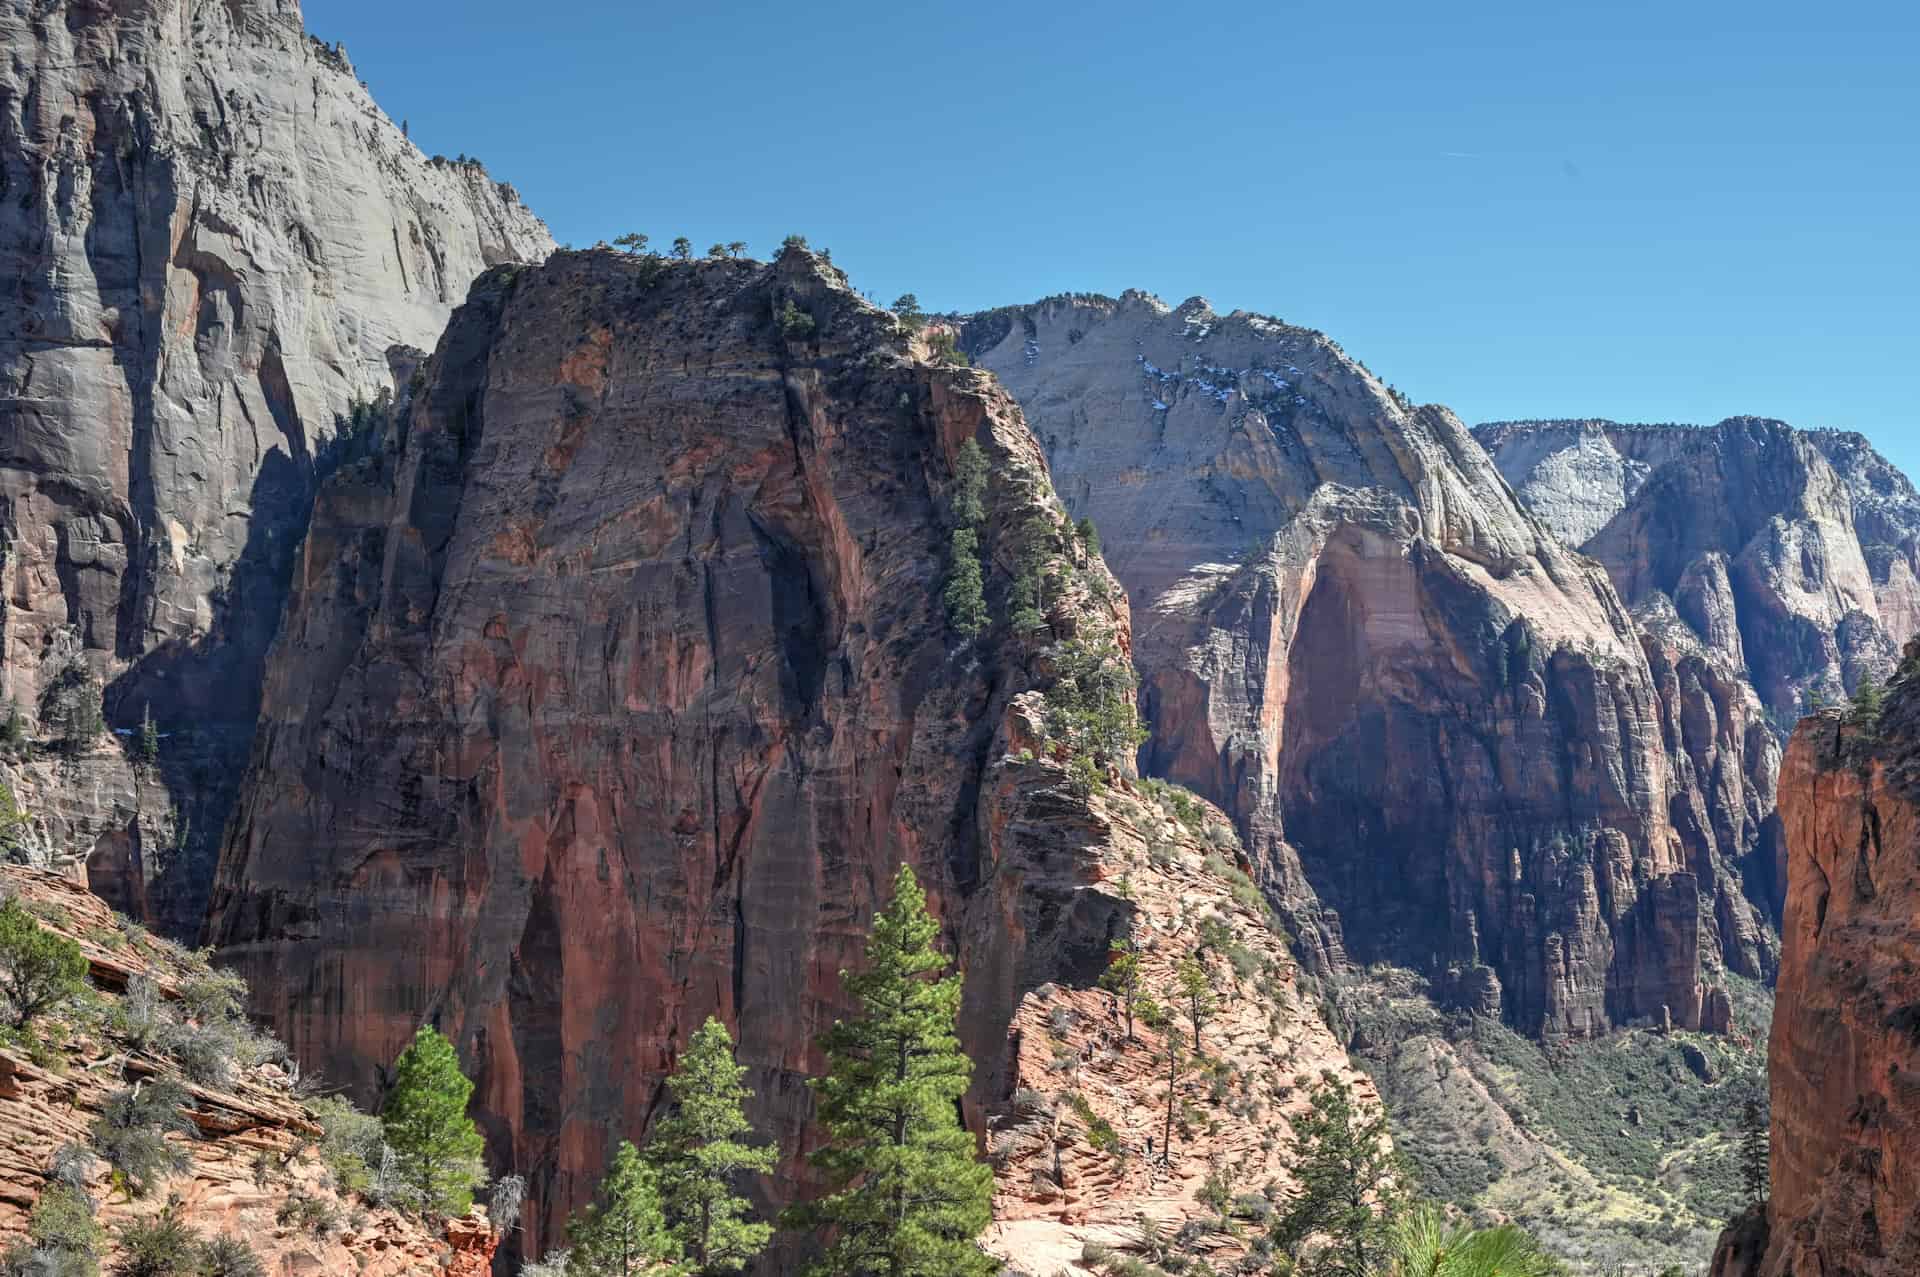
Keep going and you’ll be well above it. To truly appreciate the sense of scale, spot the two people in the picture below (pink and blue shirts, near the center of the image just below the spur trail to Angels Landing)
The West Rim Trail – Additional Details and Hiking Tips
Canine companions: Dogs are not permitted on the West Rim Trail. Zion National Park only allows pets on the Pa’rus Trail; all other hiking trails (including the West Rim, Scout Lookout, and Angels Landing) are off-limits to pets.
Trail environment: The West Rim Trail climbs from the floor of Zion Canyon into a dramatically changing landscape. Lower sections are enclosed by towering sandstone walls, while higher elevations open to expansive canyon views and exposed slickrock. Vegetation increases as you gain elevation, transitioning from canyon-bottom greenery to pines and high-desert plants. Shade is limited for much of the climb, particularly on the switchbacks, though Refrigerator Canyon provides a short, shaded break.
Route signage: The trail is well-marked. Junctions, particularly at Scout Lookout and along the West Rim, are clearly signed.
Trail surface / Technical aspects: The surface varies throughout the hike and includes paved paths, carved stone steps, slickrock, and packed dirt. While no technical climbing is required, the trail is steep in places and exposed. Railings are present in select areas, but footing can be uneven, especially on slickrock or after rain. Sturdy footwear with good traction is strongly recommended.
Slope and effort: The West Rim Trail is consistently uphill from the canyon floor. Steep sections, particularly the initial switchbacks and Walter’s Wiggles, make the hike physically demanding despite the relatively short distance to Scout Lookout. Elevation gain adds up quickly, and the effort feels more strenuous than the mileage alone suggests.
Previous Hiking Experience: This hike is best suited for hikers with moderate fitness levels. Many families successfully reach Scout Lookout, but the sustained climb, especially on the long switchback sections, can be challenging for younger children and less experienced hikers. During our hike, we encountered numerous people visibly struggling on the ascent, stopping frequently, turning back early, or appearing overwhelmed by both the physical effort and exposure. Several hikers mentioned running low on water or underestimating the difficulty, despite mild spring conditions around 80°F (27°C).
Because of the trail’s popularity and its reputation as a “must-do” Zion hike, it often attracts visitors who are underprepared for the elevation gain, heat, and sustained uphill effort. Proper footwear, adequate water, sun protection, and realistic expectations make a significant difference in both comfort and safety.
Cell Service: Cell reception is inconsistent. You may have a signal near The Grotto or Scout Lookout, but coverage can drop out entirely higher up the trail. Download maps ahead of time if needed and do not rely on cell service for emergencies.
Leave No Trace: Stay on the designated trail and avoid cutting switchbacks, which causes erosion and damages fragile terrain. Do not venture beyond railings or barriers. Pack out all trash and keep noise levels low: sound carries easily in the canyon.
Bugs: Insects are generally minimal. Occasional flies may appear in warmer months, particularly near the river or shaded sections, but mosquitoes are uncommon. Bug spray is optional.
Equipment: No special gear is required for hiking to Scout Lookout or along the West Rim Trail. Wear sturdy hiking shoes or trail runners, and bring plenty of water, sunscreen, sunglasses, and a hat. Trekking poles can help on the steep descent.
Weather and Exposure: Much of the trail is exposed, especially on the switchbacks and higher elevations.
- Sun exposure: Strong sun is common year-round. Sun protection is essential.
- Wind: Gusts are frequent near Scout Lookout and along exposed sections of the West Rim.
- Rain: Slickrock and stone steps become slippery when wet. Use extra caution after rain or snow.
Wildlife: You may spot birds, lizards, or small mammals. Wildlife encounters are typically brief. Stay alert and give animals space.
Current Trail Conditions: Check the Zion National Park alerts page before your visit for updates on road closures, tunnel traffic controls, weather impacts, or temporary trail restrictions—especially important during winter storms or high visitation periods.
Best Time to Hike the Trail
Best Time to Hike the Trail
The West Rim Trail is open year-round, but temperature, crowd levels, and trail conditions vary significantly by season. Because the hike involves a sustained climb, long switchbacks, and exposed sections near Scout Lookout, choosing the right time to hike can greatly affect both comfort and safety.
Spring (March–May):
One of the best seasons to hike the West Rim Trail. Daytime temperatures typically range from 60–80°F (16–27°C), making the long ascent more manageable. Spring offers clear views, flowing water in Refrigerator Canyon, and excellent visibility throughout Zion Canyon.
This is also peak visitation season, and the trail, especially up to Scout Lookout, can become crowded. Early morning starts or late afternoon are strongly recommended to avoid congestion on the switchbacks and reduce heat exposure.
Summer (June–September):
The trail remains open, but summer conditions can be very demanding. Temperatures often exceed 90°F (32°C), and much of the climb, especially the first set of switchbacks and Walter’s Wiggles, is fully exposed. Heat radiating off the rock can make the ascent exhausting, and dehydration is a common issue among unprepared hikers.
Afternoon thunderstorms are possible during monsoon season, which can make slickrock and paved sections slippery. Very early morning hikes (as early as the shuttles can get you to the trail) are the safest and most comfortable option during summer.
Fall (October–November):
Another excellent time to hike the West Rim Trail. Daytime highs usually fall between 65–80°F (18–27°C), and the lower sun angle enhances the canyon’s sandstone colors. Crowds remain high in October but taper off significantly by November. The weather is generally stable, making fall one of the most reliable seasons for longer day hikes beyond Scout Lookout.
Winter (December–February):
Quieter and less crowded, but conditions are more variable. Daytime temperatures often range from 40–55°F (4–13°C). Snow and ice are possible, especially in shaded areas like Refrigerator Canyon and on Walter’s Wiggles. Traction devices may be helpful after storms. While the trail is often accessible, always check conditions before hiking, particularly if planning to go beyond Scout Lookout.
Quick Summary – When to Visit
Regardless of the season, early morning is the best time to hike the West Rim Trail. You’ll encounter cooler temperatures, fewer crowds on the switchbacks, and better lighting in the canyon. Late afternoon can also work in spring and fall, but plan carefully to avoid hiking the steep descent in low light.
Hiking Packing List
All Trails subscription – This comes in really handy for areas with little or no cell reception, as the annual subscription allows you to download trail maps for offline use.
External Battery – If you are using your phone to track your progress along the trail or to help with navigation, you certainly don’t want your phone to die on you. That’s especially true in the unlikely event that you might get hurt or need assistance.
Hiking poles – These can be particularly useful in steep trails or muddy/boggy trail conditions.
Water Filter Bottle – The Life Straw bottle is an advanced water bottle with a filter that not only improves water taste but more importantly filters out bacteria and parasites, chemicals and microplastics.
Headlamp – very practical and a smart choice if you plan to start your hike before sunrise or finish it after sunset.
Is the West Rim Trail Worth It?
This depends largely on how far you hike and what you expect from the experience. The lower sections of the West Rim Trail see heavy traffic due to their connection with Scout Lookout and Angels Landing, while the upper stretches quickly thin out and feel very different. Elevation gain, exposure, and crowd levels all play a role in how rewarding the hike feels.
Why You Might Enjoy It:
– Access to much of the Angels Landing route without needing a permit
– Gradually improving canyon views rather than a single viewpoint payoff
– A well-built, clearly marked trail with no technical obstacles
– The option to turn around at many points without the hike feeling incomplete
– Quieter, more open terrain if you continue beyond Scout Lookout on the West Rim
Why it Might Not Be for You:
– Heavy foot traffic, especially on the lower switchbacks and at Scout Lookout
– Sustained elevation gain that many hikers underestimate
– Long stretches with little shade and significant sun exposure
– Can feel intimidating for those uncomfortable with heights
Want to Know More About Zion National Park?
We’ve put together a dedicated Zion National Park Guide that covers the park’s must-see viewpoints, iconic hikes inside the main canyon, scenic drives like the Zion–Mount Carmel Highway, and practical tips for navigating shuttle season, parking, and crowds. It’s the perfect companion for building a well-balanced Zion itinerary or fitting the park smoothly into a Utah road trip. We also have individual hiking guides for some of our favorite Zion trails:
The Watchman Trail
If you want a shorter, accessible hike that still delivers quintessential Zion scenery, the Watchman Trail is a perfect choice. This trail climbs gradually through scrubby desert terrain and scattered junipers, offering a mix of shaded sections and open views as you approach the base of the Watchman rock formation. Along the way, you get expansive panoramas of the lower canyon, the Virgin River, and the town of Springdale framed by the towering sandstone cliffs. At the viewpoint, the Watchman itself dominates the scene, and you can take in the classic West Temple and Altar of Sacrifice formations across the canyon. It’s an excellent option for families, photographers, or anyone looking to experience Zion’s dramatic cliffs without committing to a long or technical hike. For more trail details and hiking tips, see our Watchman Trail Hiking Guide.


Observation Point via East Mesa Trail
For one of the highest and most expansive viewpoints in Zion without the relentless elevation gain of other routes, the Observation Point hike via the East Mesa Trail is an excellent choice. This relatively gentle trail winds through open pinyon-juniper forest before emerging at the rim of Zion Canyon, where the view suddenly drops away to reveal Angels Landing far below and the full breadth of the main canyon stretching into the distance. With minimal exposure and a mostly level path, this route delivers jaw-dropping scenery with far less effort than the classic canyon-side approaches. It’s ideal for anyone who wants big views, fewer crowds, and a calmer hiking experience in Zion’s quieter eastern backcountry. For more trail details and hiking tips, see our Hiking Guide for Observation Point via East Mesa Trail.


Where to Stay Near Zion National Park
If you want to stay close to Zion without dealing with limited parking at the Visitor Center or juggling both the Springdale shuttle and the Zion Canyon shuttle, the northern end of Springdale is one of the most practical places to base yourself. Lodging here puts you within a short walk or drive of the park entrance, allowing you to start early and simplify logistics during peak season.
Below are two solid, well-located options that balance comfort, convenience, and access. Both are within a 20-minute walk of the park’s southern entrance.
Best Western Plus Zion Canyon Inn & Suites
What sets it apart: Reliable comfort and one of the closest hotel locations to the park entrance.
This modern Best Western sits at the quiet northern end of Springdale, within easy walking distance of Zion’s pedestrian entrance. Rooms are clean and spacious, and amenities include an outdoor pool, hot tub, and complimentary breakfast. Its location makes it especially appealing for hikers planning early starts, as you can avoid parking constraints and step straight into the shuttle system.
Cliffrose Springdale, Curio Collection by Hilton
What sets it apart: Riverside setting with resort-style grounds, right at the edge of the park.
Cliffrose is one of the closest properties to Zion’s entrance, offering direct access to the Virgin River and beautifully maintained gardens. While more polished than a standard mid-range hotel, it remains a practical choice thanks to its walkability, on-site amenities, and proximity to the park. It’s well-suited for travellers who want a comfortable base with a quieter, more relaxed atmosphere after long hiking days.
Booking Tip: Springdale accommodations fill quickly, particularly in spring and fall. Staying near the park entrance is especially valuable during shuttle season, so booking well in advance is strongly recommended.
West Rim Trail – Frequently Asked Questions (FAQ)
Where does the West Rim Trail start?
The West Rim Trail begins at the Grotto shuttle stop inside Zion National Park. From the shuttle stop, a pedestrian bridge crosses the Virgin River and leads directly to the trailhead. During shuttle season, this is the only practical way to access the trailhead.
How difficult is the West Rim Trail?
The trail is considered moderately challenging to challenging, depending on how far you go.
While the path is well-maintained and mostly paved or packed dirt, the sustained elevation gain, long switchbacks, and heat exposure make it physically demanding. Many hikers underestimate the effort required, especially on warm days.
Is Scout Lookout the same as Angels Landing?
No, but they are closely connected. Scout Lookout is a viewpoint and junction on the West Rim Trail.
Is the Watchmate Trail difficult?
The trail is generally considered easy, though with a steady (but not steep) uphill climb. Less experienced hikers might find it to be more of a “moderate” hike. Angels Landing is a short spur trail that begins at Scout Lookout and climbs the narrow ridge to the summit. You can hike to Scout Lookout without a permit, but the Angels Landing spur requires one.
Can you hike Angels Landing without a permit?
No. A permit is required to hike the Angels Landing spur beyond Scout Lookout.
However, you do not need a permit to hike all other parts of the West Rim trail, both before and after Scout Lookout.
Is the West Rim Trail worth it if you don’t do Angels Landing?
Absolutely! In fact, many hikers find the West Rim Trail more enjoyable and less stressful than Angels Landing. Continuing even a short distance beyond Scout Lookout leads to quieter trails, wider paths, and expansive canyon views, often higher and farther than the Angels Landing summit.
Is the West Rim Trail suitable for kids?
It depends. Many families successfully hike to Scout Lookout, but the trail includes: Long, steep switchbacks, significant elevation gain, and limited shade. Younger children may struggle with the sustained climb, especially in warm weather. Close supervision is important near exposed areas, and turning around early is common.
What is the best time of day to hike the Watchman Trail?
The best time of day to hike the Watchman Trail is early morning or late afternoon. Morning hikes offer cooler temperatures, fewer crowds, and softer light on the surrounding cliffs, making the uphill climb more comfortable, especially in warmer months. Late afternoon and early evening are ideal for sunset views, when the Watchman and surrounding sandstone formations glow with deep reds and oranges. Midday hikes are possible year-round but can be hot and exposed, particularly in summer, with limited shade along the trail.
Are drones allowed?
No. Drones are strictly prohibited throughout Zion National Park. Launching, landing, or operating drones is not allowed anywhere within park boundaries, including trailheads, overlooks, and backcountry areas. This regulation helps protect wildlife, preserve the natural soundscape, and ensure visitor safety.
Explore More Utah National & State Park Guides
Continue exploring Utah with these detailed guides:
Bryce Canyon National Park Guide
Capitol Reef National Park Guide
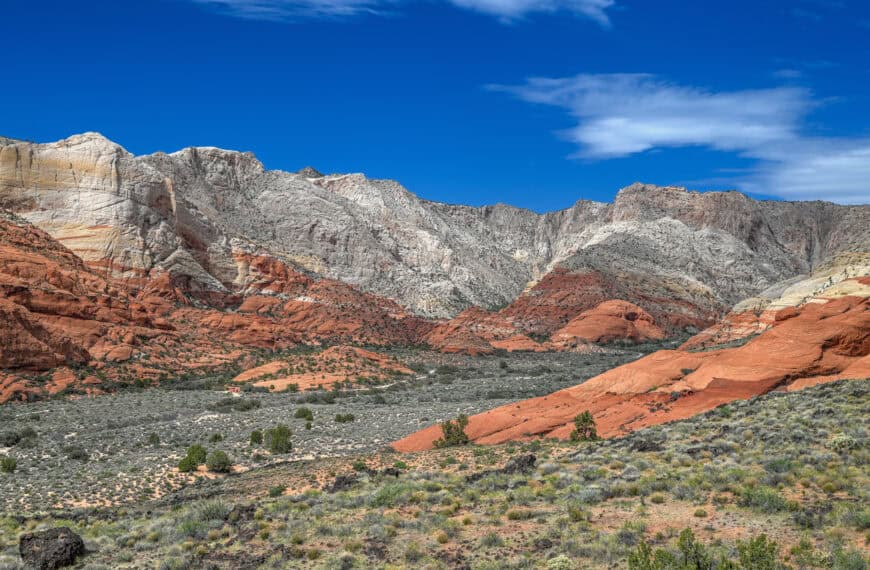
Snow Canyon State Park Guide
Valley of Fire State Park Guide
Goblin Valley State Park Guide
Photography Gear
If you like our photography, you might be interested in some of the gear we use to shoot our travel and hiking destinations.
Camera Body – Nikon Z 6ii Fx-series Mirrorless Body
Main Lens – NIKON 24-120mm F/4G ED VR AF-S
Zoom Lens – Sigma 745-306 150-600mm f/5-6.3
Polarizing filters – Urth Circular Polarizing (CPL)
Camera Tripod – K&F Concept 64-inch Camera Tripod
Mini-tripod – Lammcou Flexible Camera Tripod
Camera/hiking backpack – Vanguard Alta Rise 48 Backpack
Universal Travel Adapter – VYLEE Universal International Power Travel Plug
Other Travel Essentials
Travel Insurance
SafetyWing is a travel insurance company that offers comprehensive coverage for travellers. Includes Medical Insurance and Travel Insurance. Primarily geared towards long-term travellers, digital nomads, and expats.
e-Sim cards
Airalo is the world’s first and largest eSIM store with eSIM plans for 200+ countries and regions worldwide. With Airalo eSIMs, travellers can get connected the moment they land at their destination and avoid nasty data roaming charges
eSIMS are a sustainable alternative to single-use SIM cards – they are 100% digital, require less energy to produce and be re-used rather than disposed of.
Car Rentals
Discover Cars is our go-to website for car rentals. We almost always find our preferred rate there.
Transfer from Airport
Welcome Pickups is our favourite private transfer service, which you can pre-book at a fixed price. Currently available in 220 cities all over the world (mostly in Europe, but with several major cities in Asia, the Middle East and the US).
Kiwitaxi is another private transfer service – we haven’t tried it yet, but it’s currently available in a few more countries (102 as of 2024).
Hotels and Accommodations (coming soon)
Photography Prints
If you found this blog useful, you can help support our blog by purchasing low-cost digital prints. Printed physical prints are also available for purchase.


—–
Well, that wraps it up! We hope you enjoyed our Zion National Park Hiking Guide for the West Rim, Scout Lookout and Angels Landing, and that it will prove useful for planning your trip.
—–
You might also be interested in these related pages: